Search Our Database
How to Add New User in Filezilla Server
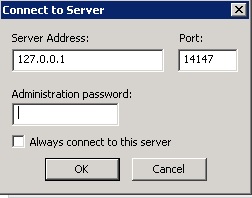
1. Double click on FileZilla Server Interface Icon on Desktop, always log in with details as shown in the screenshot:
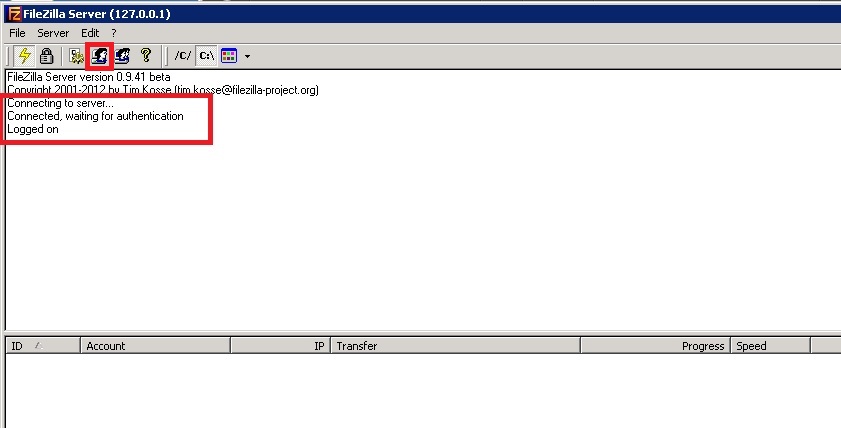
2. Wait for the server to connect, and then click on the icon above to add new user, or you can choose “Edit” in the menu, and then click “Users” to create users.
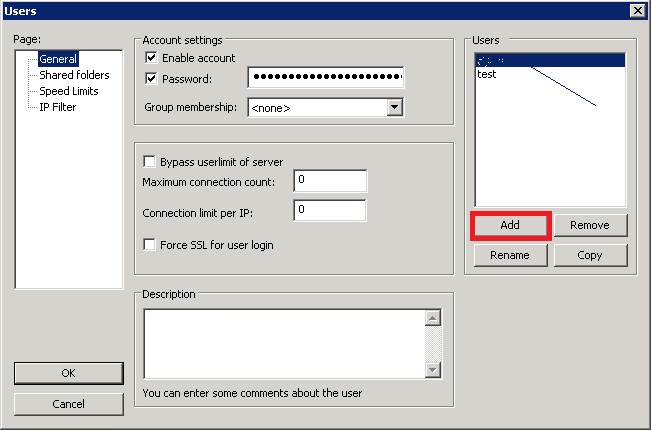
3. Here, Click on “Add” to add the user.
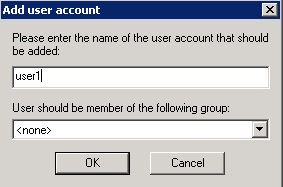
4. Insert account name for the user
5. In Account settings part, type in the password for this account, and then click on “Shared Folder” to determine the root directory of this FTP account.
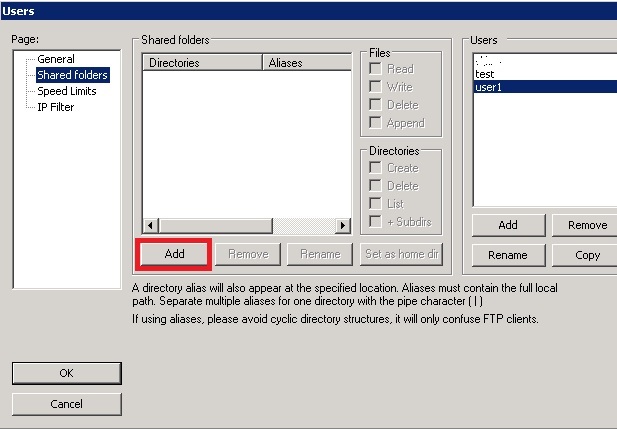
6. In the “Shared Folders” interface, click on “Add” to add in the root directory.
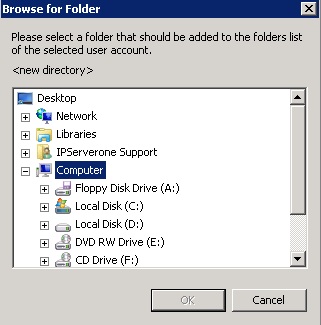
7. After clicking “Add”, browse for the directory you want to set as the root directory for that account.
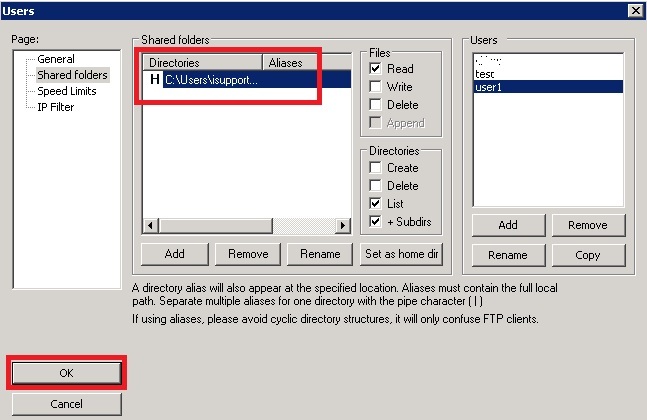
8. After decided the folder and click OK, you will be able to see the shared directory for this FTP account had been created. From the “Files” and “Directories” next to it, you can decide the priviledge of this FTP account to this directory. When everything is set, click on OK and you have successfully set up a new FTP account.
