Search Our Database
How to install Lets Encrypt AutoSSL in cPanel
Introduction
Welcome to our quick guide on installing Let’s Encrypt AutoSSL in cPanel. Let’s Encrypt AutoSSL is a popular and free SSL certificate provider that ensures your websites are encrypted and secure. This guide will walk you through the installation and configuration process, making it simple and straightforward to secure your sites hosted on cPanel.
Prerequisite
Before you begin, ensure that you have:
- Root access to your server.
- Access to cPanel for the domain(s) you wish to secure.
- Basic knowledge of using command line and cPanel interface.
Step-by-step guide
Step 1: Installation
To install the plugin, perform the following steps:
- Log in to the command line via SSH as the
root
user.
- Run the following command:
/scripts/install_lets_encrypt_autossl_provider - To disable and uninstall the Let’s Encrypt plugin, run the following command:
Step 2: Configuration
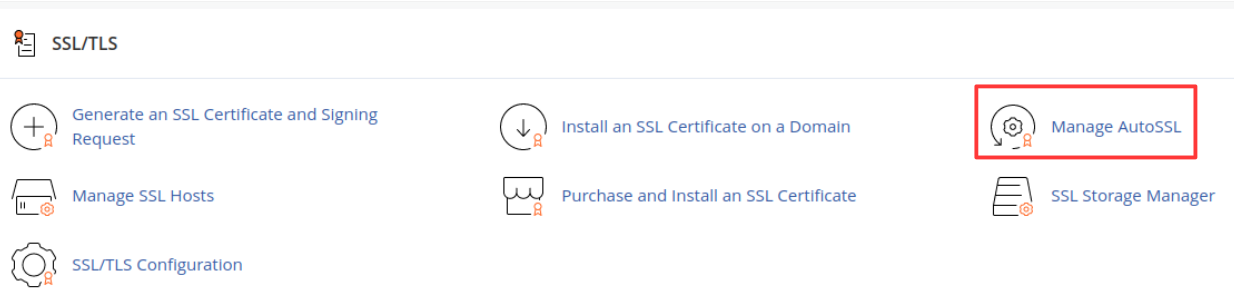
1. Login to cPanel and scroll down to SSL/TLS section and select Manage AutoSSL
2. in the Manage AutoSSL interface, scroll down to AutoSSL Providers and select Let’s Encrypt.
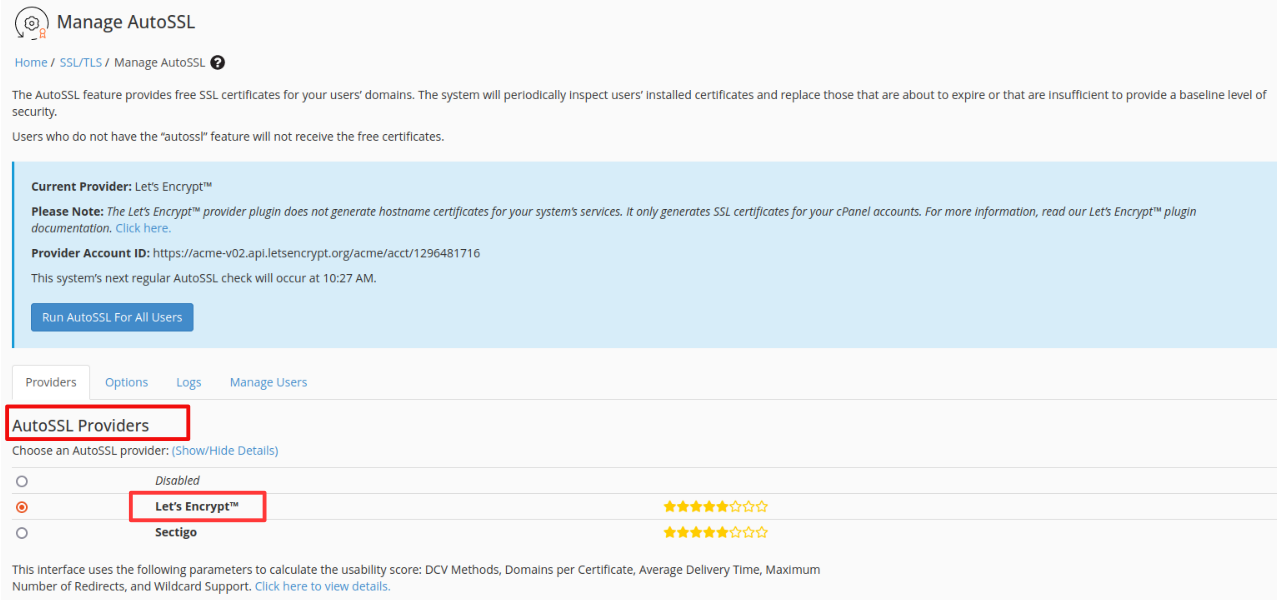
3. Check the boxes next to create a new registration with the provider and I agree to these terms of service. The terms of service can also be reviewed by clicking the link.
4. proceed to click Save. In a few seconds, you should see a little pop-up indicating that the installation was successful.
Conclusion
By following these simple steps, you have successfully installed and configured Let’s Encrypt AutoSSL on your cPanel. This will automatically secure your sites with SSL certificates, ensuring a safer browsing experience for your users.
Should you have any inquiries of the guidelines, please feel free to open a ticket through your portal account or contact us at +603 – 2026 1688. We’ll be happy to assist you further