Search Our Database
How to install ClamAV on cPanel
Introduction
Maintaining server security is essential for every administrator. By installing ClamAV on your cPanel server today via the WHM interface, you can effectively detect and quarantine malicious software to protect your hosted websites and user data.
Important Note ⚠️: To maintain stable performance, ClamAV requires at least 3GB of free RAM. If the server lacks sufficient memory, the application may consume all available resources, causing the system to slow down or become unresponsive.
Prerequisite
- Access to your cPanel account as root user
- Basic knowledge of navigating the cPanel interface
Step-by-step guide
Step 1: Access cPanel
- Login to your cPanel control panel.
The URL to your cPanel typically will be like <domain>:2087 or <server IP>:2087.
Step 2: Verify Solr Installation
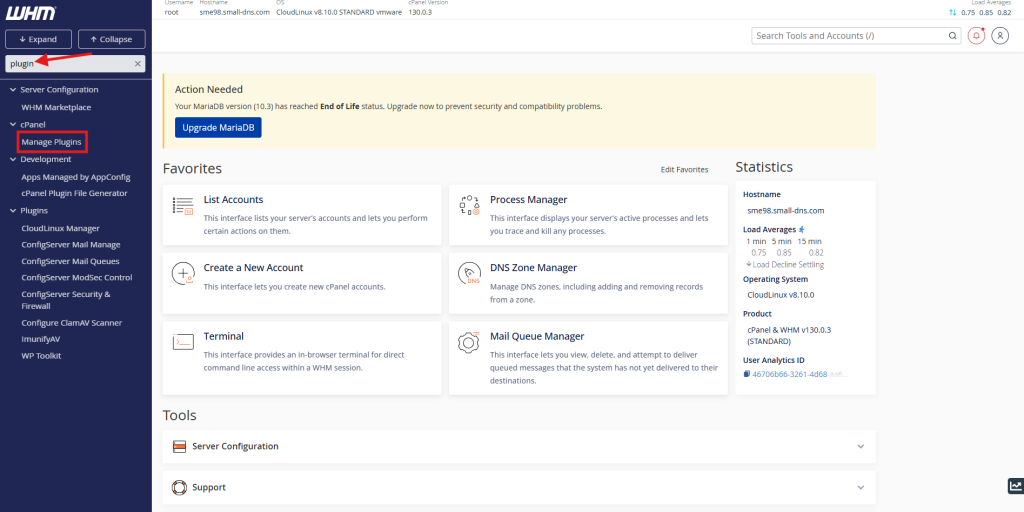
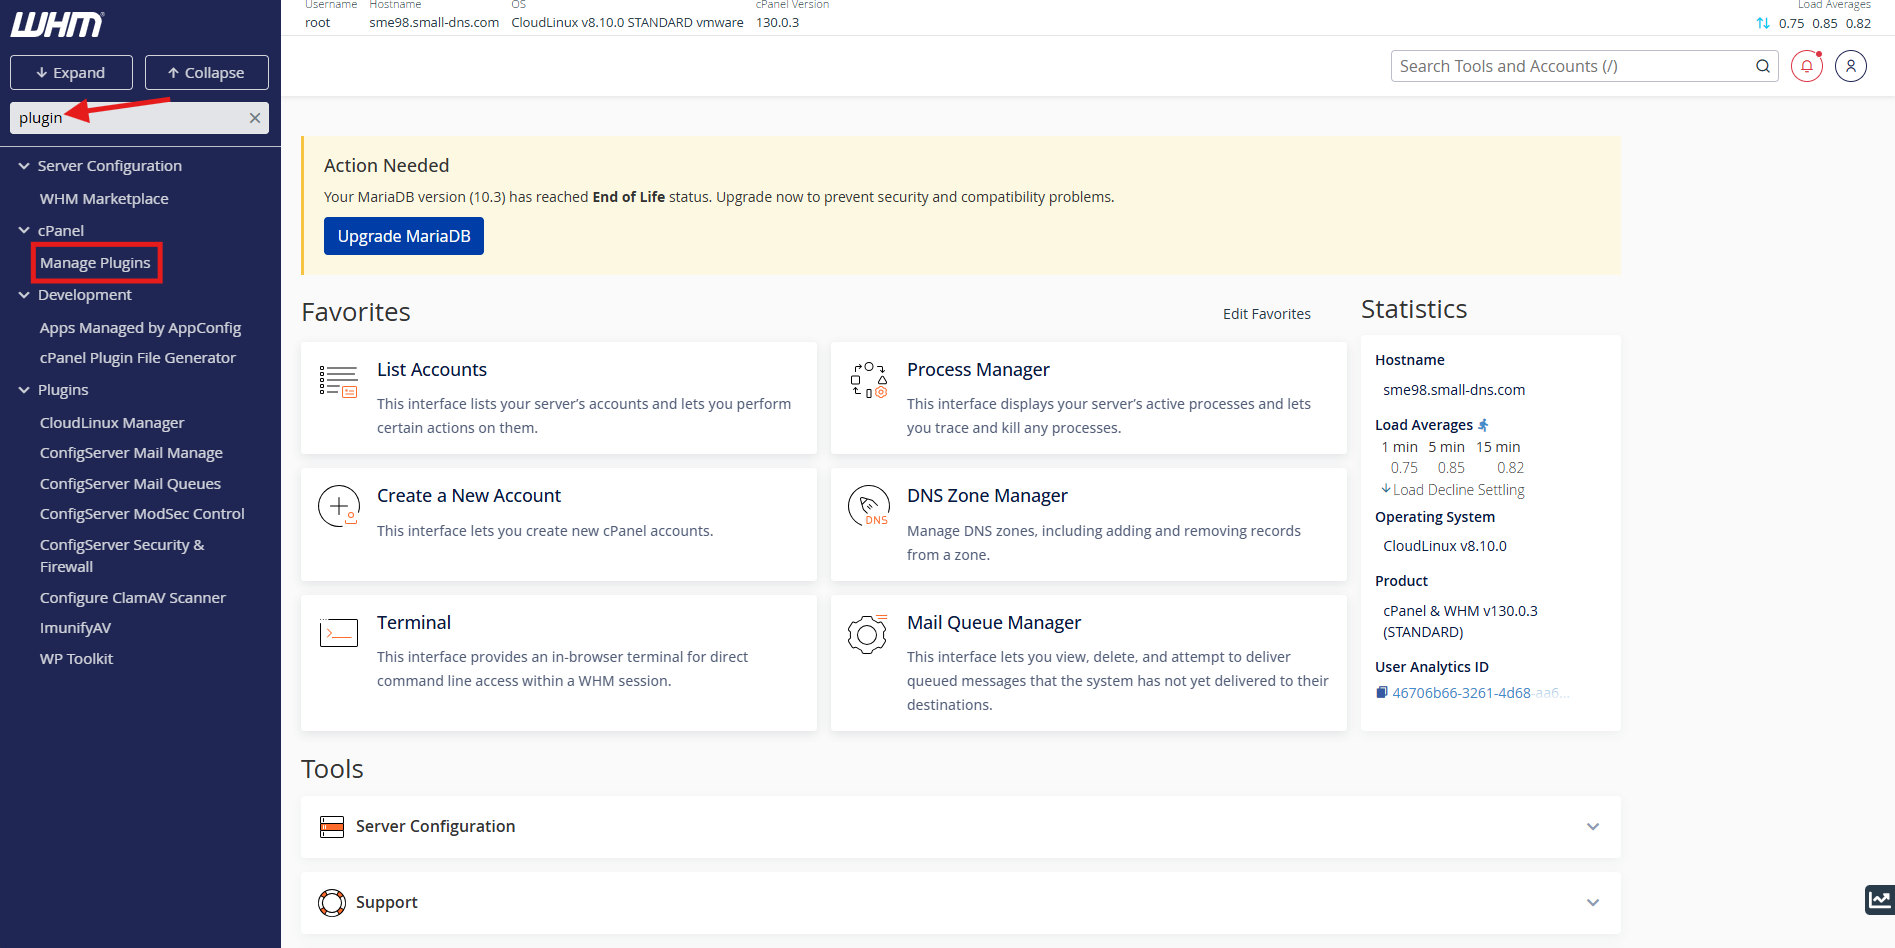
- Search ‘plugin’ in the search bar on top left.
- Select Manage Plugins to enter plugin management page.
Step 3: Installation
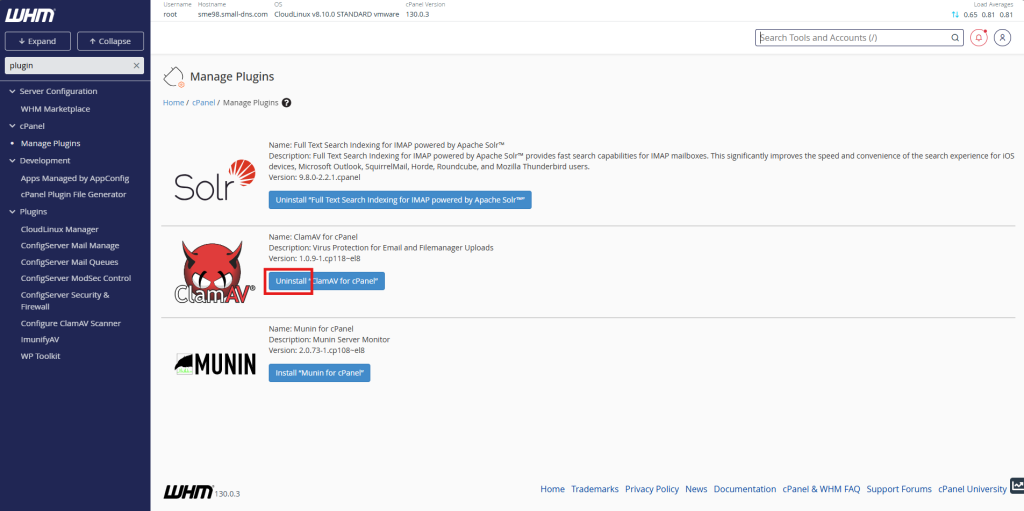
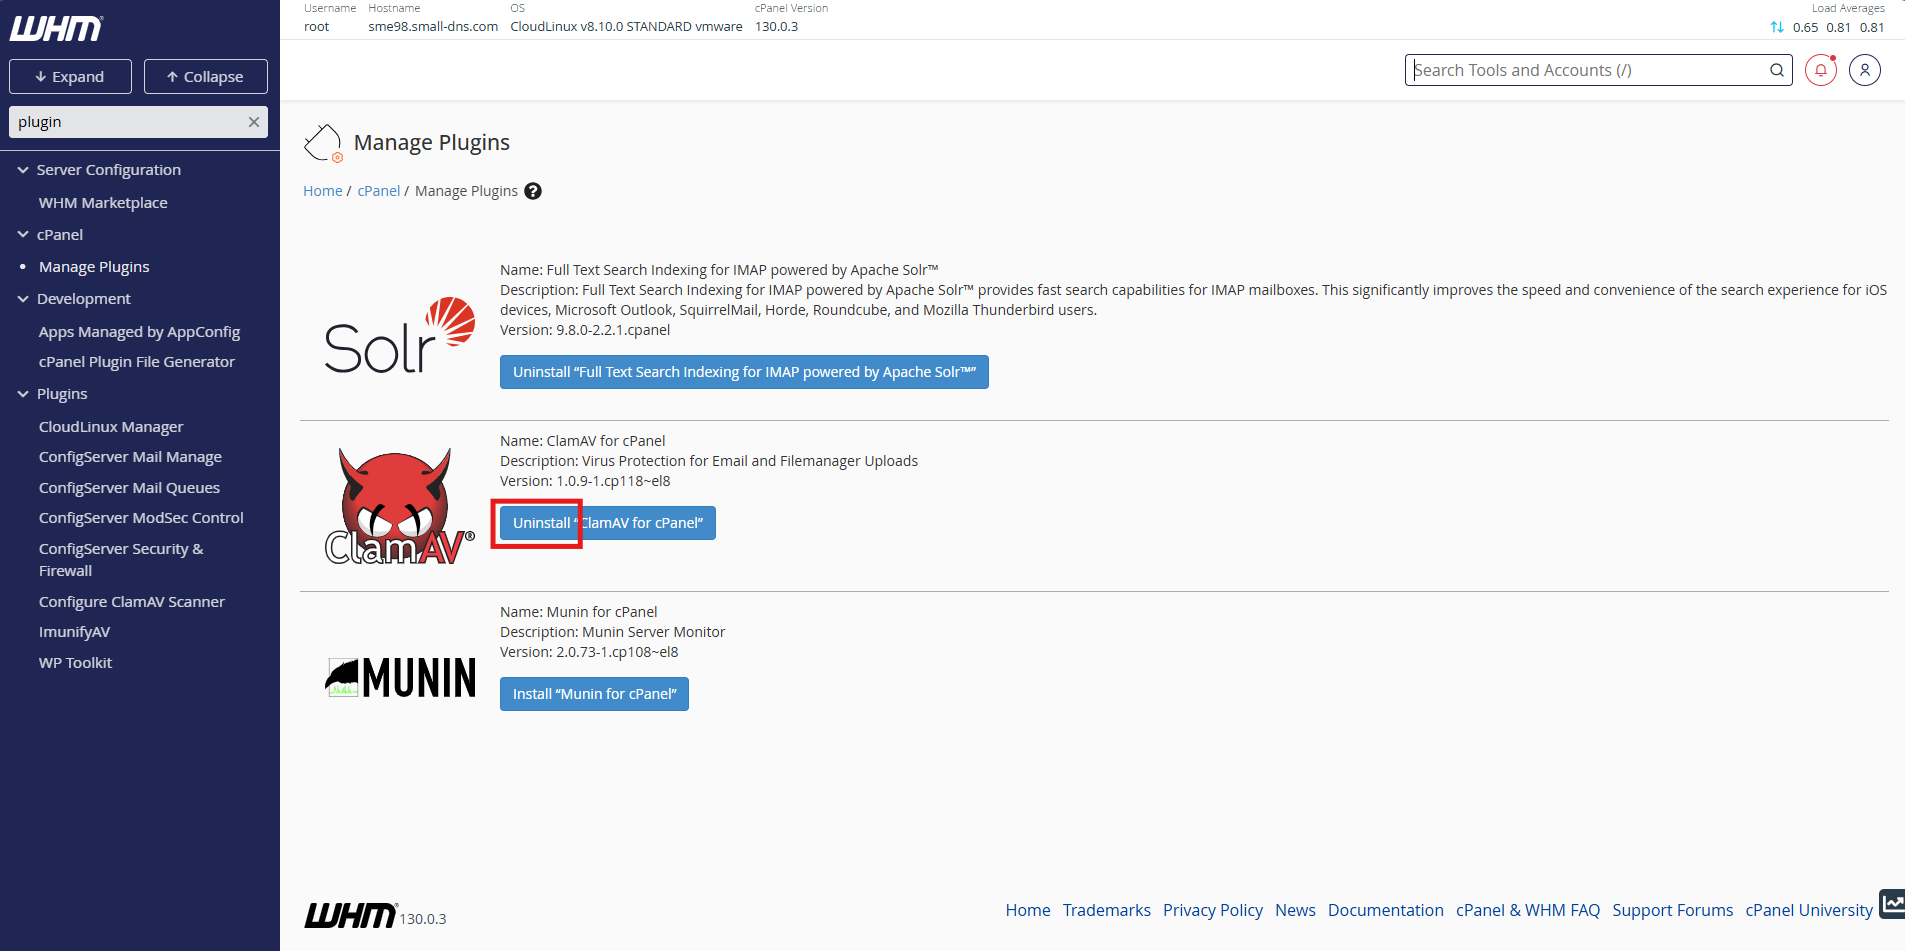
- If ‘Uninstall’ is visible on this screen, the ClamAV plugin is already installed.
Else, you may press ‘Install’ to install the ClamAV plugin.
Conclusion
By following this guidance, you can successfully integrate a powerful antivirus layer into your cPanel environment, ensuring a safer hosting experience for all your clients.
For additional assistance or if you encounter any issues, please contact our support team at support@ipserverone.com.