Search Our Database
How to start scanning in ImunifyAV on DirectAdmin
Introduction
ImunifyAV is a powerful malware scanner used by administrators to maintain server security on DirectAdmin. This guide explains how and why to initiate manual scans to identify malicious files across your hosting accounts efficiently.
Prerequisite
-
Access to DirectAdmin with Admin user
-
ImunifyAV plugin installed on the server
-
Basic knowledge on DirectAdmin navigation
Step-by-step guide
Step 1: Access the ImunifyAV dashboard
-
Log in to your DirectAdmin control panel.
The URL to your DirectAdmin typically will be like <domain>:2222 or <server IP>:2222. - If you have not yet install, you may refer to HERE.
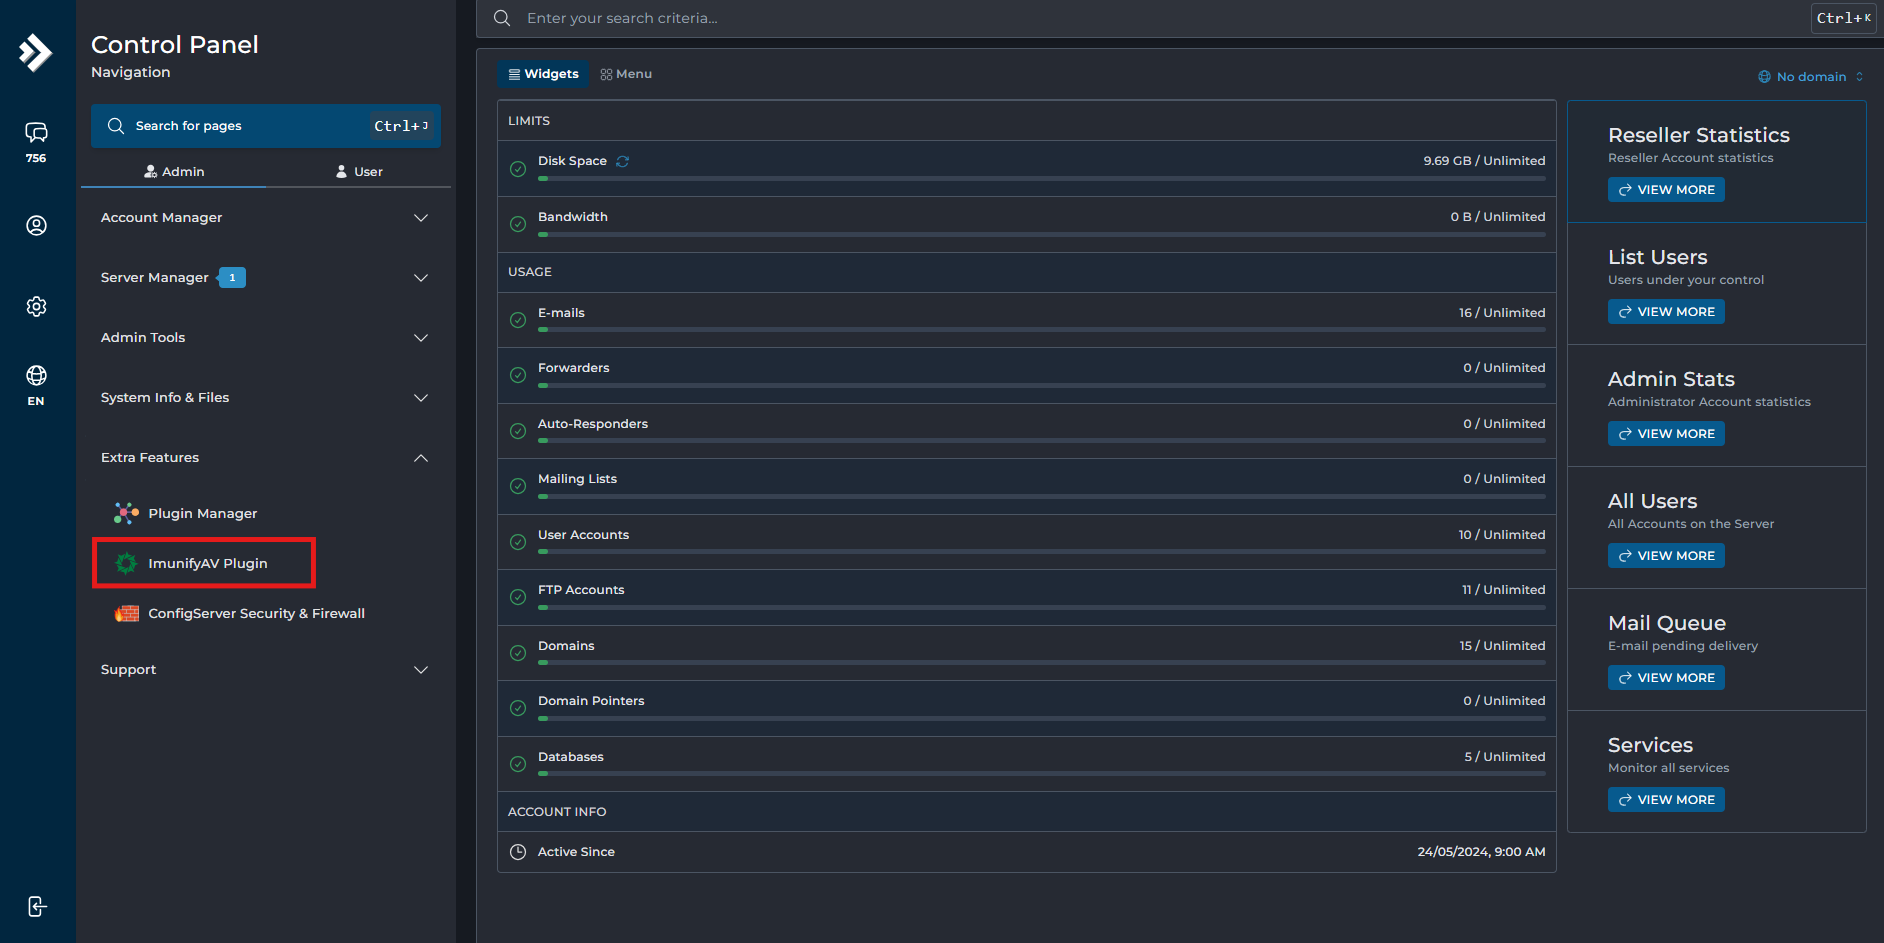
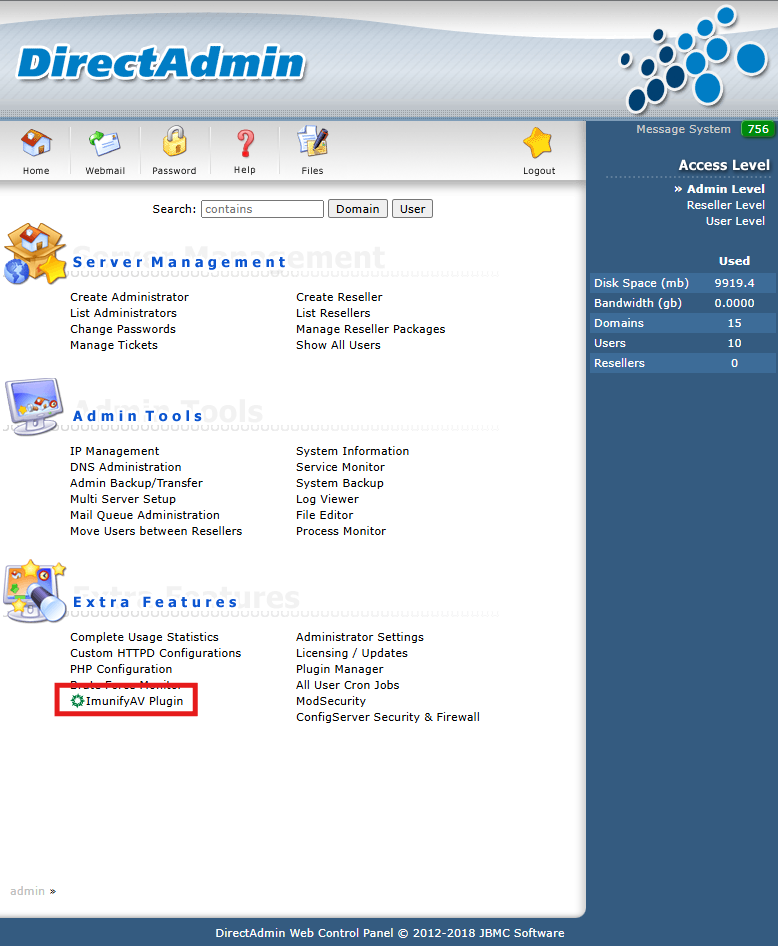
Step 2: Navigate to ImunifyAV
-
Navigate to the Extra Features section on the main dashboard.
- DirectAdmin Evolution Skin:
- DirectAdmin Enhanced Skin:
Step 3: Scanning
-
Auto scanning
- Navigate to settings.

- Scroll down until you see the Background Scanning.
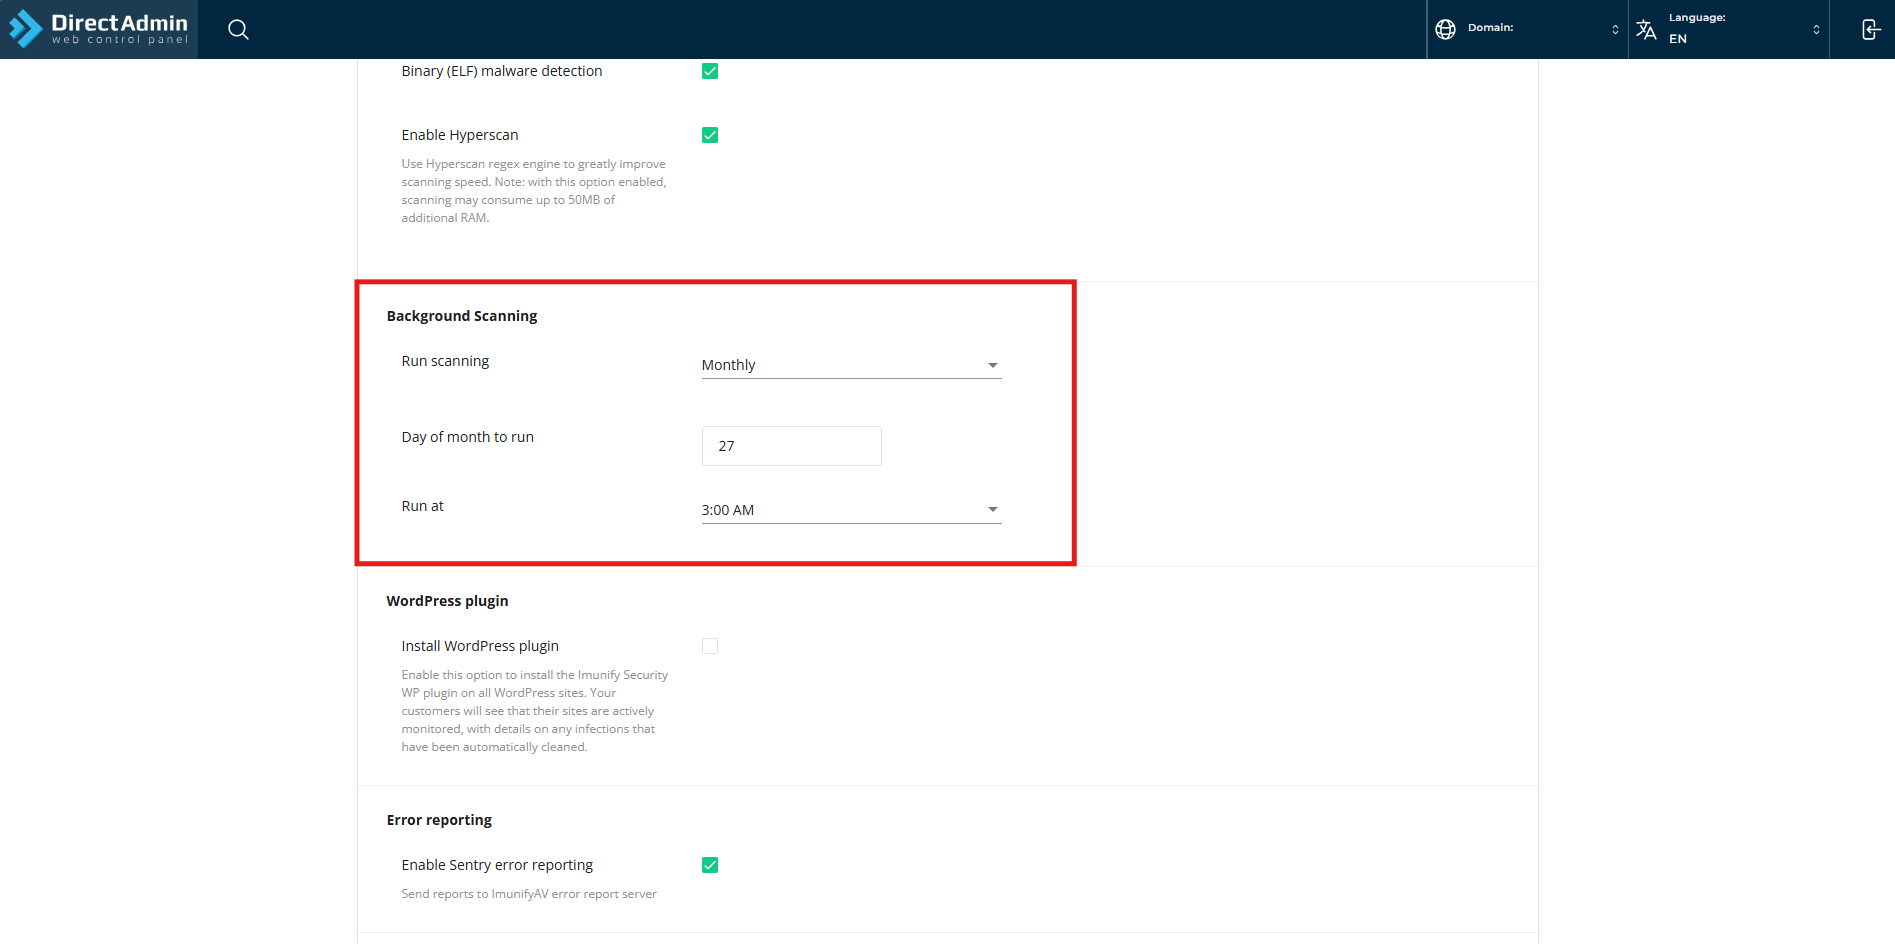
- Navigate to settings.
-
Manually scanning
- Navigate to Scan, enter the folder you wish to scan then click Start.

- If there are infected files, you can click on View results to see which files and its path.
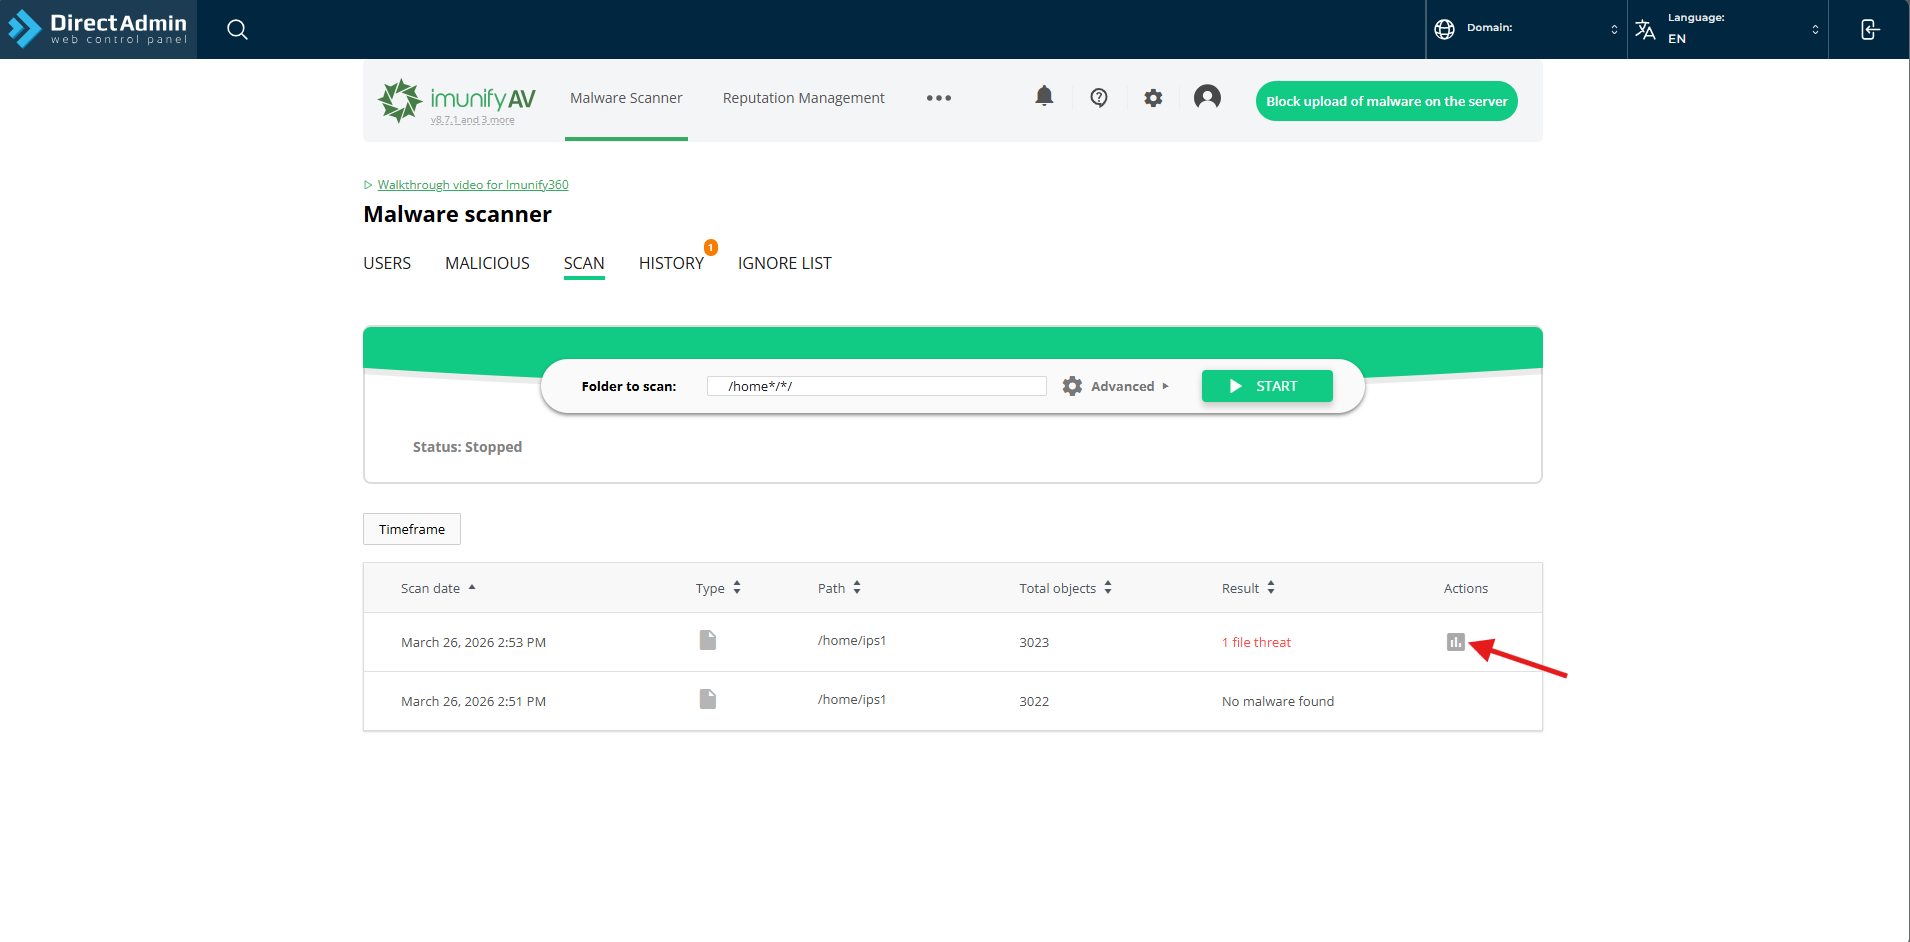
- Navigate to Scan, enter the folder you wish to scan then click Start.
Conclusion
By following this guidance, you can successfully initiate a manual malware scan using the ImunifyAV interface in DirectAdmin, helping you to proactively secure your website and identify potential threats.
For additional assistance or if you encounter any issues, please contact our support team at support@ipserverone.com.