Search Our Database
How to Create a New Filter and Blocked with Specific Email User in Gmail Web
Introduction:
Creating a filter for a specific email user in Gmail Web allows you to automate how incoming messages from that sender are handled within your inbox. The process begins by clicking the settings gear icon and selecting the “See all settings” option to access the full range of account configurations. From this menu, you must navigate to the “Filters and Blocked Addresses” tab and click “Create a new filter” to define your rules. By entering the specific email address in the “From” field, you can ensure that the filter only applies to messages from that particular sender. To finalize the setup, you must choose an automated action, such as “Mark as read,” and click “Create filter” to activate the rule. A success notification will appear at the bottom-left of the interface once the new filter is officially applied to your account.
Prerequisites:
- User must possess a fully registered and active Gmail account.
- The procedure explicitly requires accessing the Gmail Web interface.
- You must have the specific email address of the user you want to filter ready to enter into the “From” field.
Step-by-step Guide:
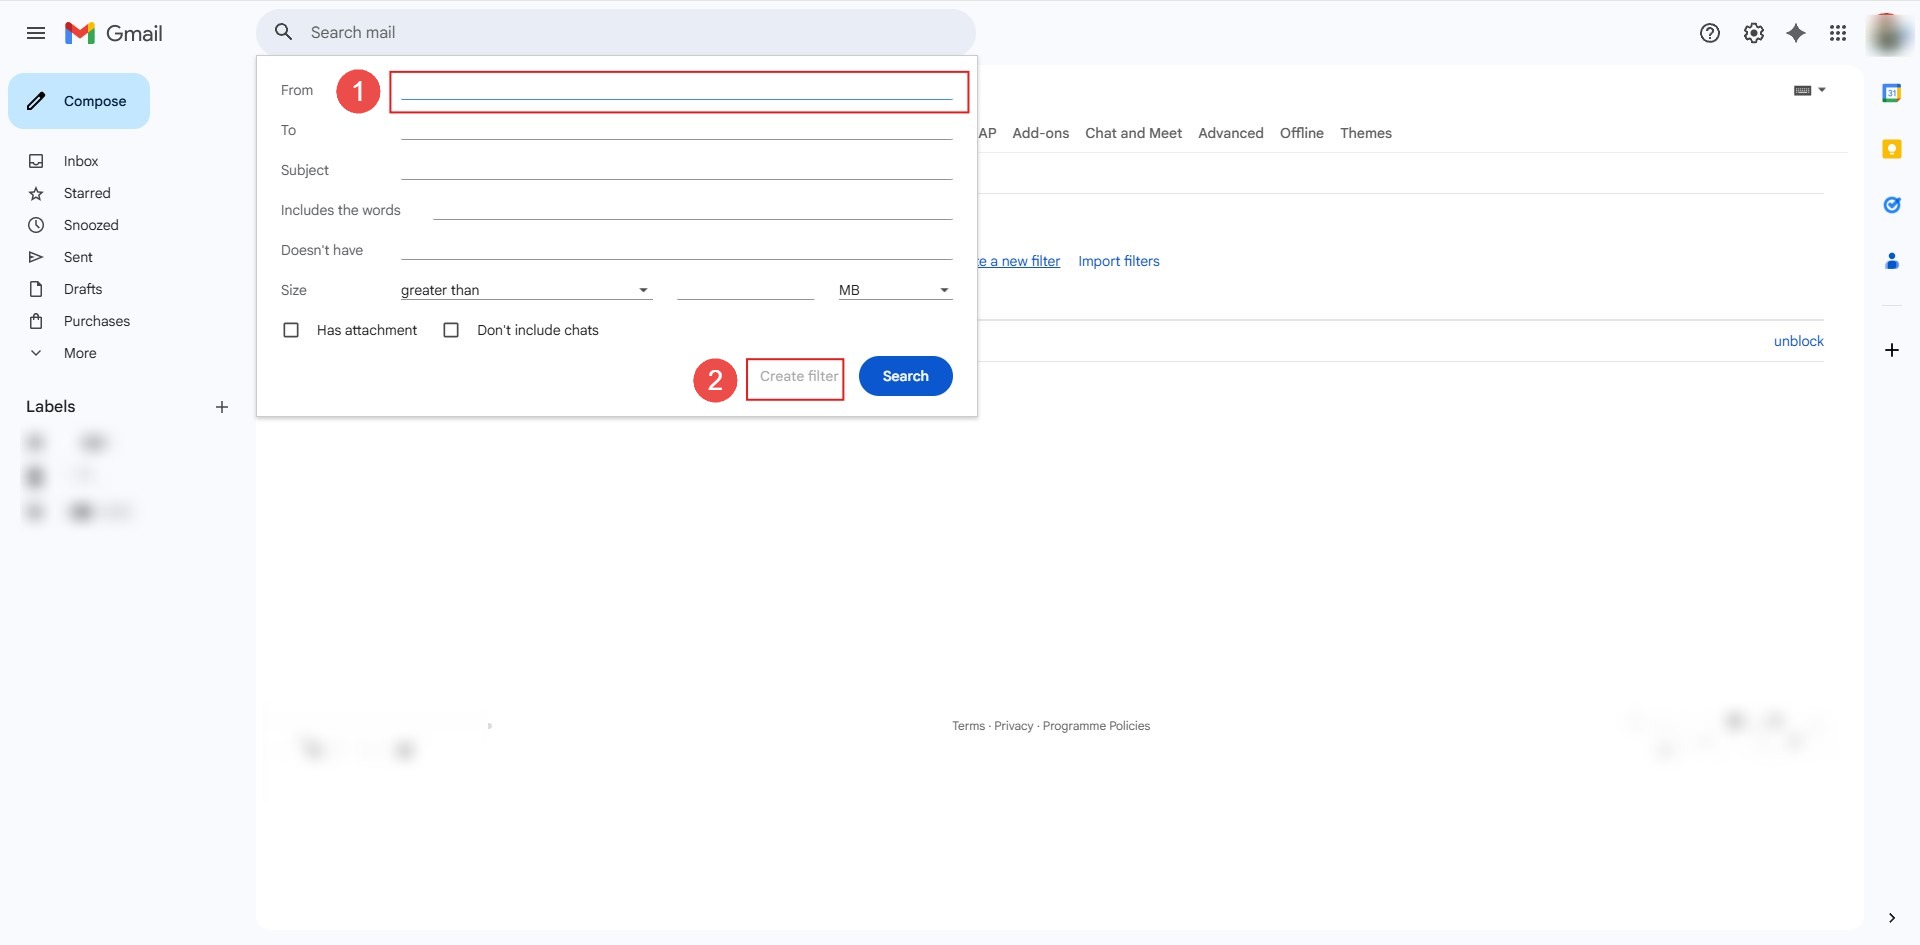
Step 1: Access Settings
- The initial action required is to Click setting.
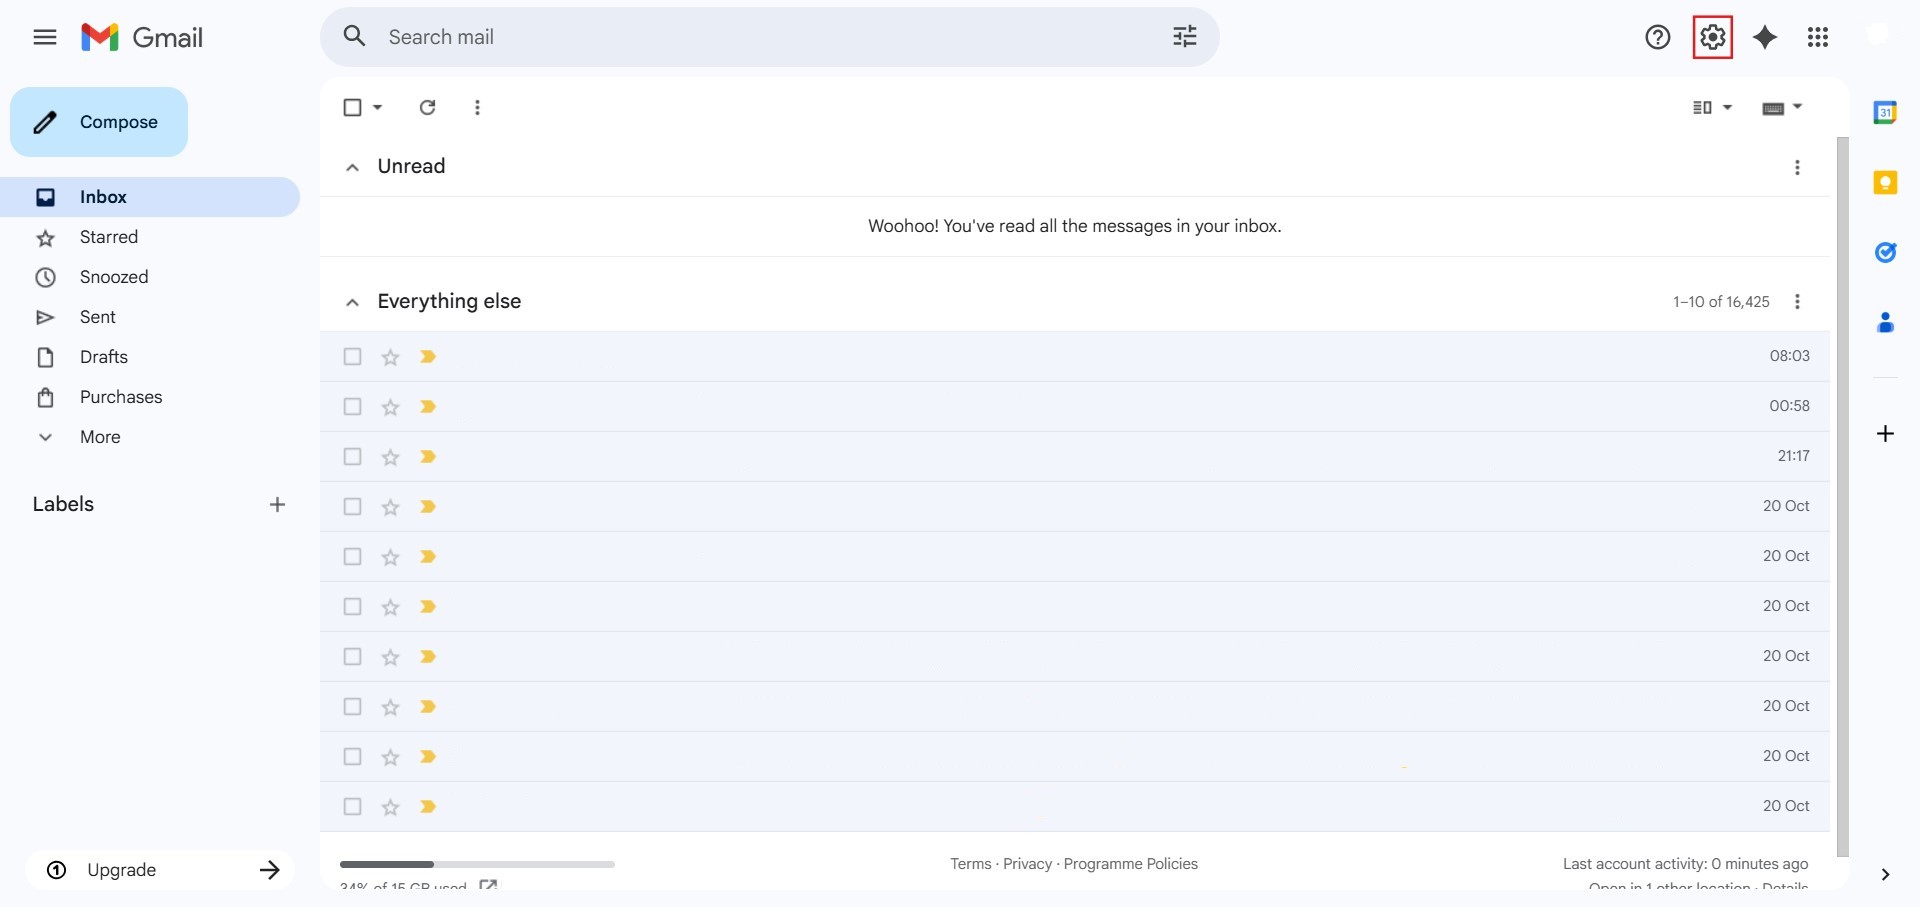
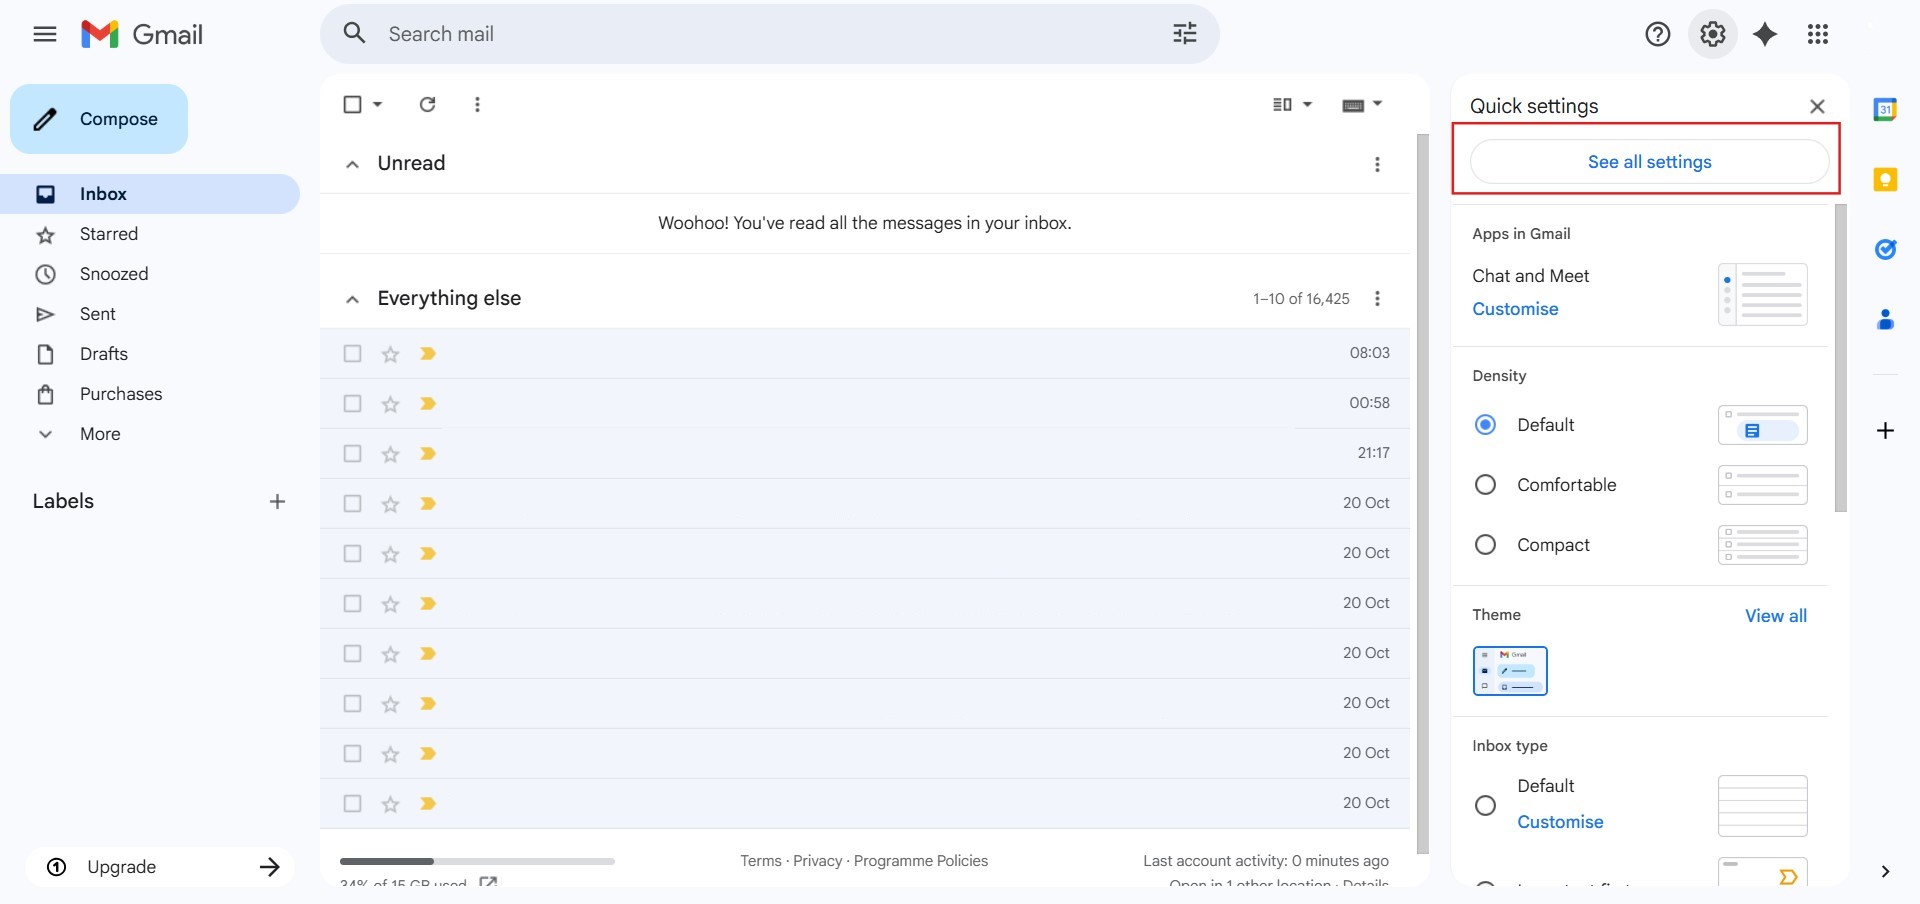
Step 2: Navigate to All Settings
- After clicking “setting,” proceed to select See all Settings.
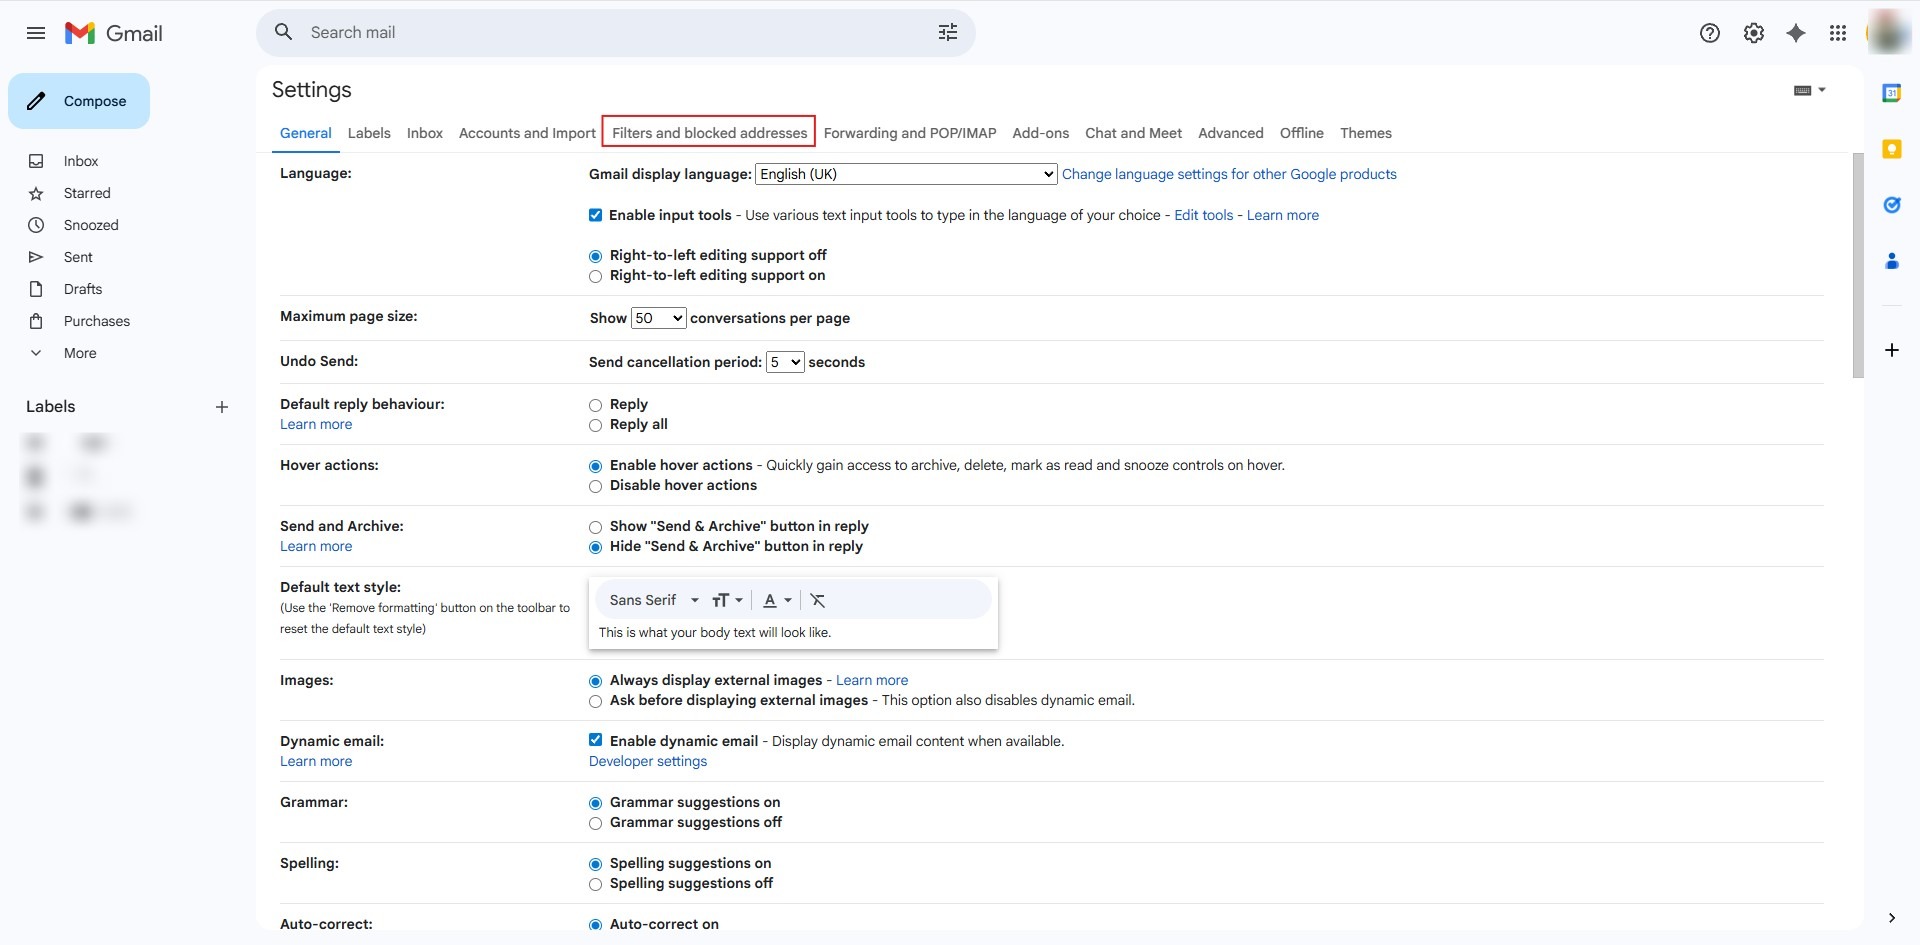
Step 3: Navigate to Filters
- Click on the “Filters and blocked addresses” tab at the top of the settings page.
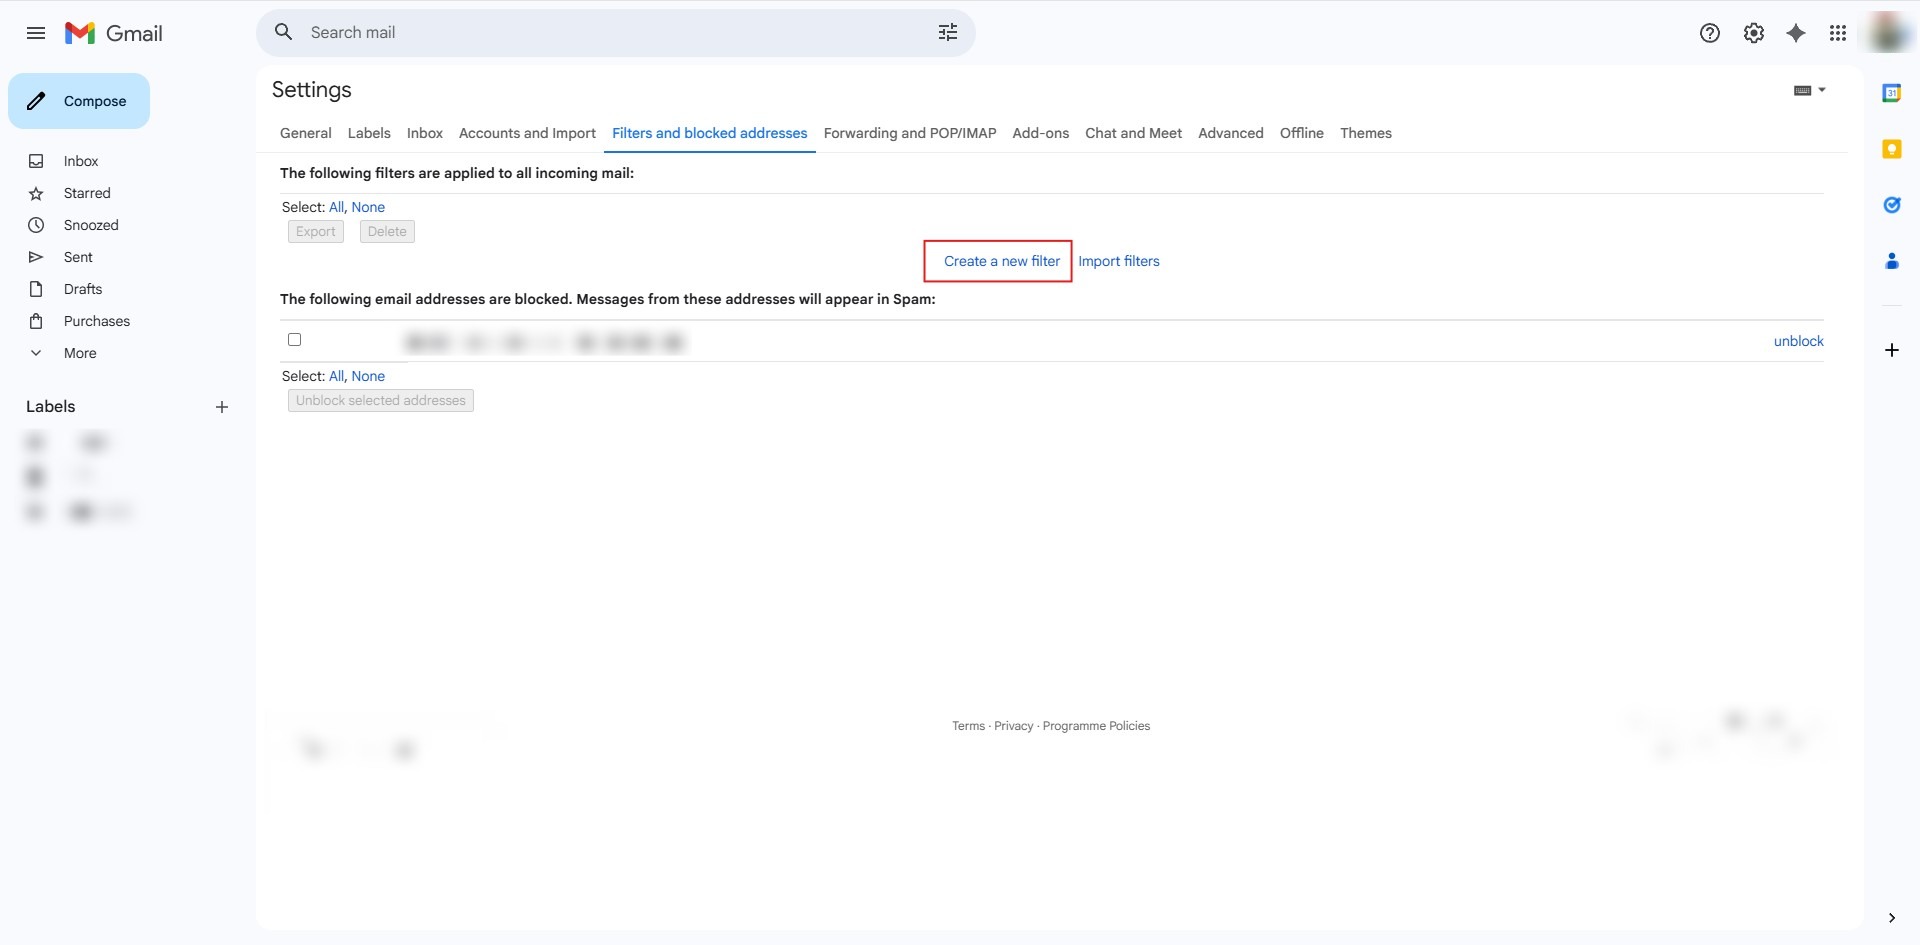
Step 4: Create New Filter
- Click the “Create a new filter” link to open the criteria window.
Step 5: Key in Email
- Type the specific email address into the “From” field and click “Create filter”.
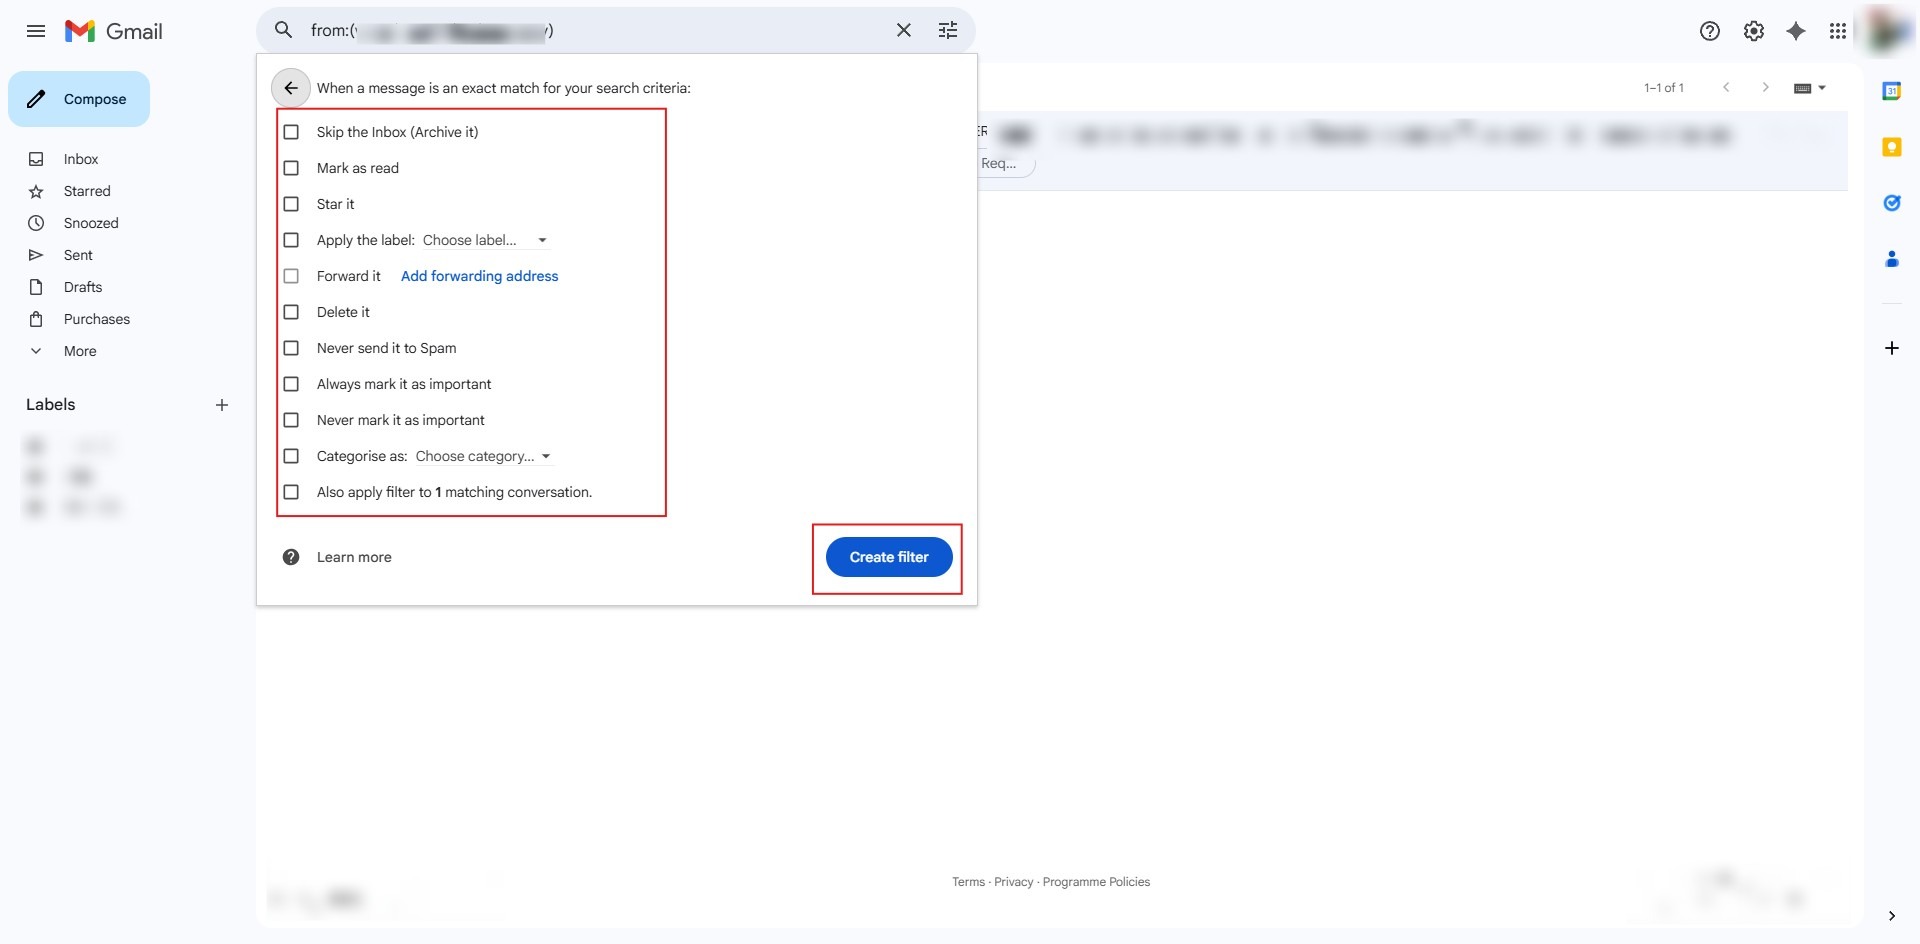
Step 6: Select Action
- Choose at least one action, such as “Mark as read,”
- Click the final “Create filter” button.
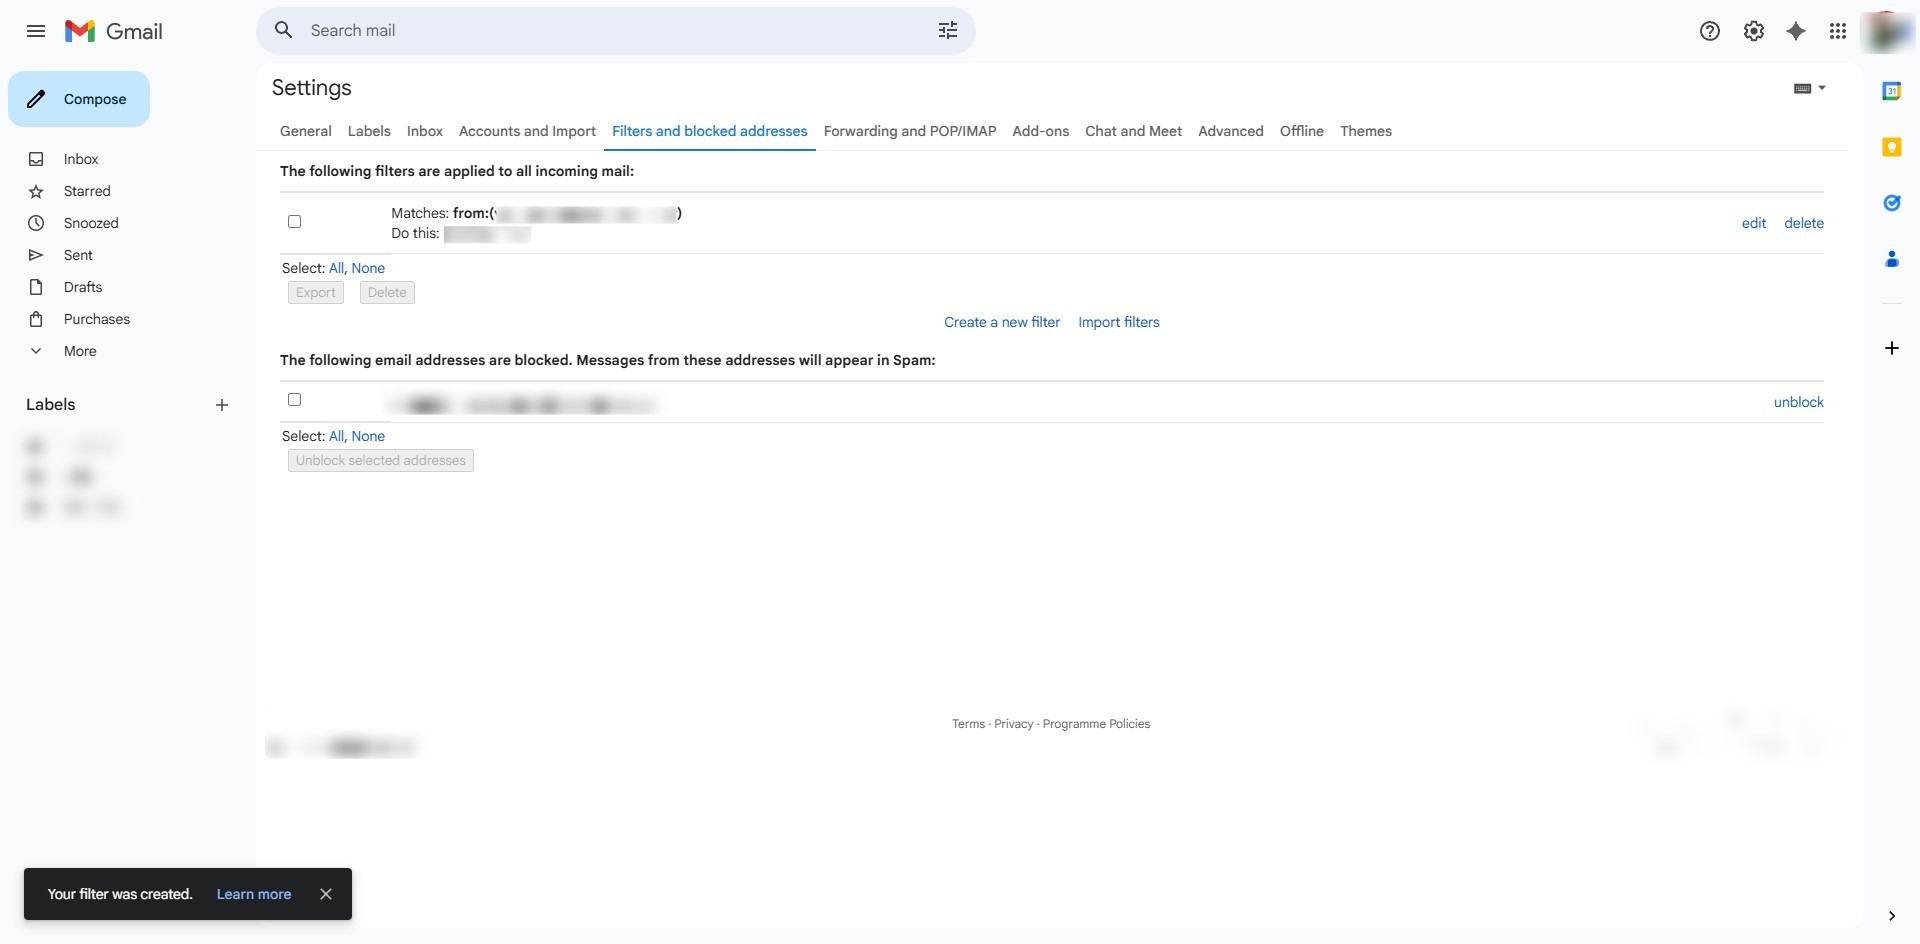
Step 7: Confirmation
- A success message will appear in the bottom-left corner confirming “Your filter was created”.
Conclusion:
In conclusion, managing messages from a specific sender in Gmail Web is accomplished by navigating to the “Filters and blocked addresses” tab within the comprehensive settings menu. Once the target email address is entered into the search criteria and a desired action is chosen, clicking “Create filter” activates the rule. The process is officially complete when the system displays a notification confirming that the filter has been successfully established.