Search Our Database
How to Modify an Email Autoresponder using Autoresponders in cPanel
Introduction
This Knowledge Base article provides a simple, step-by-step guide on How to Modify an Email Autoresponder using Autoresponders in cPanel. Modifying an autoresponder allows you to update the response message, change the interval, adjust the duration, or edit other settings without deleting and recreating the autoresponder. Use this guide when you need to make changes to an existing autoresponder configuration.
Prerequisite
- Access to your cPanel login page.
Step-by-Step Guide
Step 1: Log in to cPanel
-
Access your cPanel account using your username and password.
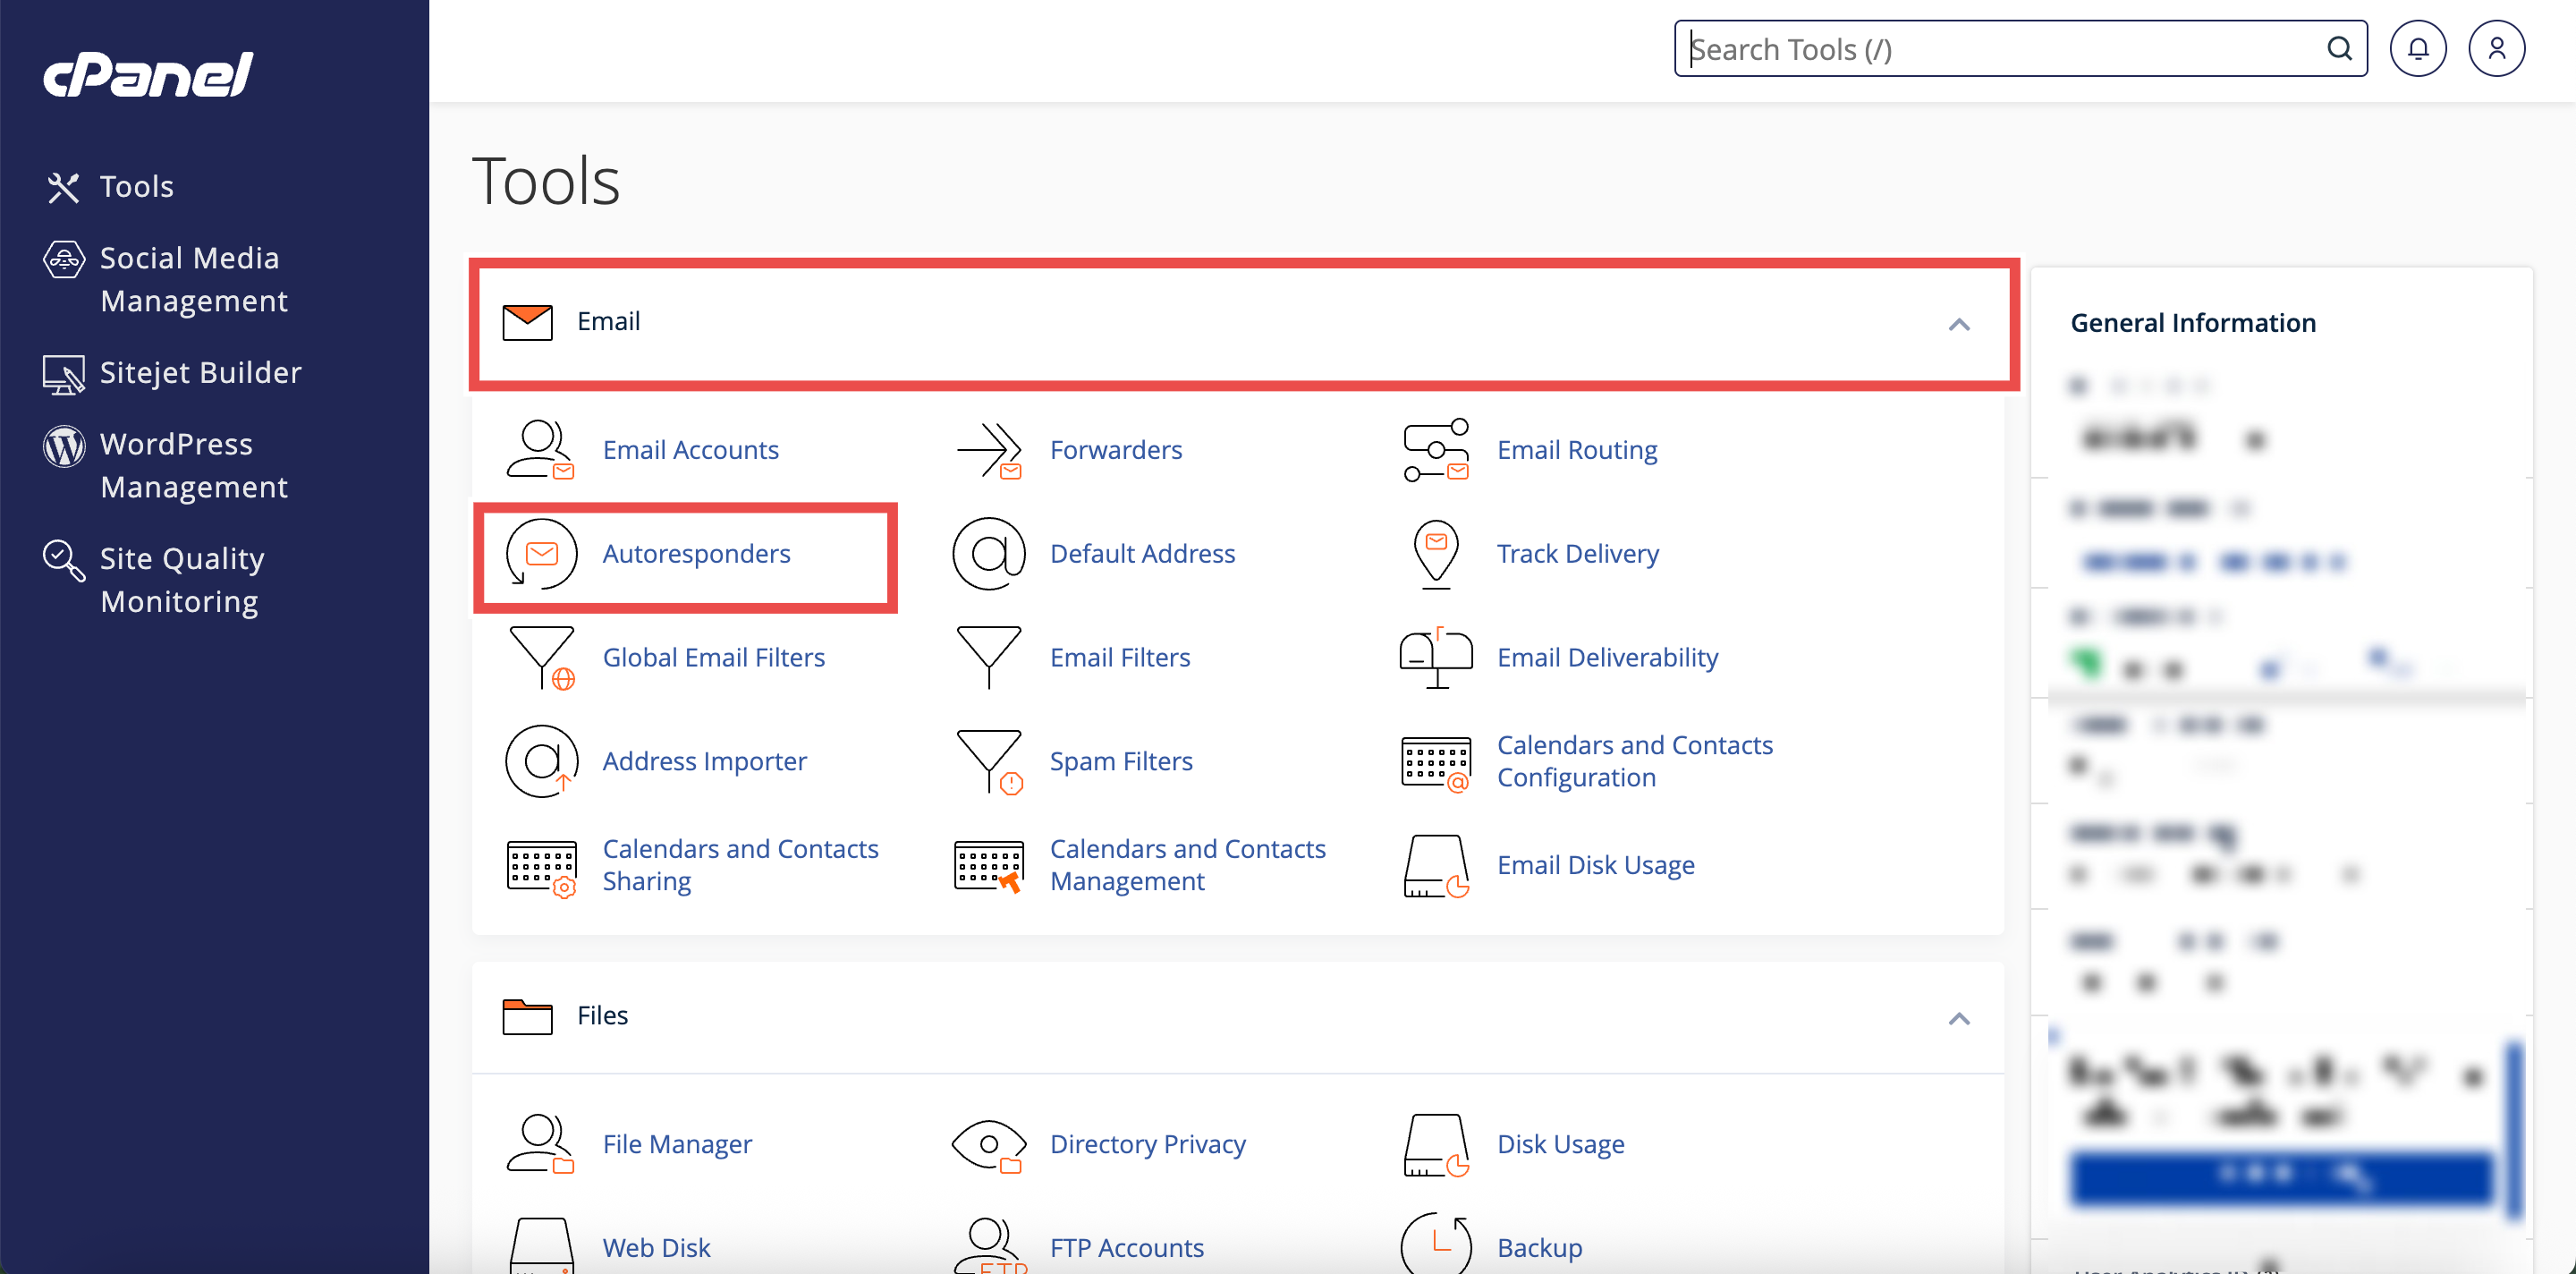
Step 2: Open Autoresponders
- In the Home page, under the Email section, click Autoresponders.
Step 3: Select Your Domain
- From the Managing menu on the top left side of the interface, select the domain for which you want to configure an autoresponder.
⚠️ Important Note:
- Select All Domains if you want the autoresponders to be applied to all of your domain.

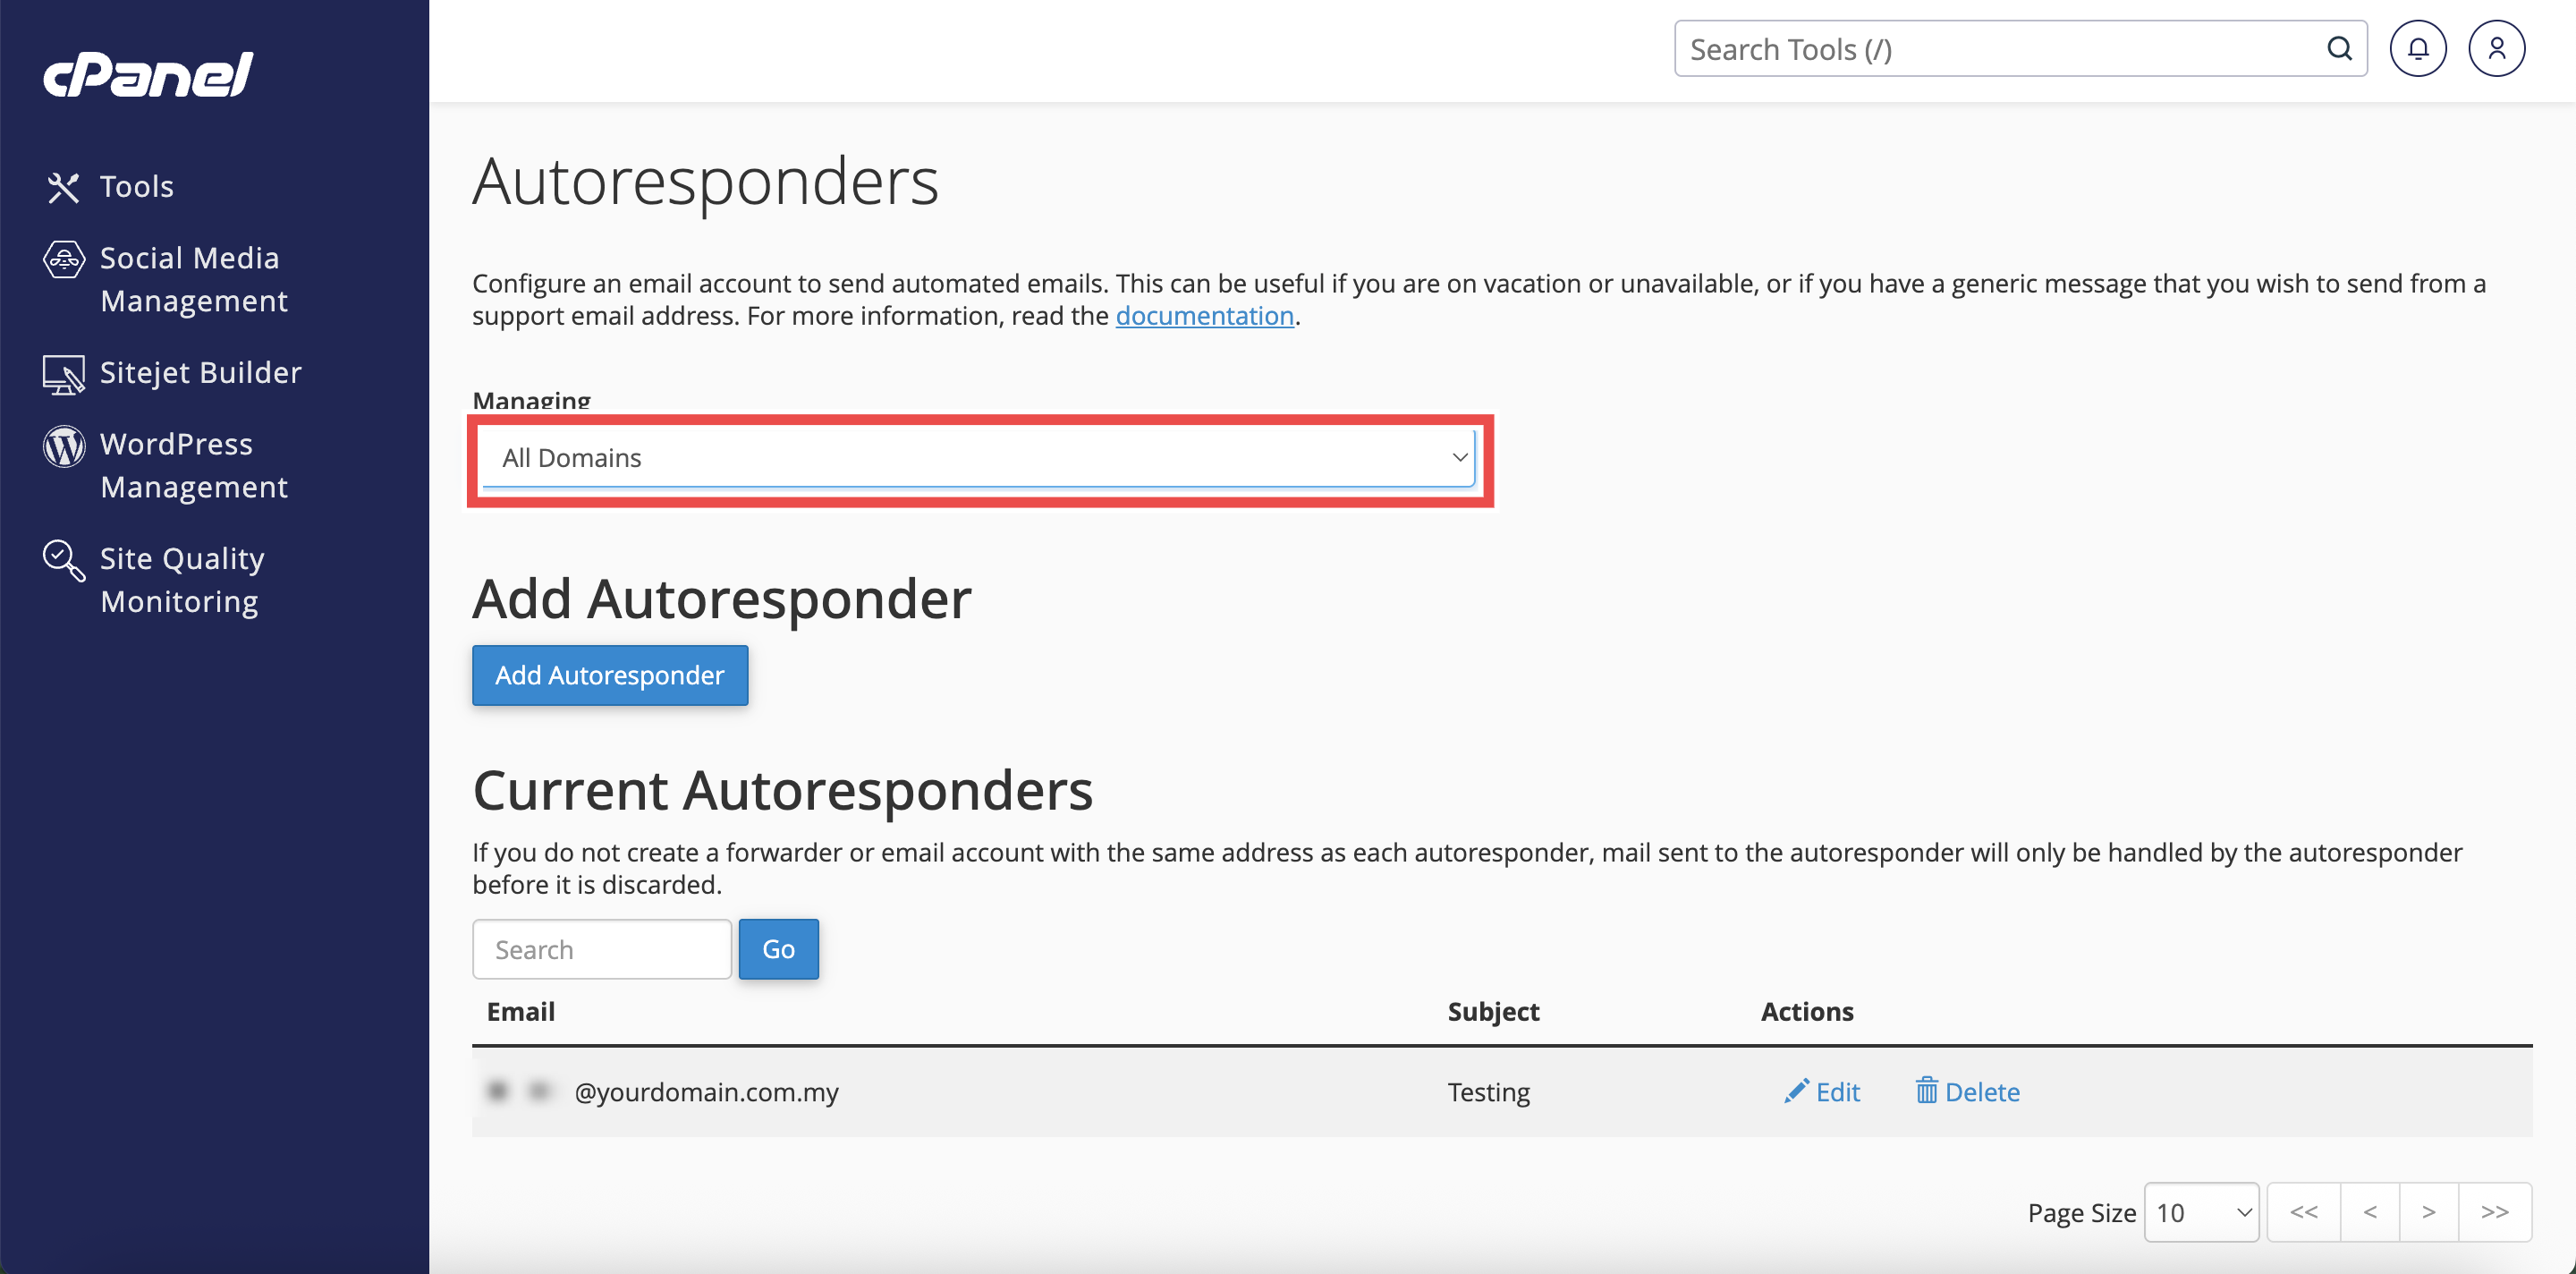
Step 4: Locate the Autoresponder
- In the Current Autoresponders table, locate the autoresponder you want to edit.
⚠️ Important Note: You can use the Search text box to find a specific autoresponder by entering a keyword and clicking Go.

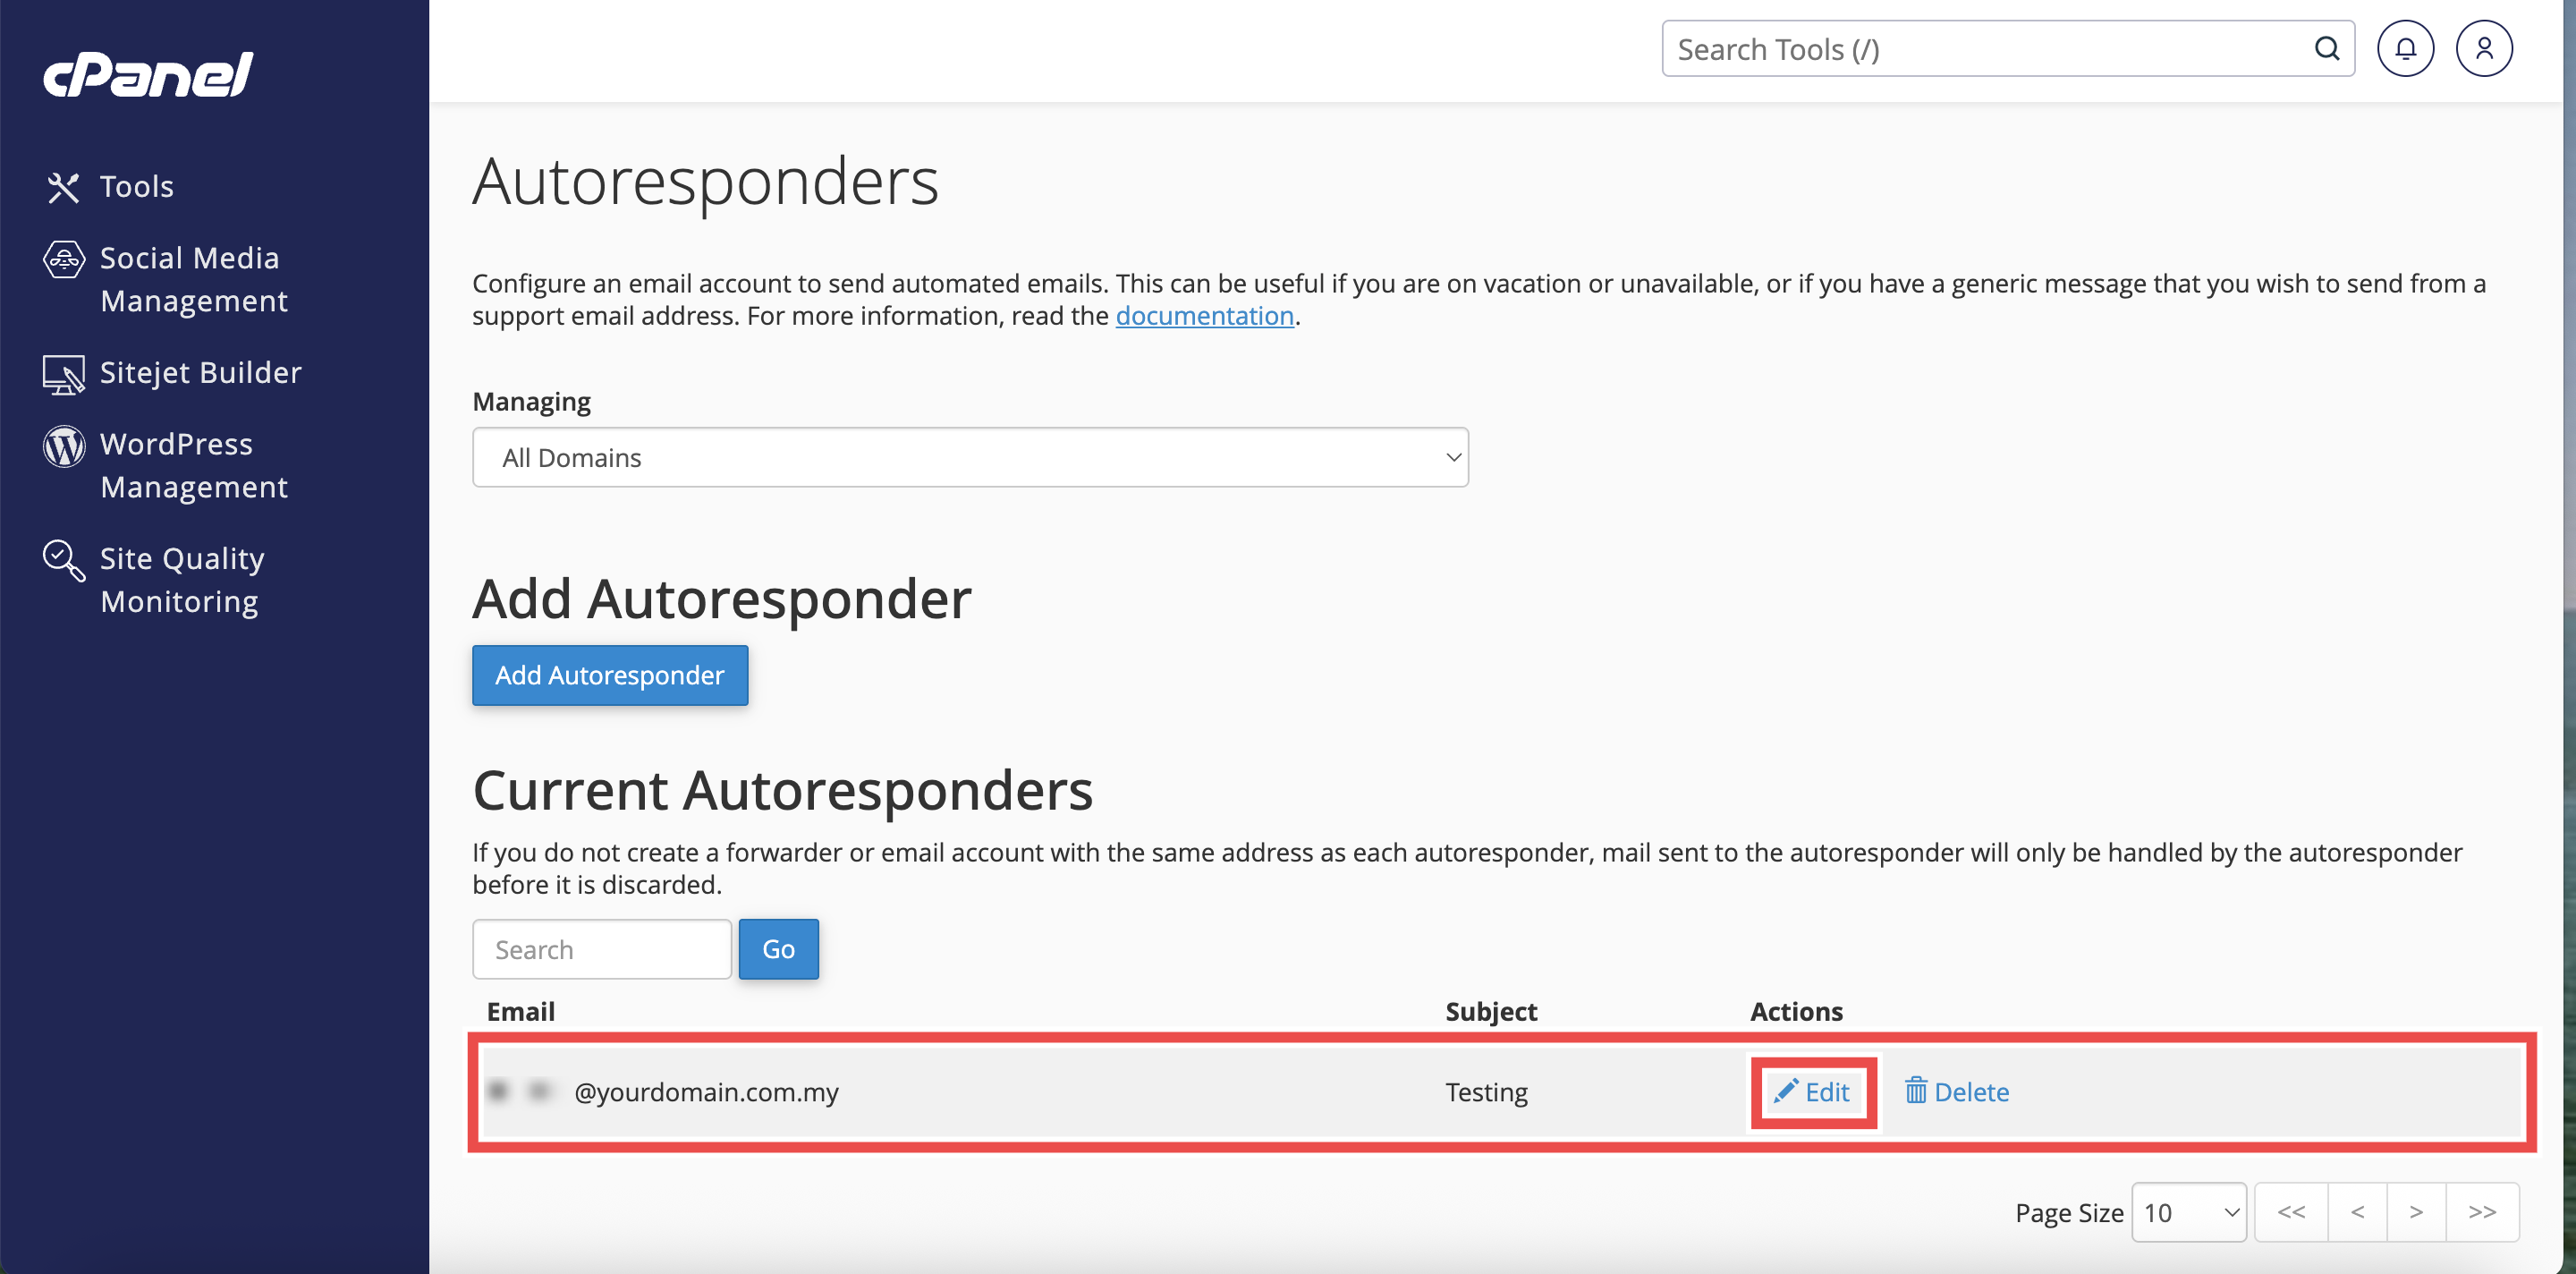
Step 5: Edit Autoresponder
- Click Edit next to the autoresponder you want to edit.
- The autoresponder configuration interface will appear.
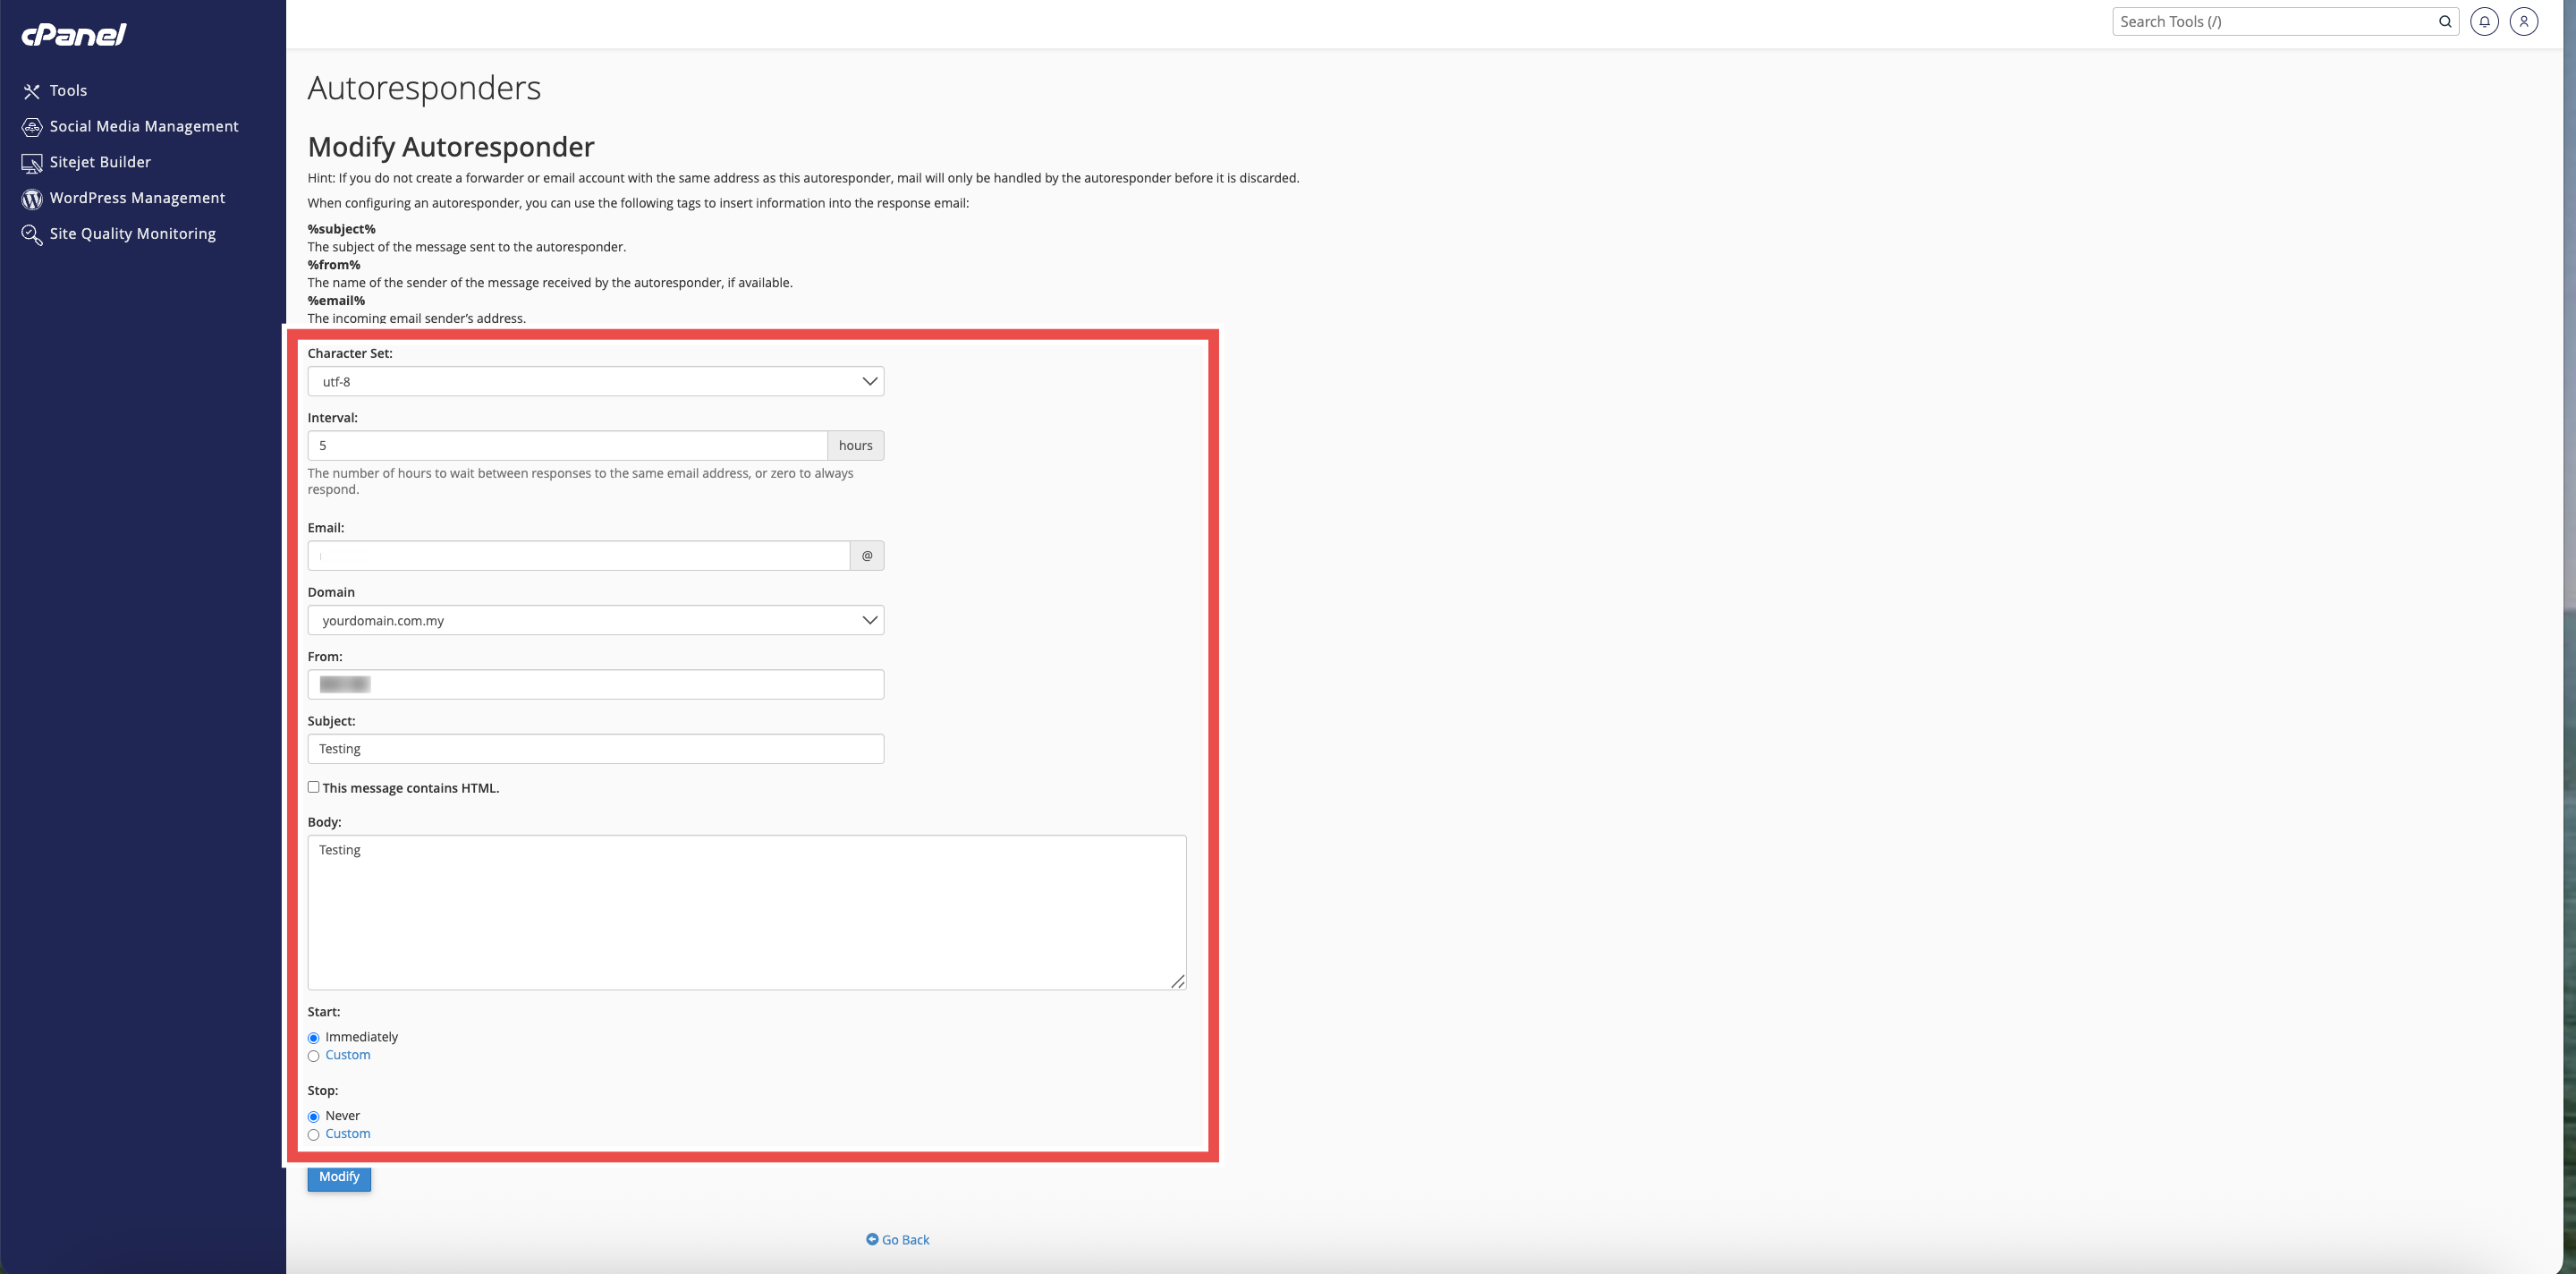
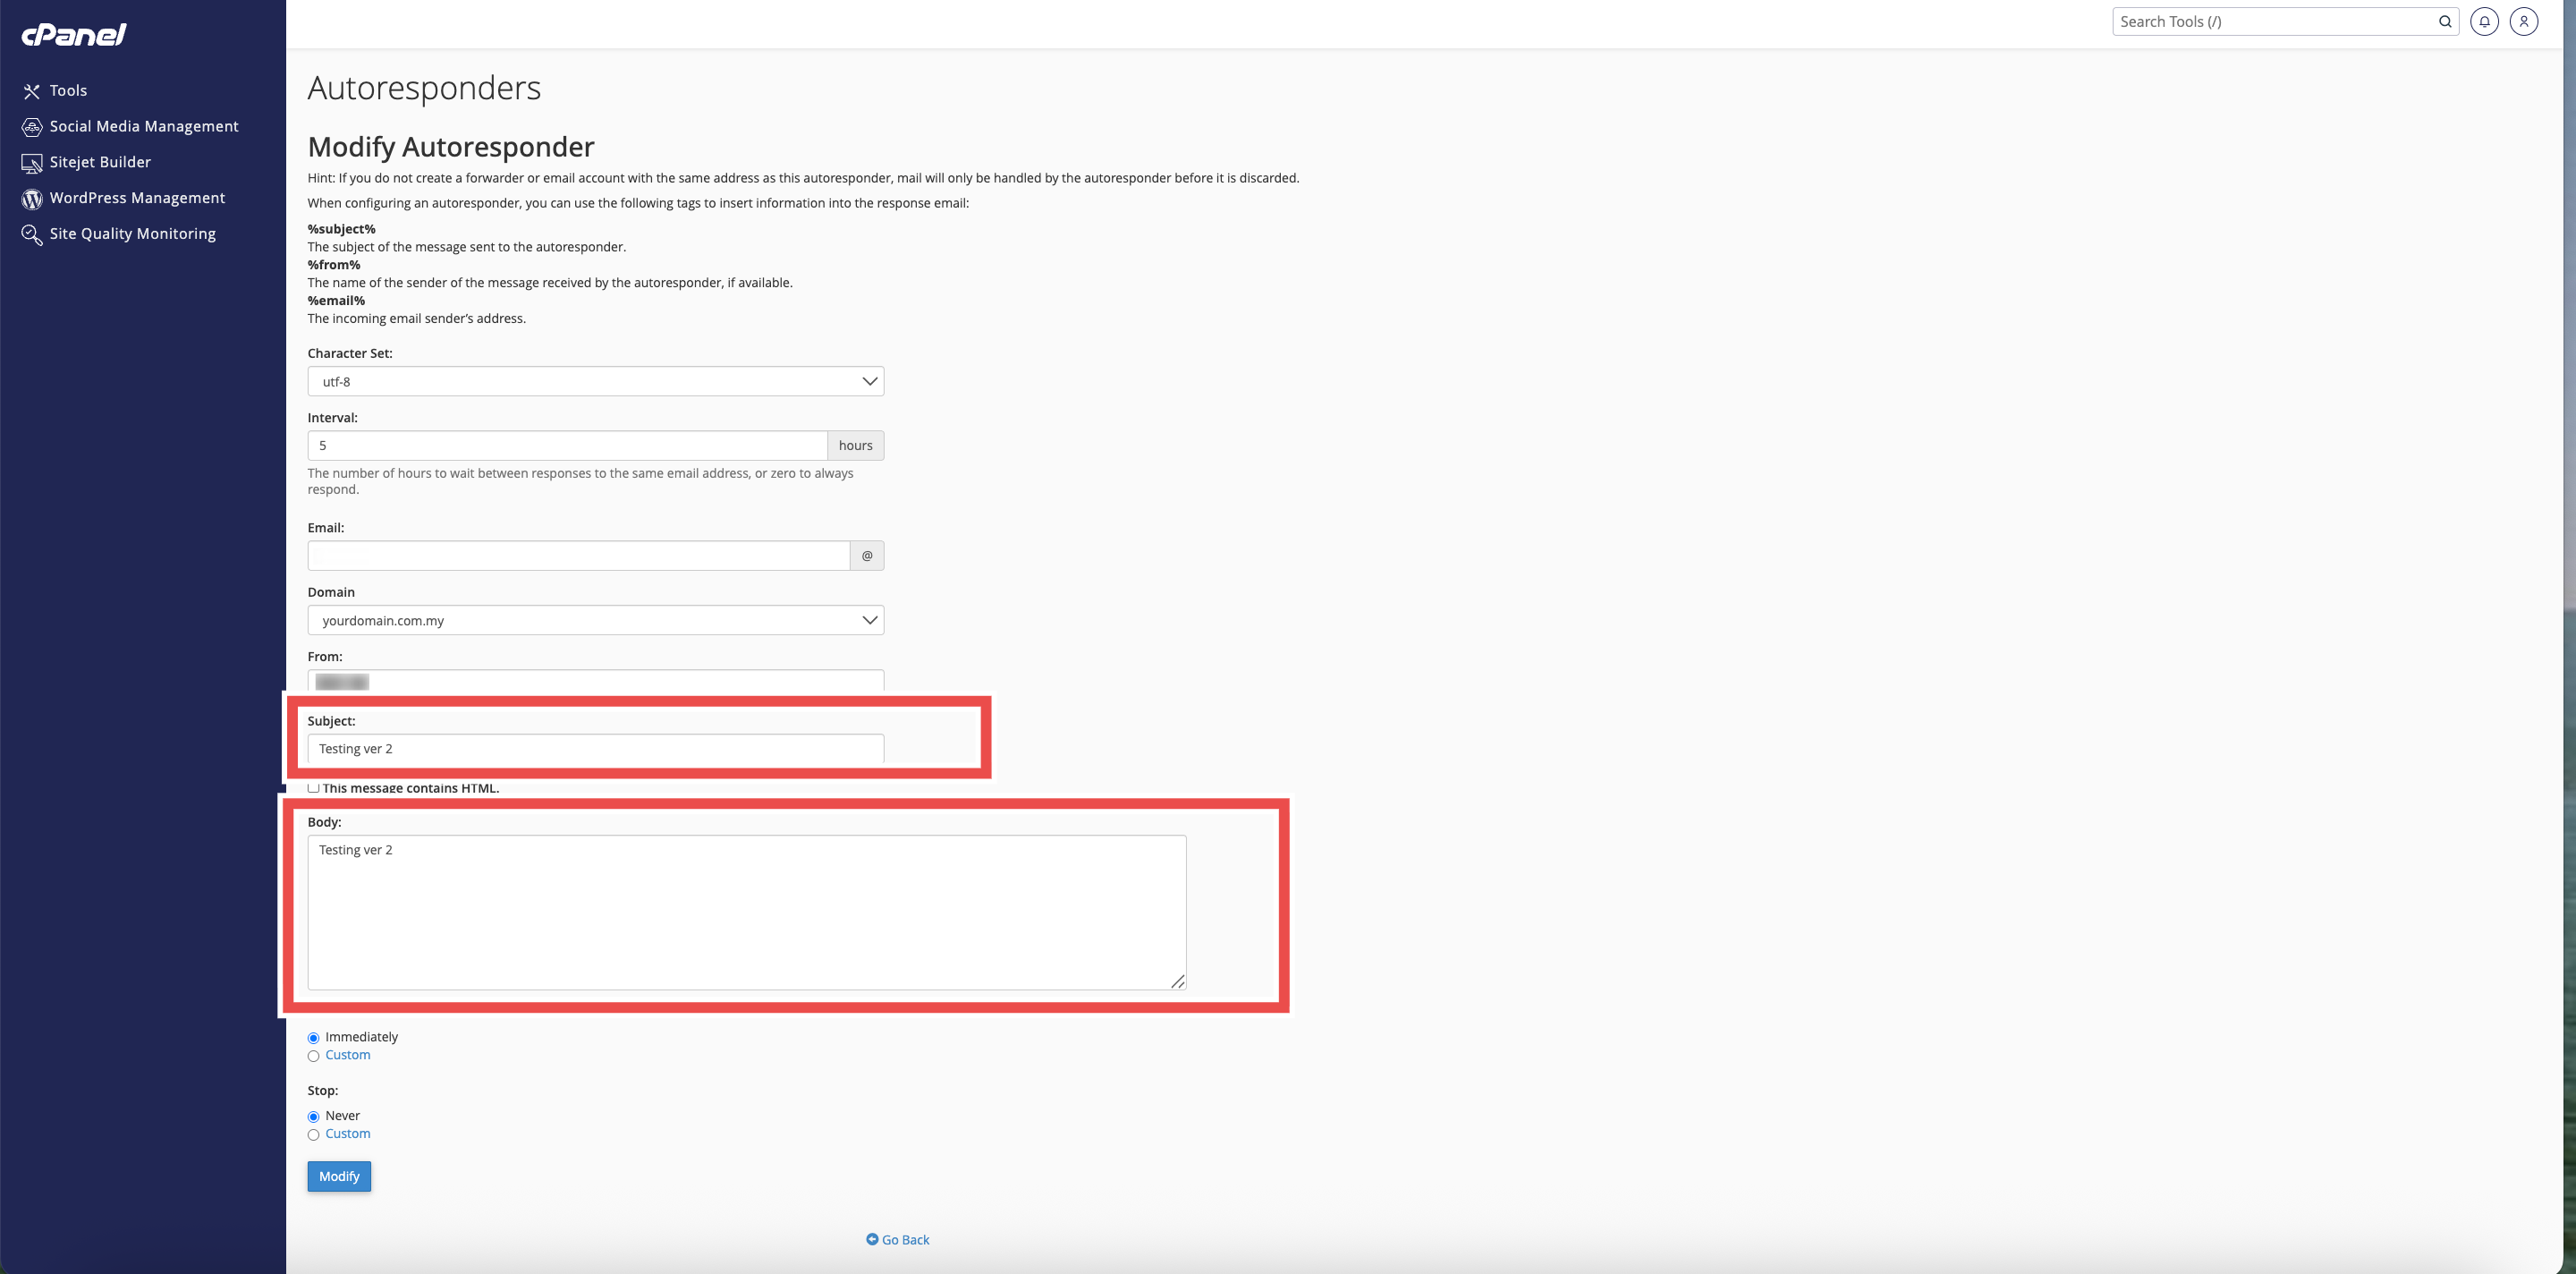
Step 6: Modify the Settings
- Update the settings as needed.
- Click Modify apply the configuration.
⚠️ Important Note:
- Understanding Autoresponder Settings:
- Character Set: Character encoding for the message (default: UTF-8 for most languages).
- Interval: Hours between responses to the same sender (e.g., 24 = once per day).
- From name: Name displayed as the sender of the autoresponse.
- Subject line: Subject that appears in the autoresponse email.
- Body text: Main message content of your autoresponse.
- HTML option: Check if your message includes HTML formatting tags; leave unchecked for plain text.
- Start time: When autoresponder begins (Immediately or Custom date/time).
- Stop time: When autoresponder ends (Never or Custom date/time).

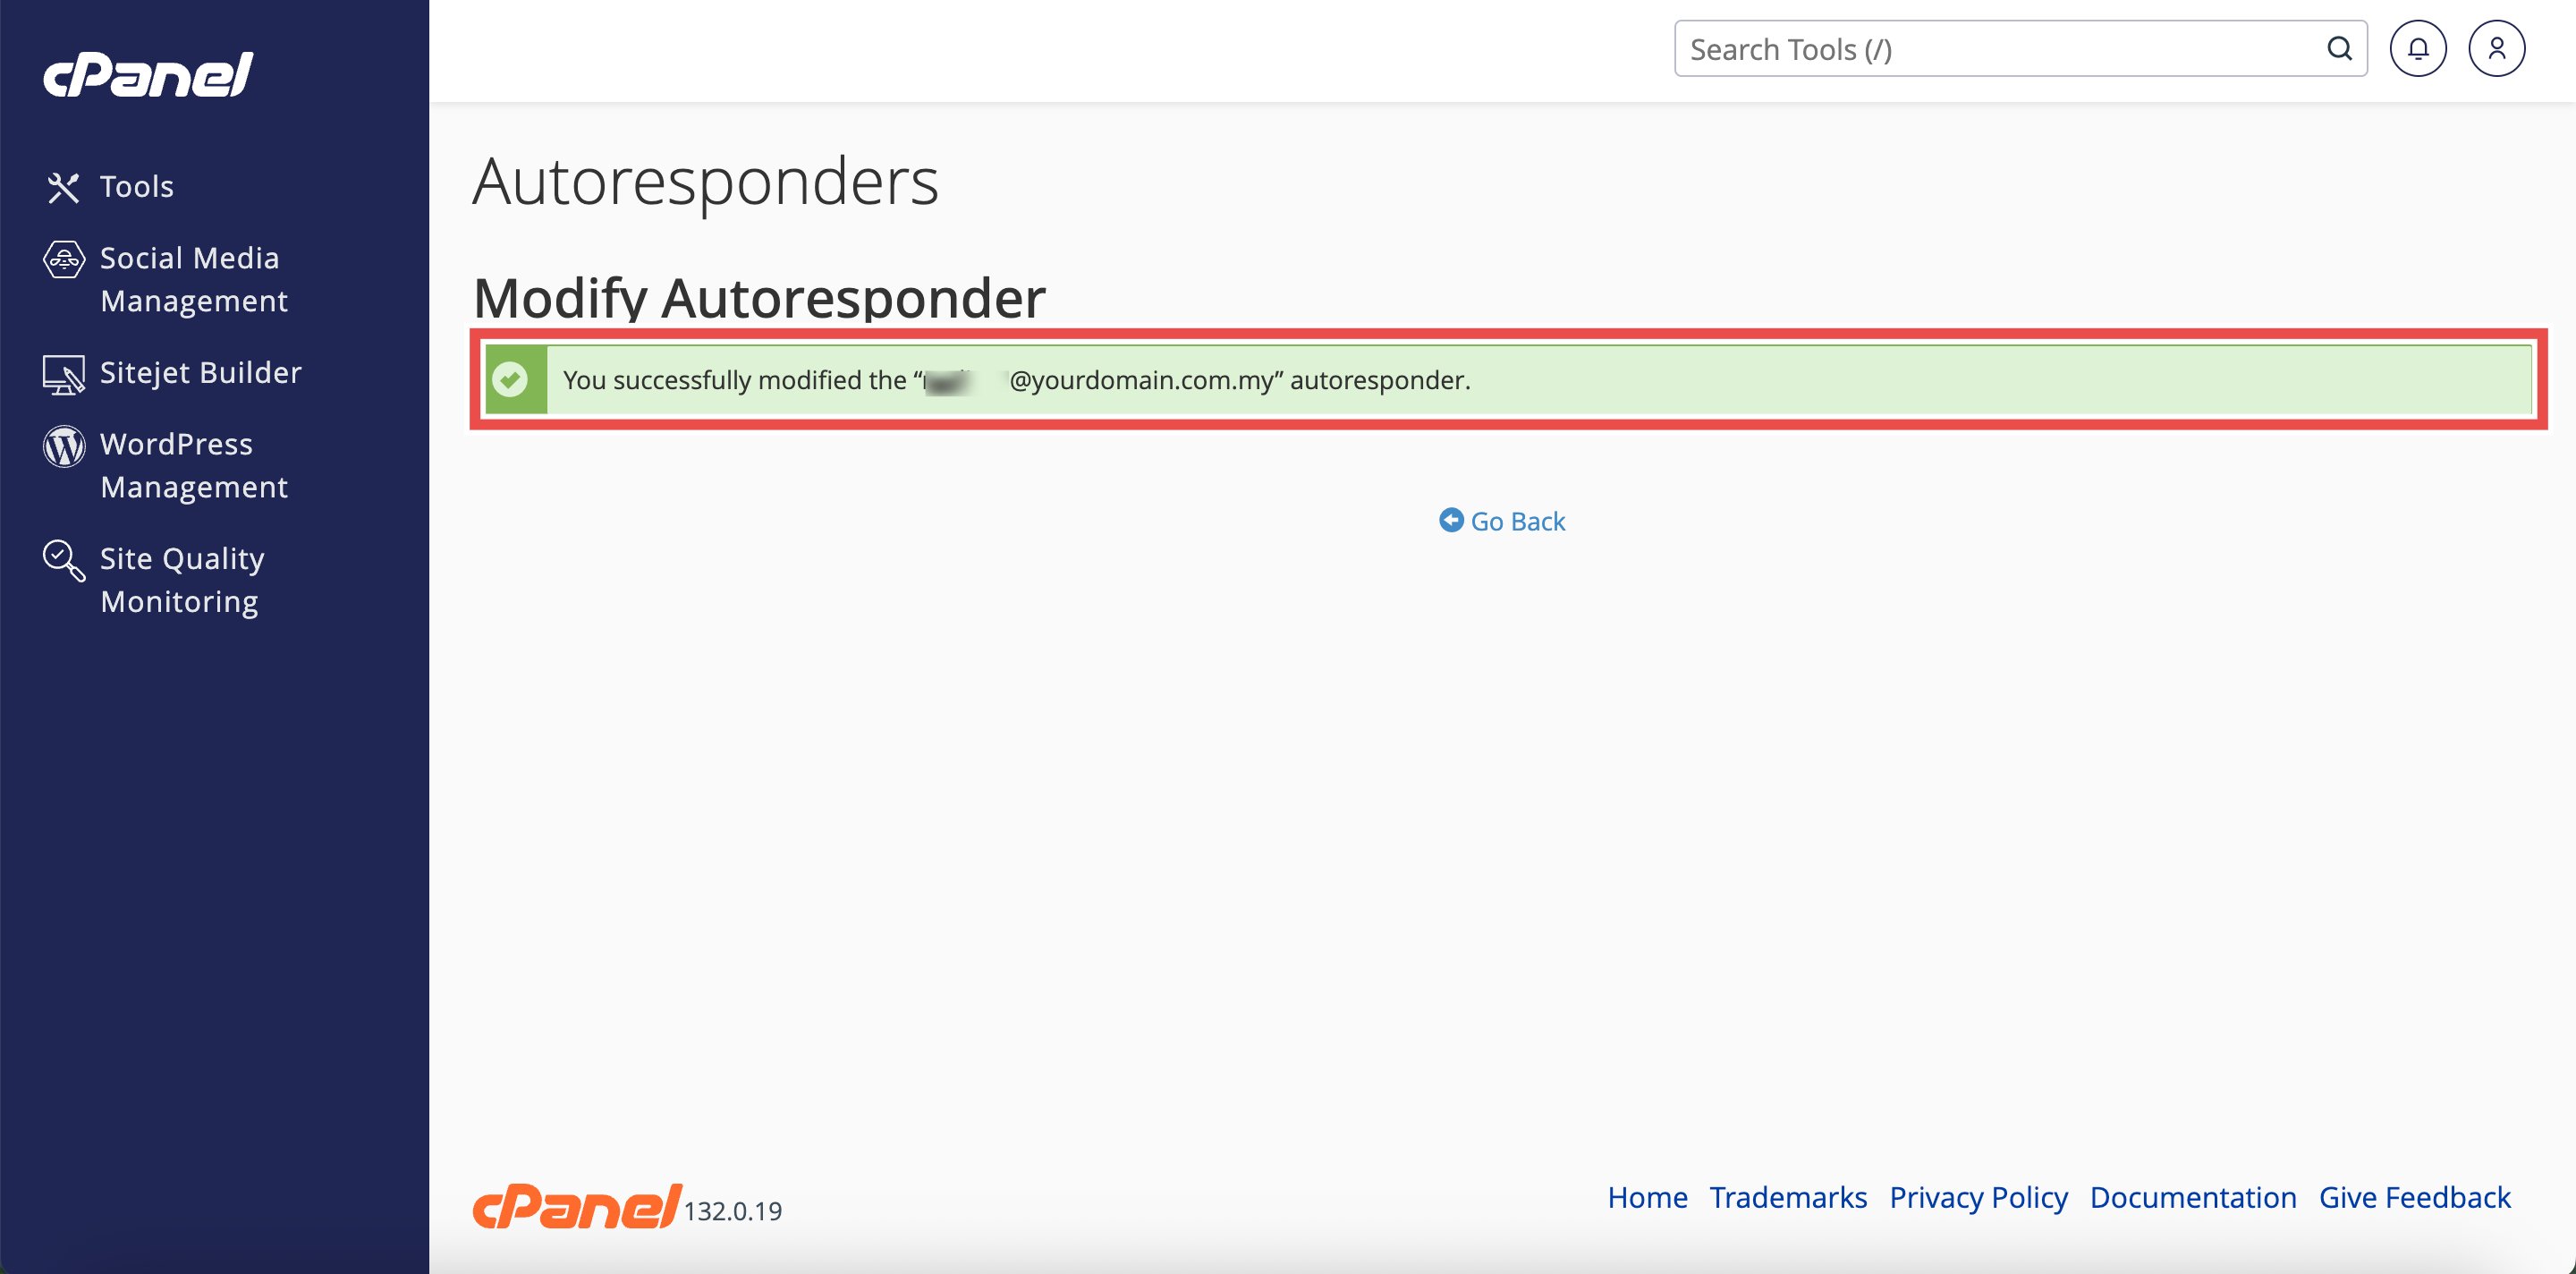
Step 7: Verify Changes
- A confirmation message will appear indicating that the autoresponders has been updated.
- Additionally, you may send a test email to the autoresponder address to verify the modifications are working correctly.
⚠️ Important Note:
- Changes take effect immediately after clicking Modify.
- When you activate an autoresponder, the system still delivers messages to the inbox as usual.
- You can only have one autoresponder per email address.
- Modifying the interval affects when the autoresponder will respond to repeated emails from the same sender.
- If you change the start/stop times, make sure the new schedule is appropriate for your needs.
Conclusion
By following these steps, you can modify an email autoresponder using Autoresponders in cPanel. Updating your autoresponder settings allows you to adapt to changing circumstances, correct errors, or improve your automatic response messages without disrupting email service.
Should you encounter any issues or have any questions, our support team at IPSERVERONE is always here to assist you. Don’t hesitate to reach out to us at support@ipserverone.com for any help you need.