Search Our Database
How to Download a Full Account Backup Using cPanel
Introduction
This Knowledge Base article provides a concise, step-by-step guide on How to Download a Full Account Backup Using cPanel. A full account backup contains all of your website files, databases, email accounts, and configurations, making it essential for disaster recovery or when migrating to a new hosting environment. The backup file is stored as a tarball with a .tar.gz extension and can be saved to your home directory or a remote server for safekeeping.
Prerequisite
- Access to your cPanel login page.
- Sufficient disk space available for the backup file.
Step-by-Step Guide
Step 1: Log in to cPanel
- Access and log in to your cPanel account using your username and password.
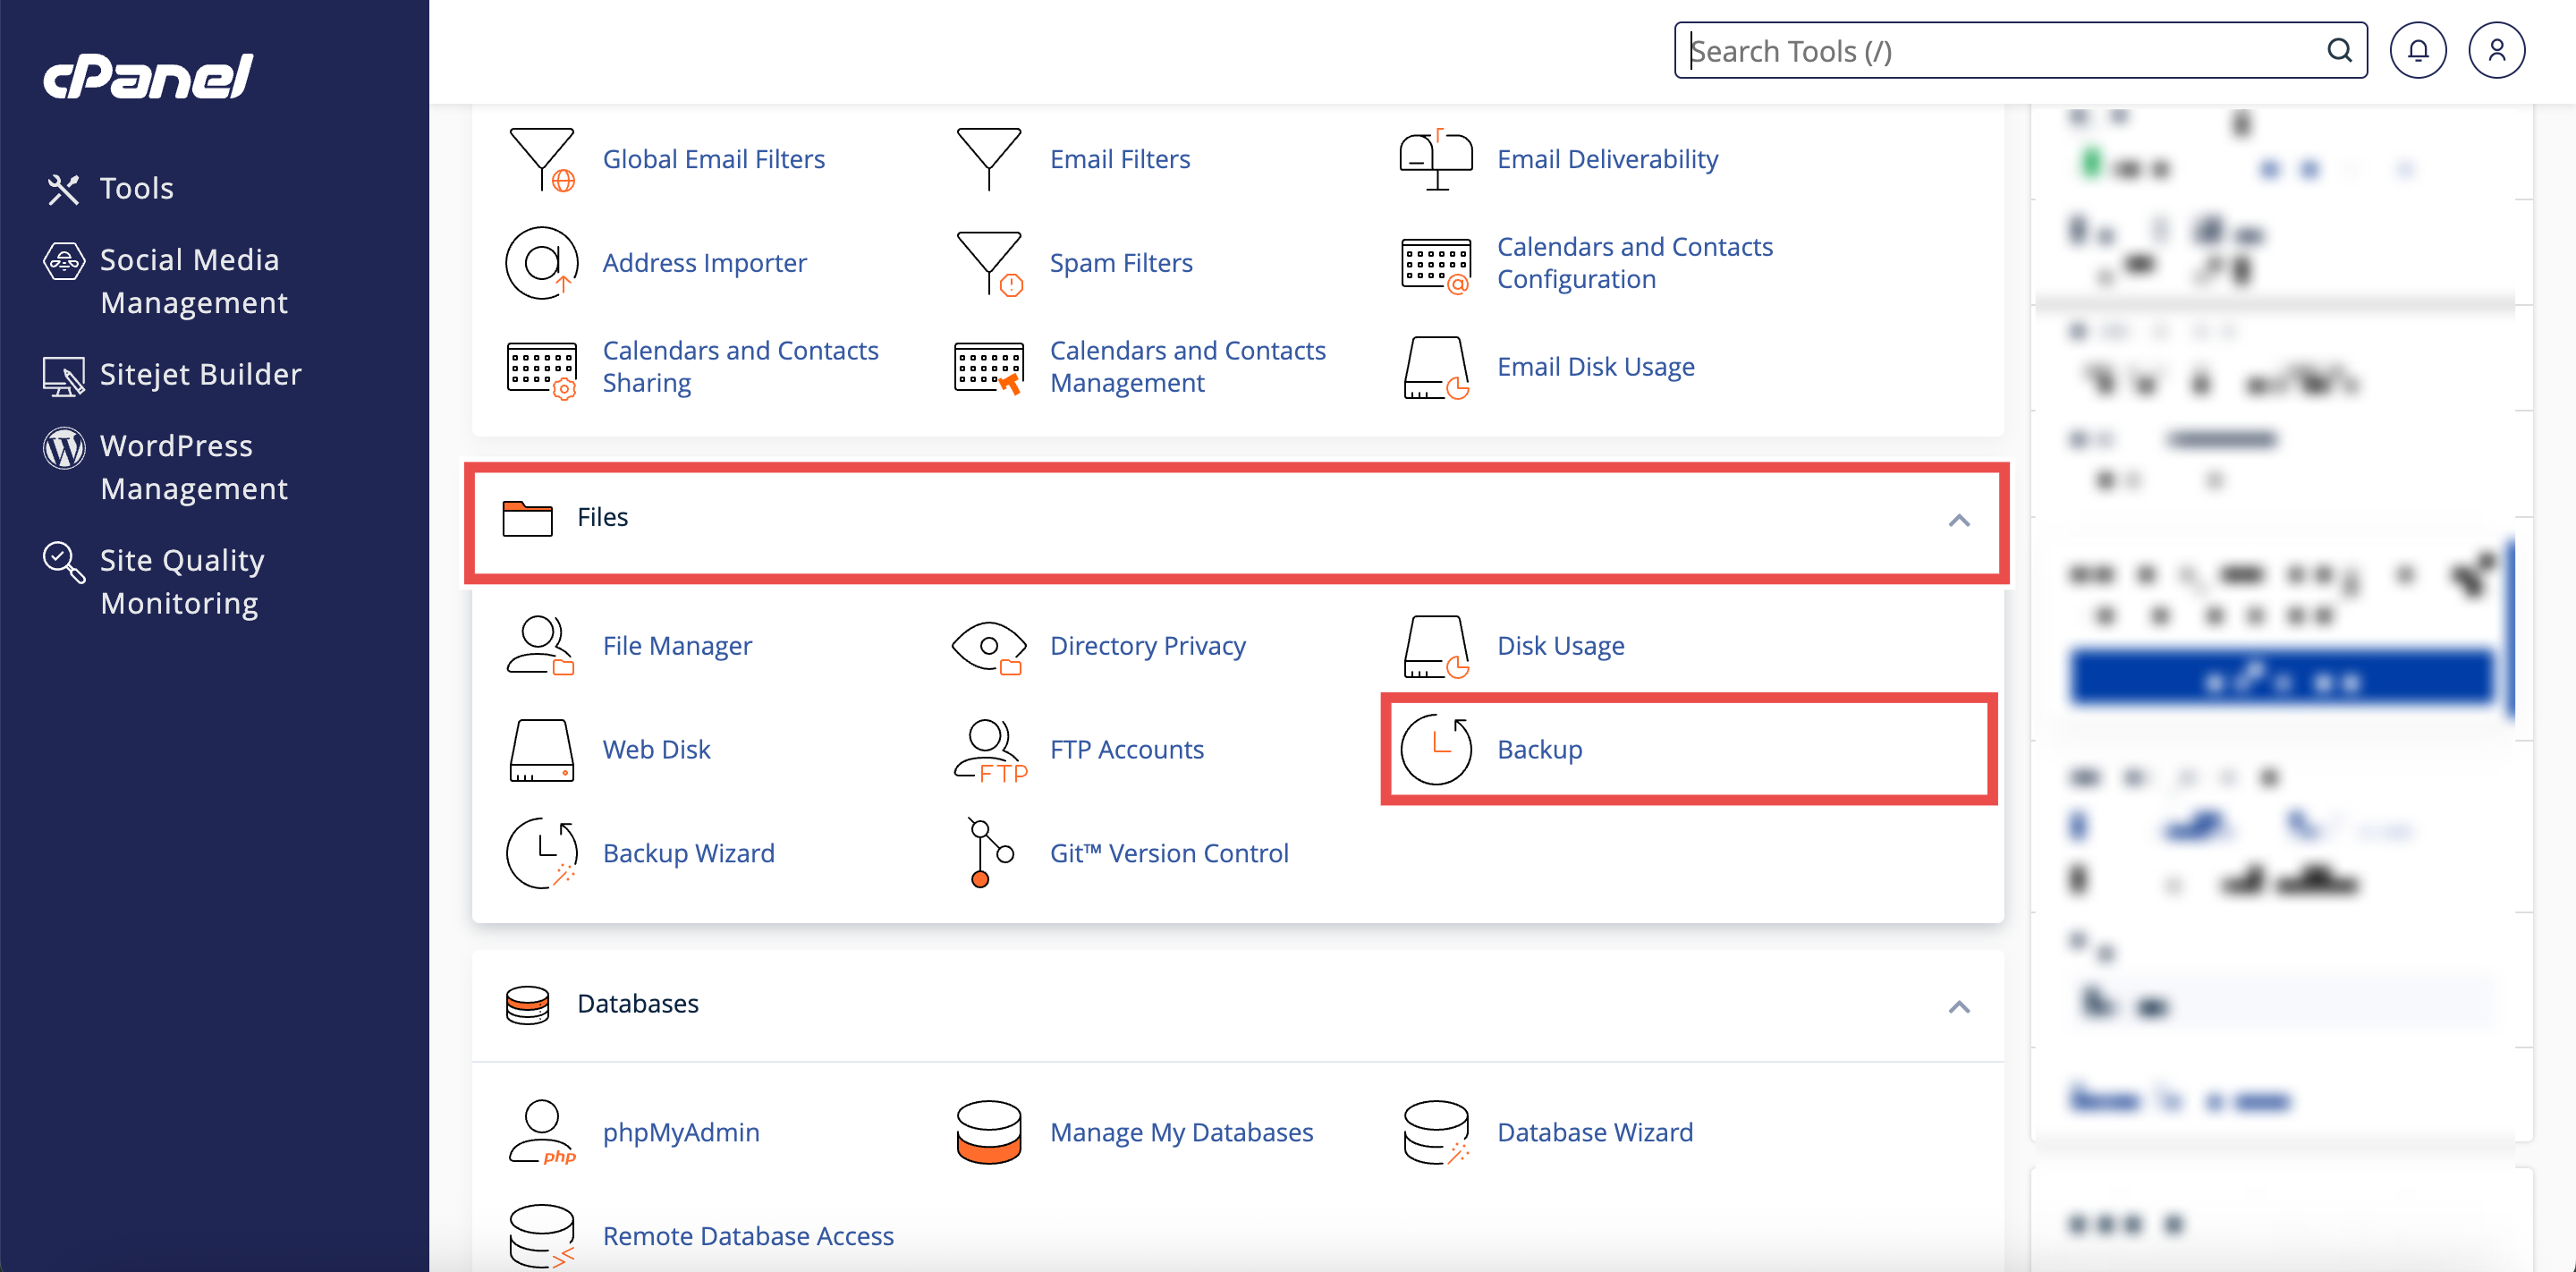
Step 2: Open Backup
- In the Home page, under Files, click Backup.
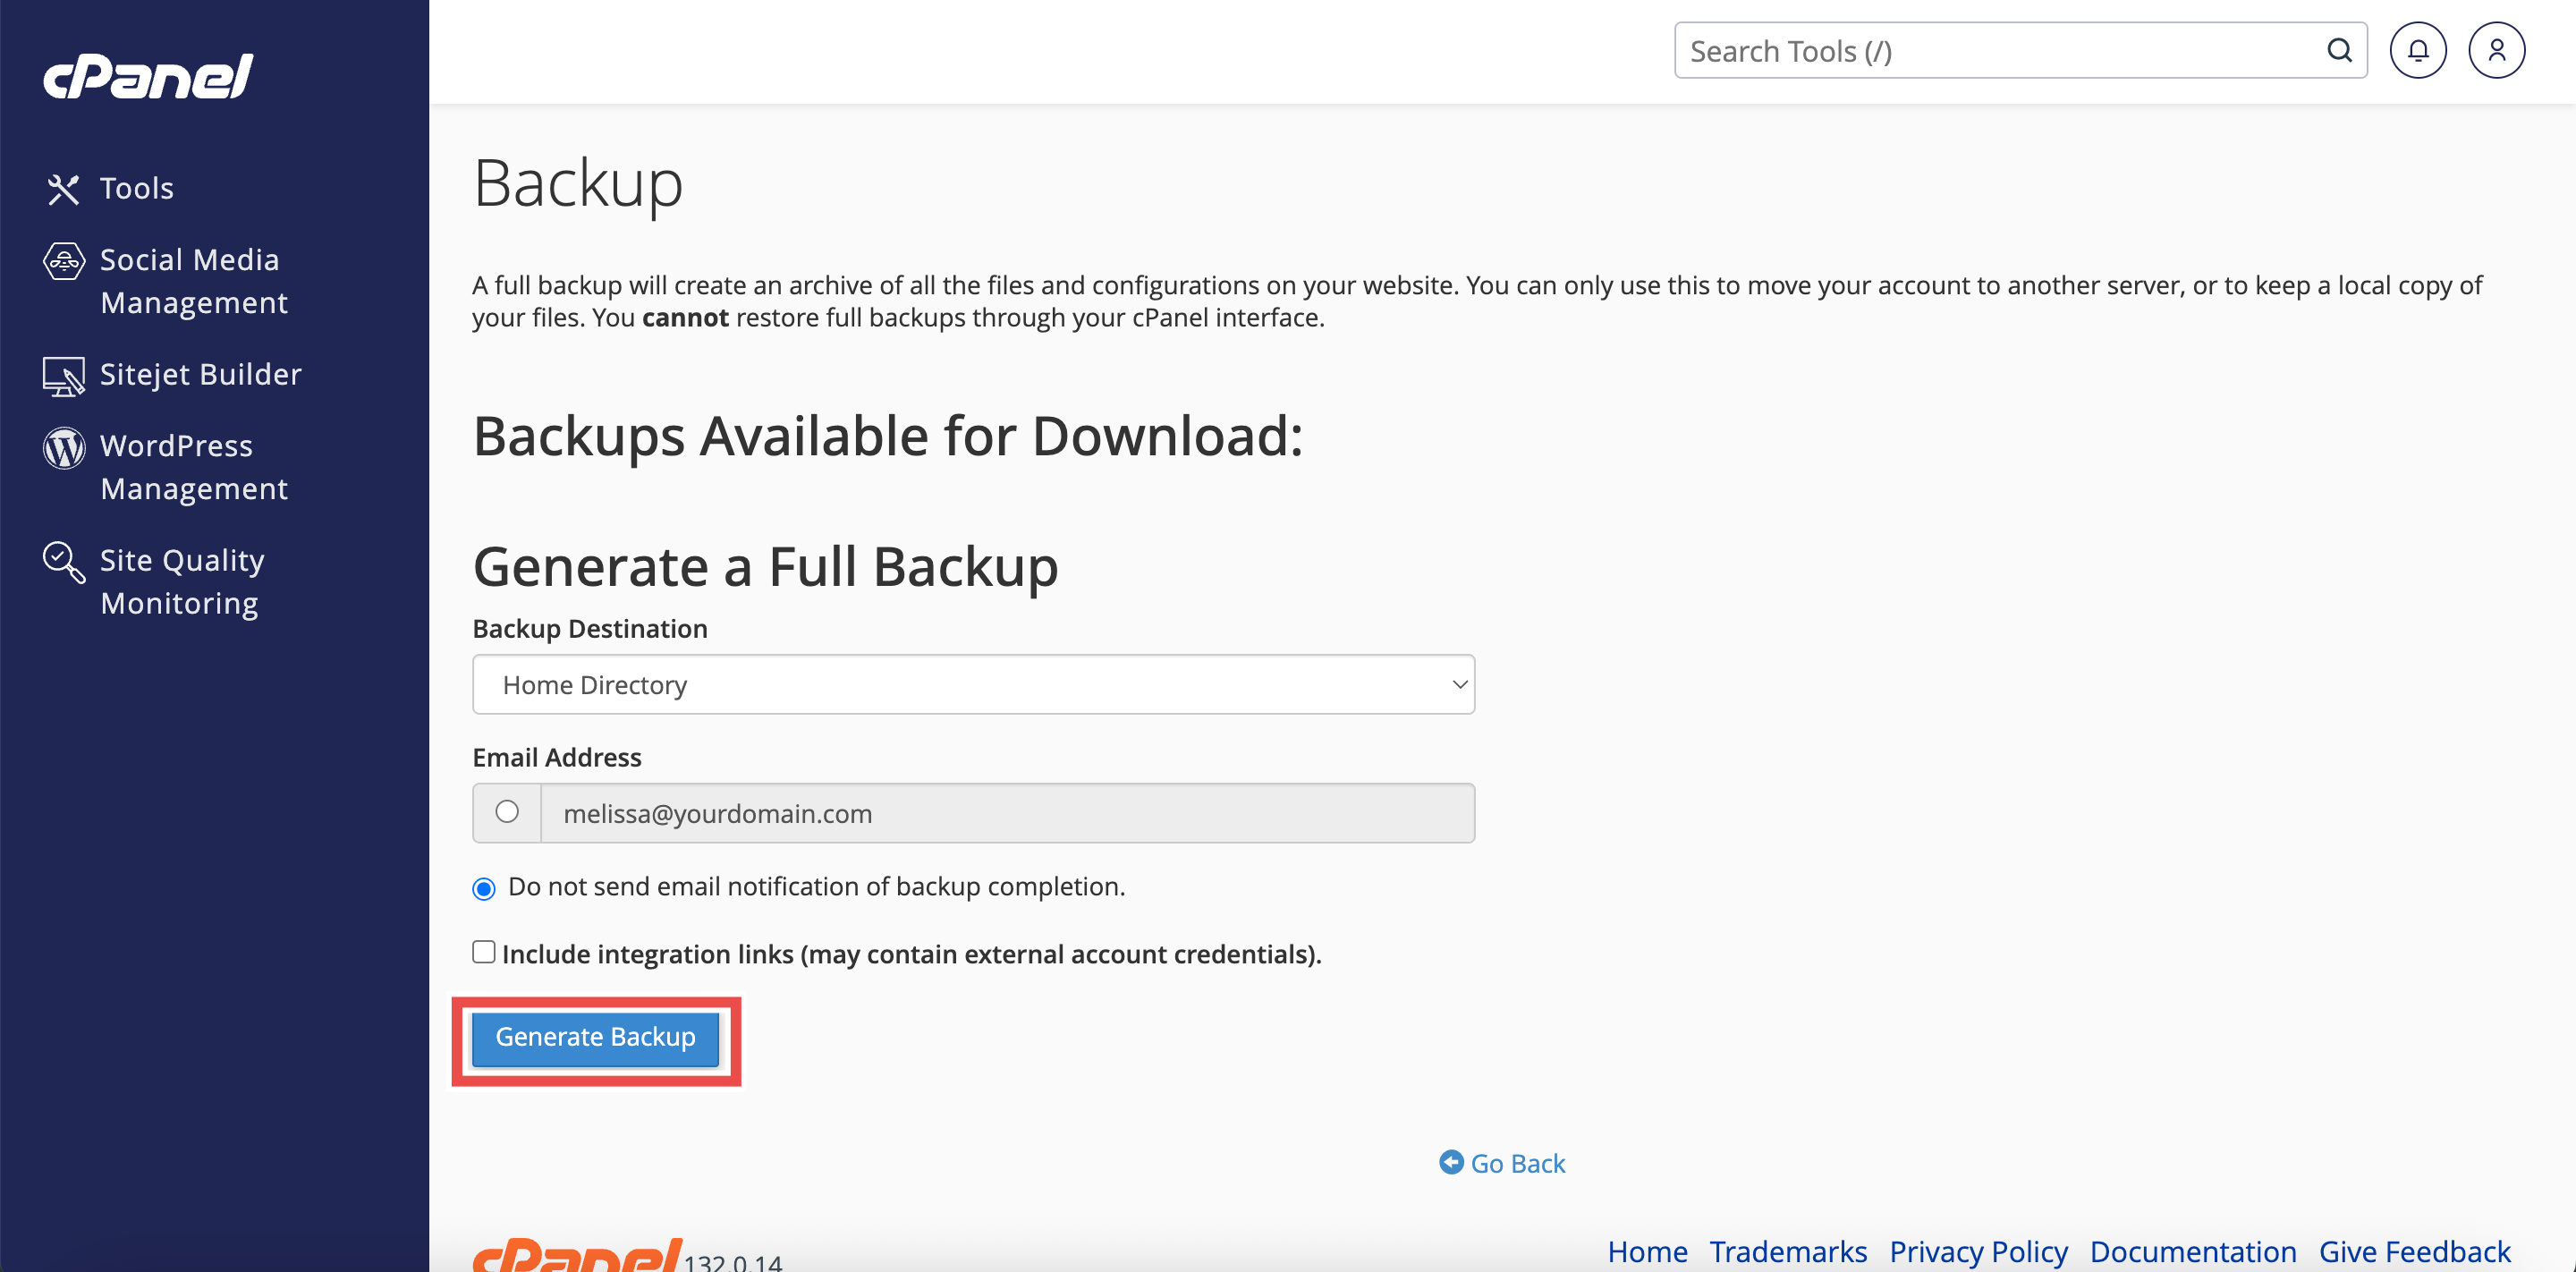
Step 3: Generate a Full Account Backup
- In the Full Backup section, click Download a Full Account Backup .
- The Generate a Full Backup interface will appear.

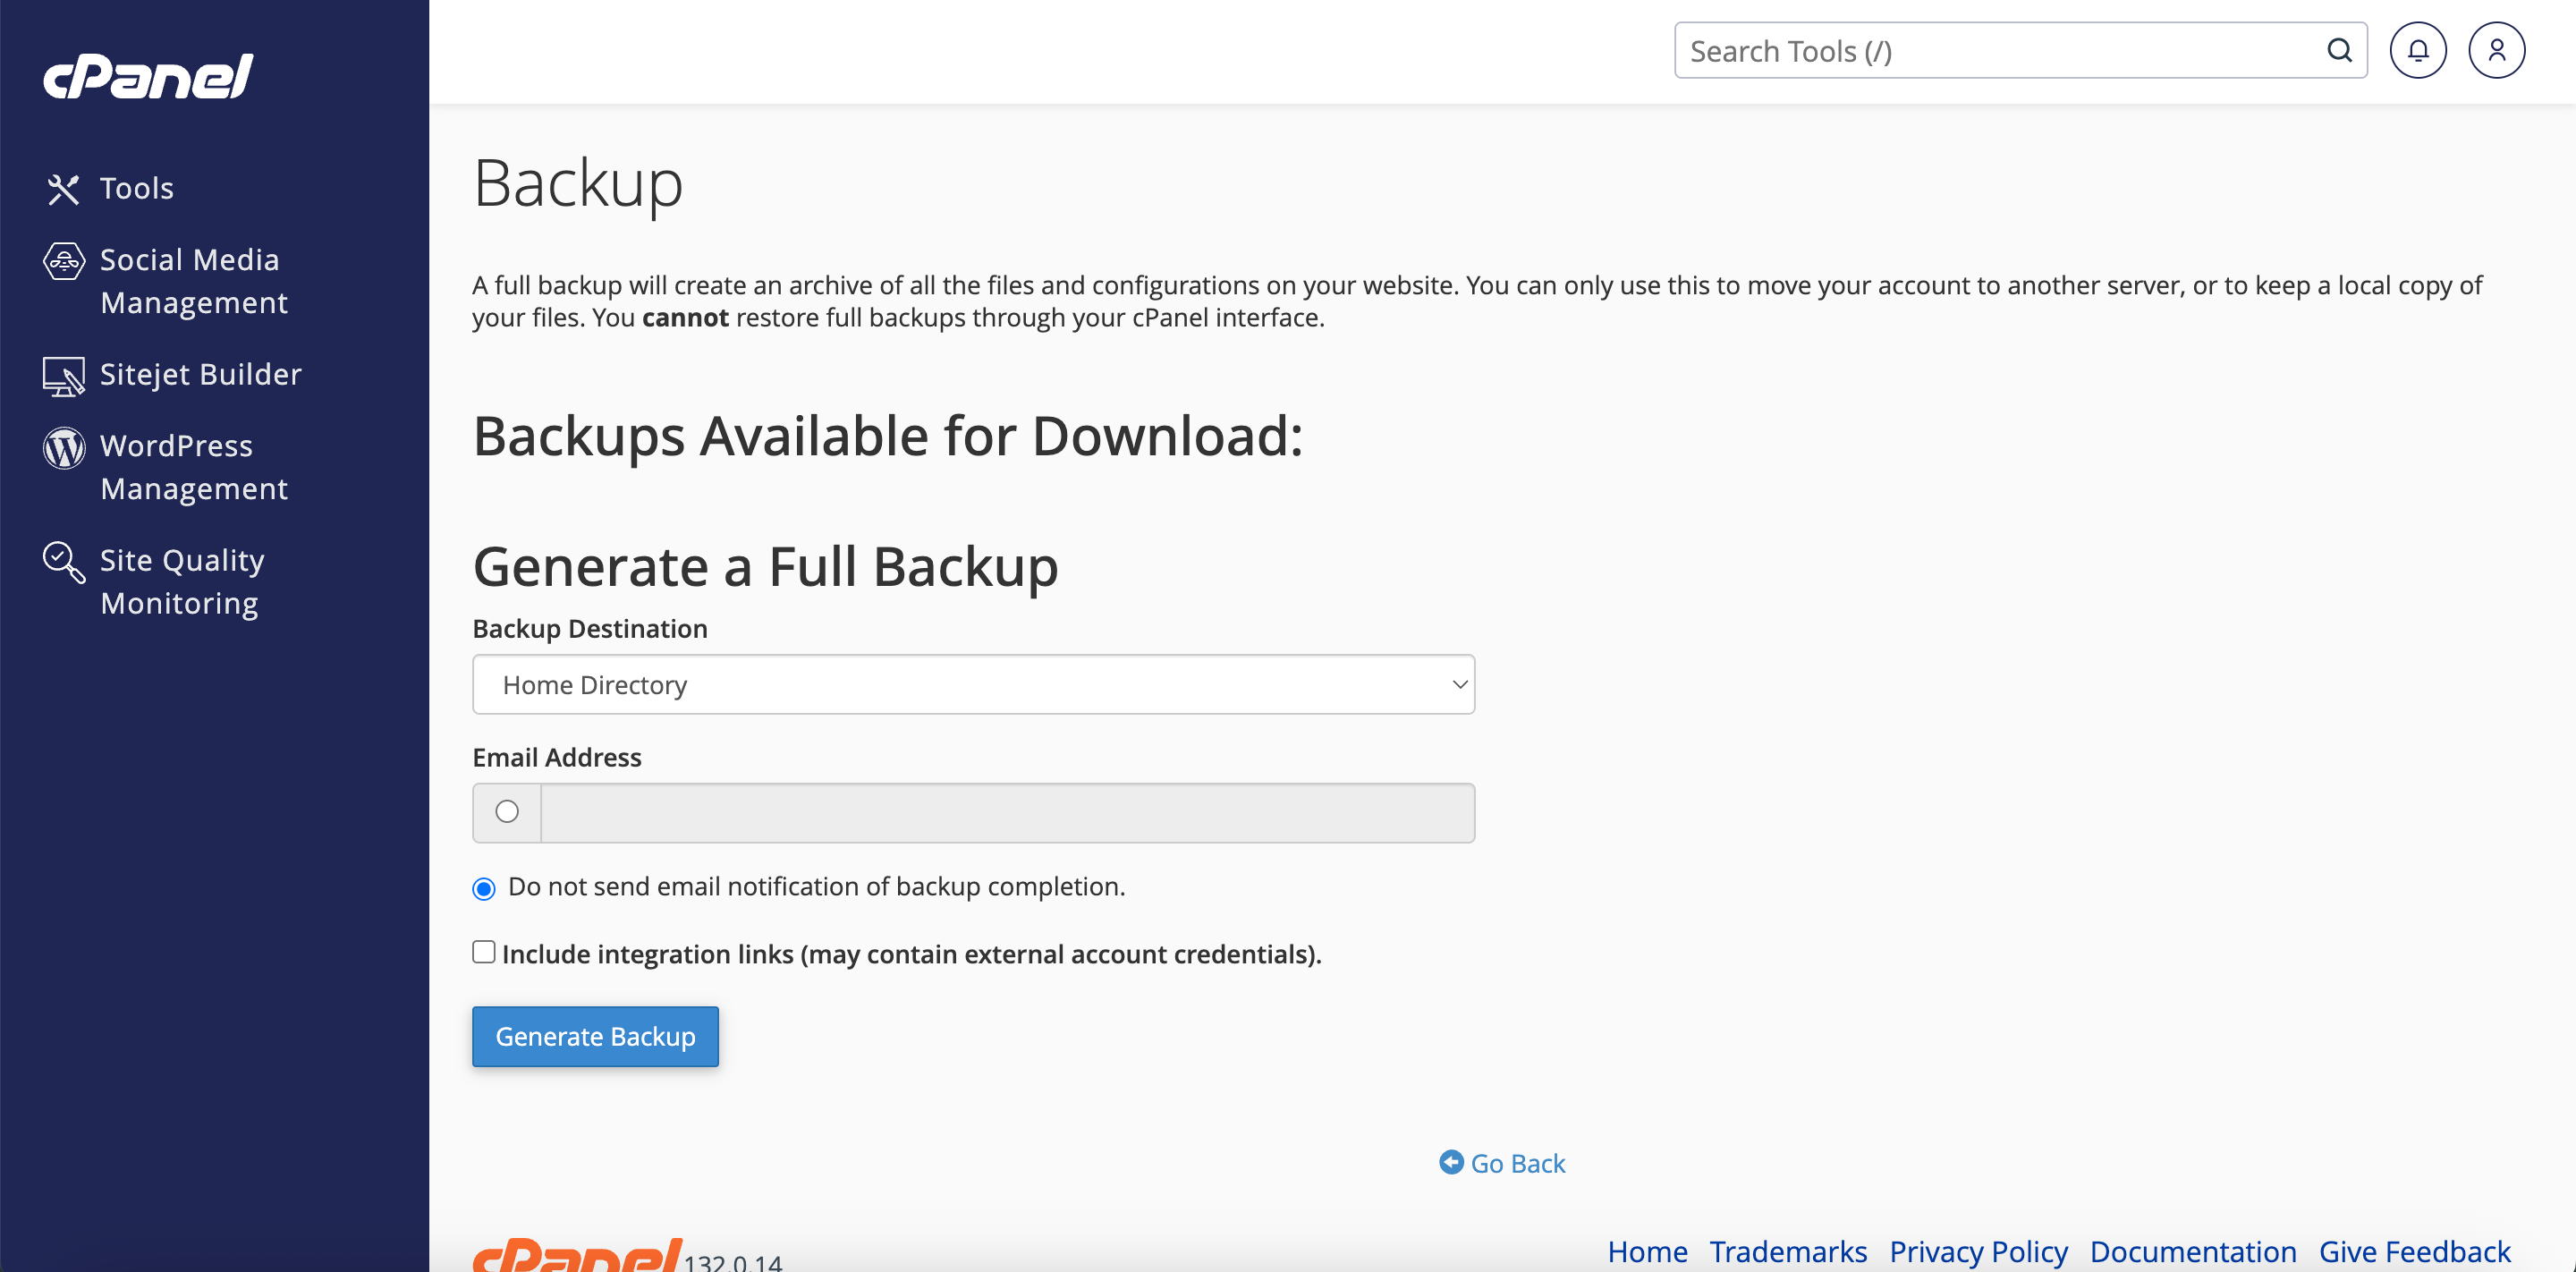
Step 4: Select Backup Destination
- From the Backup Destination menu, select your preferred storage location:
- Home Directory: Saves the backup file on the server (accessible via SSH or File Manager).
- Remote FTP Server: Stores the backup on a remote server using FTP.
- Remote FTP Server (passive mode transfer): Stores the backup on a remote serve using passive FTP.
- Secure Copy (SCP): Stores the backup on a remote server using secure copy protocol.
⚠️ Important Note:
- If you selected a remote destination, enter the required server information (host, username, password, port, and directory path) in the available text boxes.

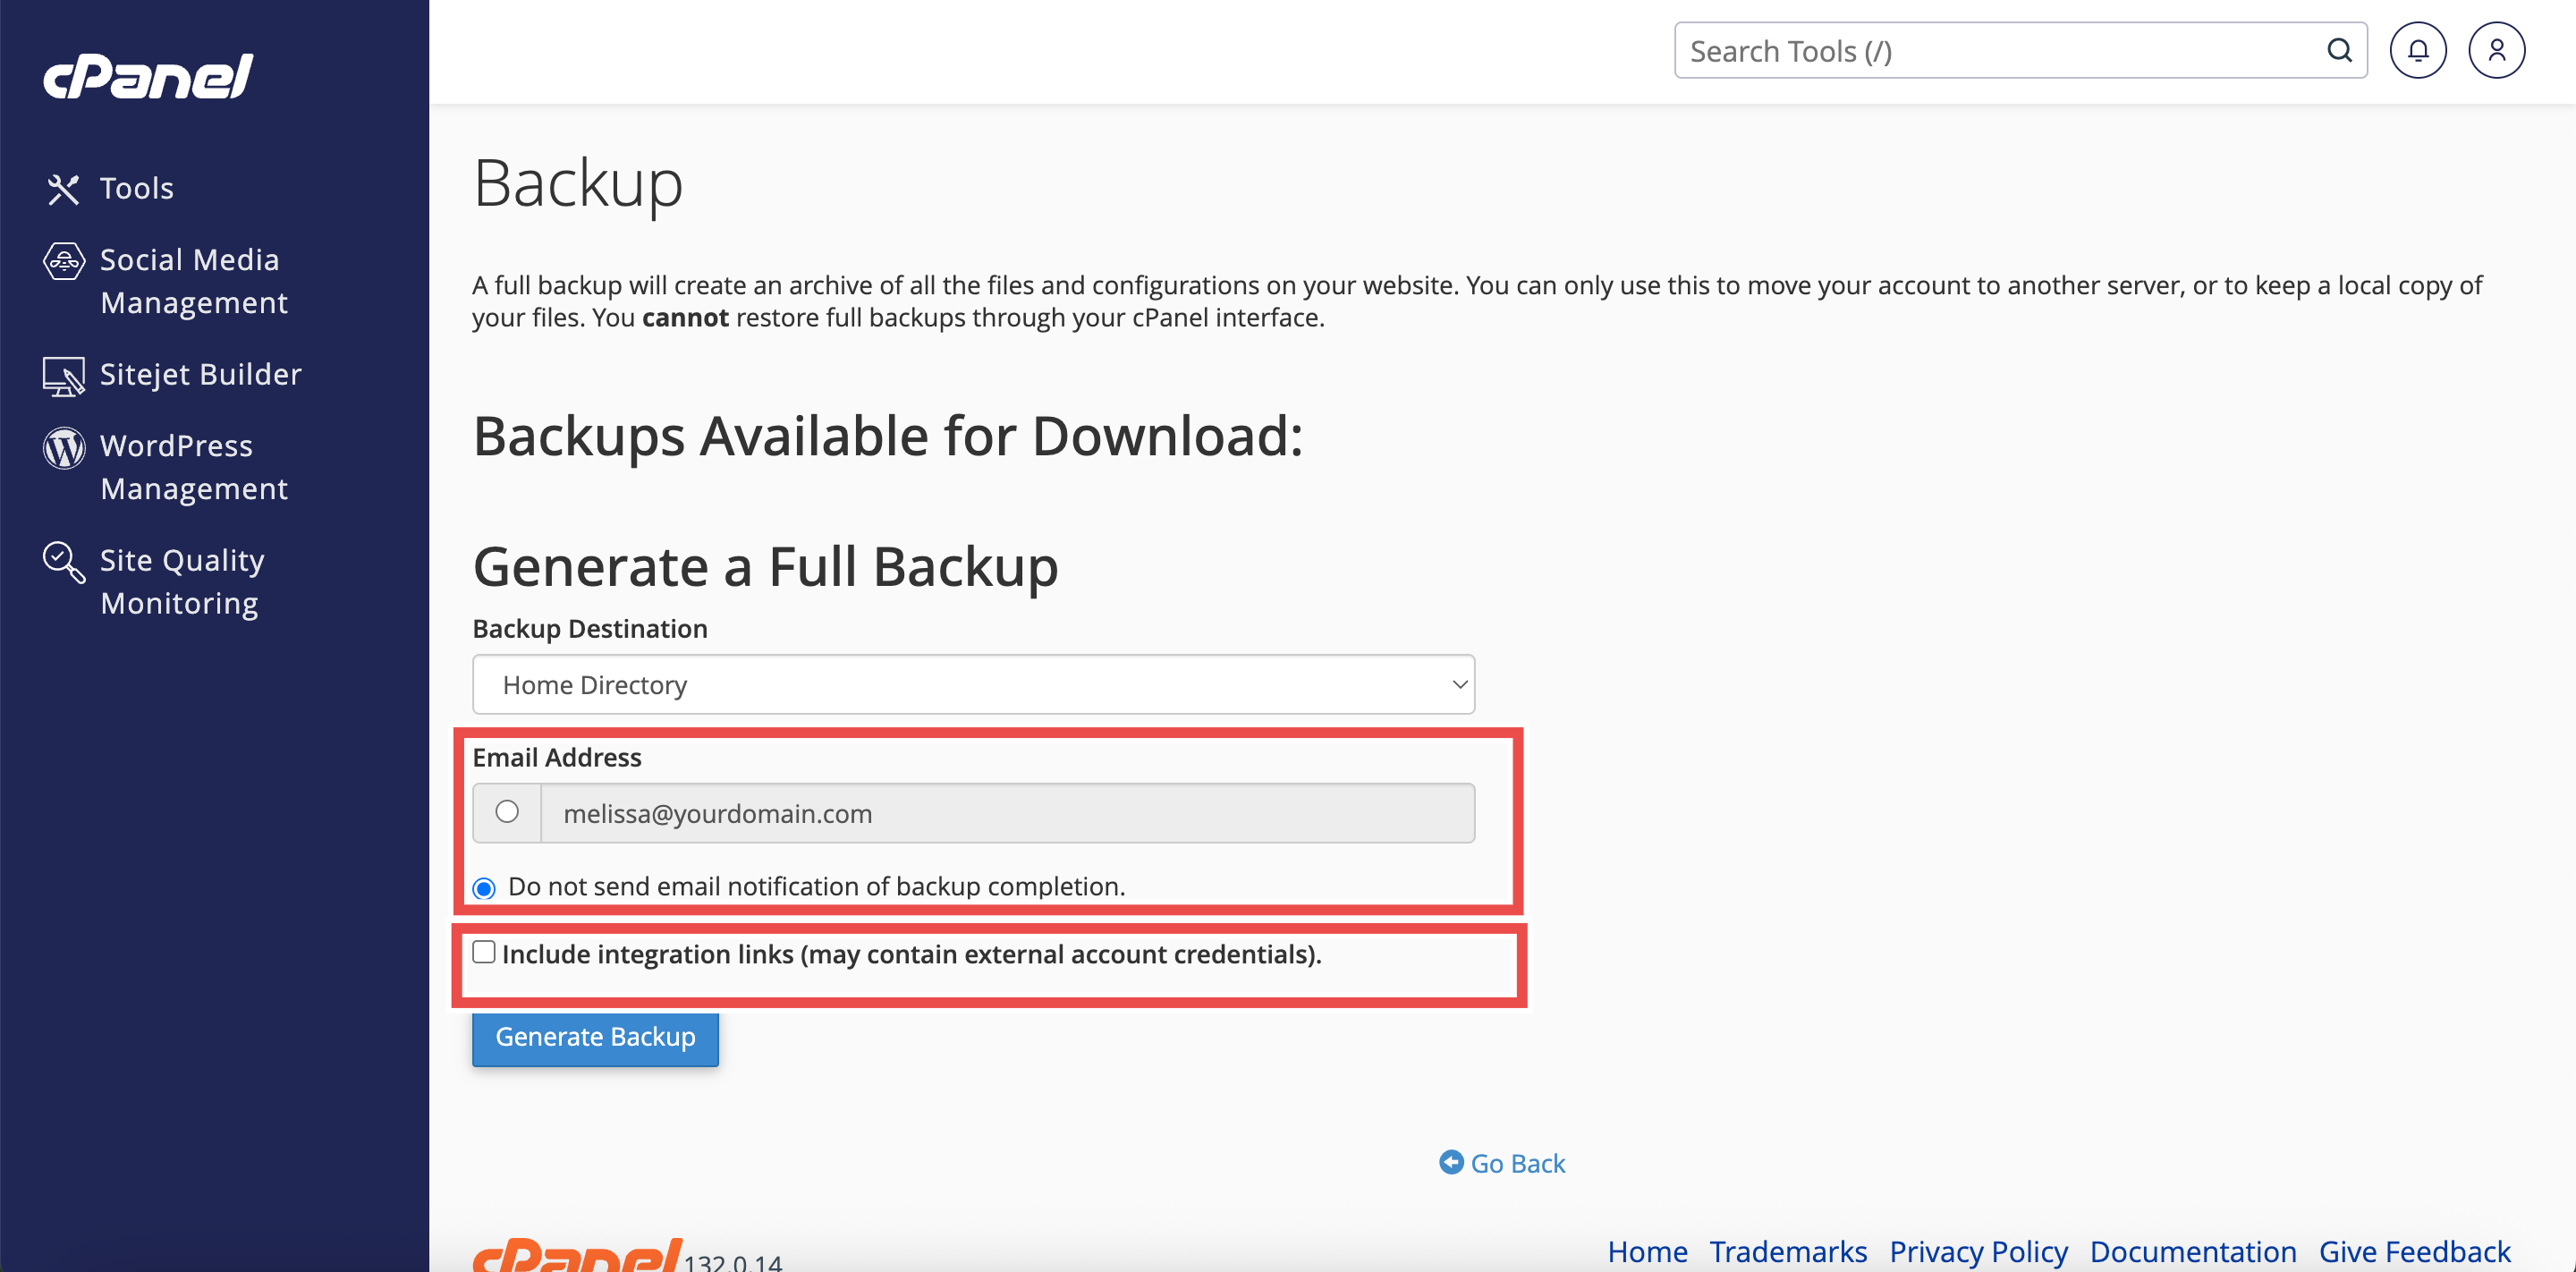
Step 5: Configure Notification Settings
- To receive an email notification when the backup completes, enter your email address in the available text box.
- If you do not wish to receive a notification, select Do not send email notification of backup completion.
- If needed, select Include integration links (may contain external account credentials) to include integration links in the backup.
Step 6: Download the Backup
- Click Generate Backup to download the full account backup.
⚠️ Important Note:
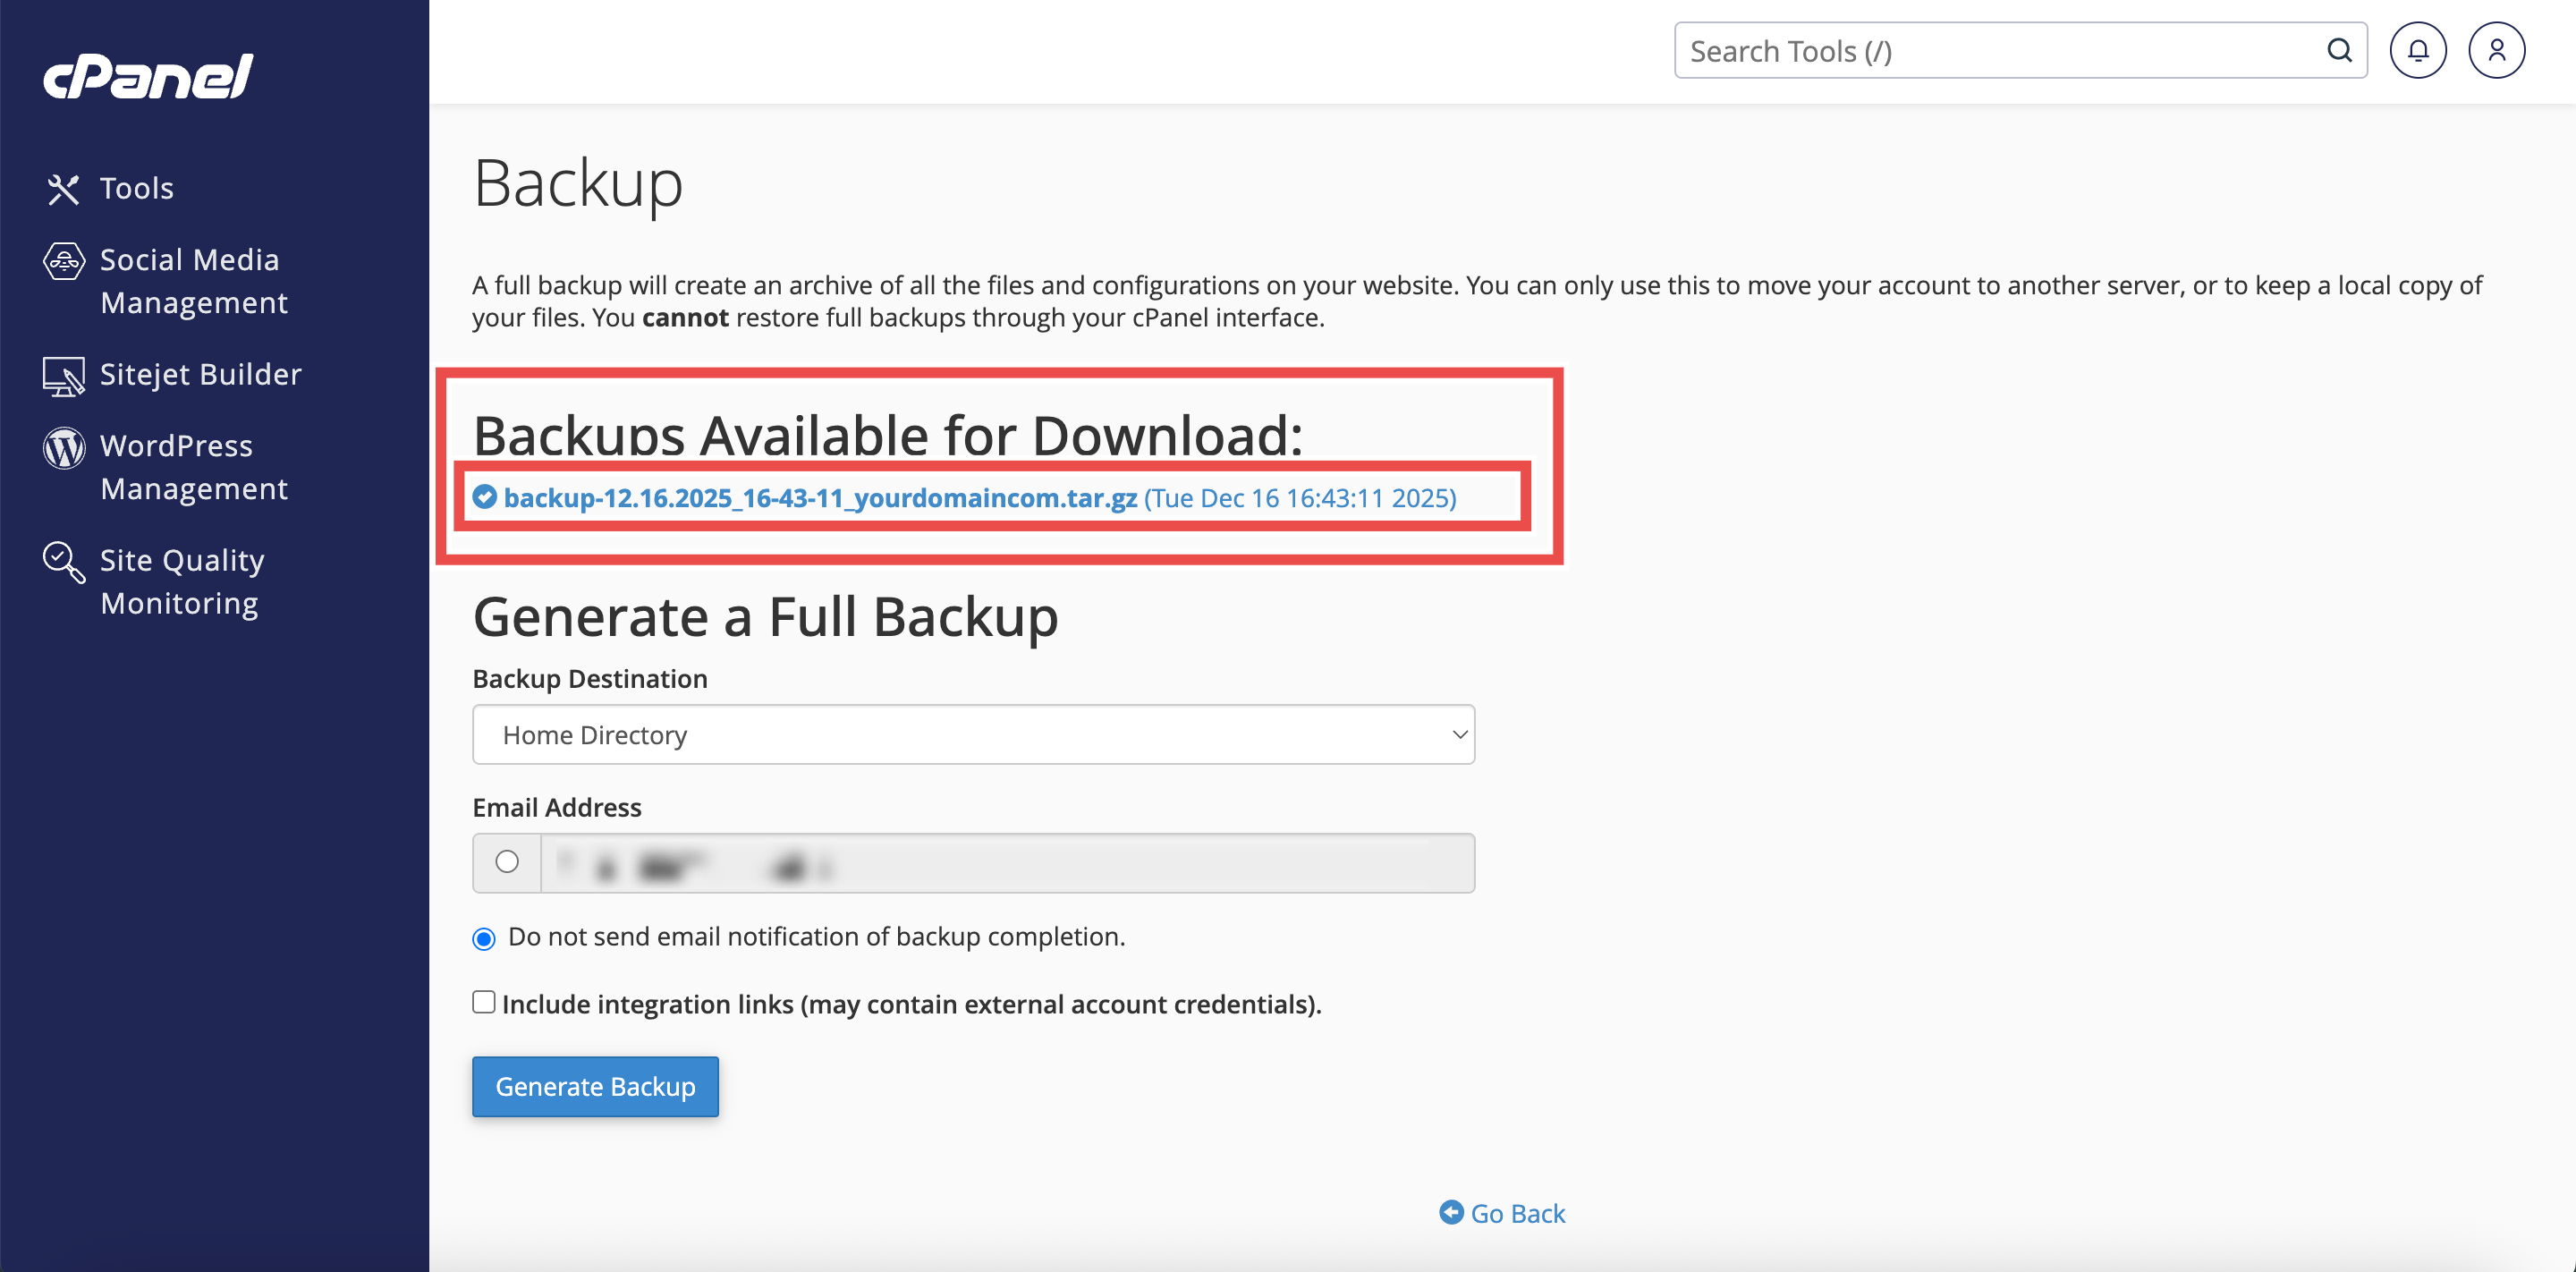
- The system will create the backup file and save it to your selected destination.
- If you selected Home Directory, the backup file will be available in the Backups Available for Download list.
- To download the backup to your computer, click the backup filename from the list.
- The backup file uses the backup-MM-DD-YYYY format, where MM is the month, DD is the day, and YYYY is the four-digit year.
Step 7: Verify the Backup File
- Locate the downloaded backup file based on your selected destination:
- Home Directory (check Backups Available for Download section or File Manager)
- Remote/Computer (check Downloads folder or specified location).
- Additionally, you may extract and inspect the contents to ensure all necessary files are included.
- If you entered your email address, you will receive the email notification when the backup completes.

Conclusion
By following these steps, you can successfully download a full account backup using cPanel. Regular backups are essential for protecting your website data and ensuring you can recover quickly from any unexpected issues. Always store your backup files in a safe location separate from your hosting server.
Should you encounter any issues or have any questions, our support team at IPSERVERONE is always here to assist you. Don’t hesitate to reach out to us at support@ipserverone.com for any help you need.