Search Our Database
How to Clear the Email Failure Queue in WHM
Introduction
Email delivery issues are a common concern in hosting environments, especially when managing accounts via Web Host Manager (WHM). When an email fails to deliver, it is typically queued for retry or stored in the Mail Queue Manager, which is part of Exim, the mail transfer agent used by cPanel/WHM servers. These failures can occur for a variety of reasons including incorrect recipient addresses, DNS issues, mail server rejections, or configuration problems. Over time, if unresolved, these failed emails can accumulate in the queue, potentially consuming server resources and delaying the delivery of legitimate messages.
This guide explains how to clear the email failure queue in WHM, focusing on the Mail Queue Manager interface and relevant command-line operations. Clearing these failed messages is often necessary for system administrators who manage shared hosting servers or private web servers running cPanel/WHM. This action can help ensure proper mail flow and server performance, especially in high-volume environments or after misconfigured mail scripts have generated a backlog of undeliverable mail.
Understanding how to manage the email queue is essential for server administrators and technical staff responsible for maintaining email deliverability and server hygiene. Whether the issue is caused by spam, misconfigured scripts, or outdated mail routing, the tools within WHM and command-line options can help to resolve and prevent future mail queue build-up.
This guide will demonstrate how to inspect, delete, and manage failed emails through both the WHM interface and command line. It also highlights common scenarios where manual clearing of the queue is necessary, such as after a bulk mail campaign fails or a compromised script floods the server with outgoing messages.
Prerequisites
- A server running cPanel/WHM version 110 or later
- Root access to WHM
- SSH access (for optional command-line steps)
- Familiarity with the Exim mail system
- Terminal client (if using command-line methods)
Step-by-step Guide
Step 1: Access Mail Queue Manager in WHM
- Log in to WHM using root credentials.
- In the left sidebar or using the search bar, navigate to:
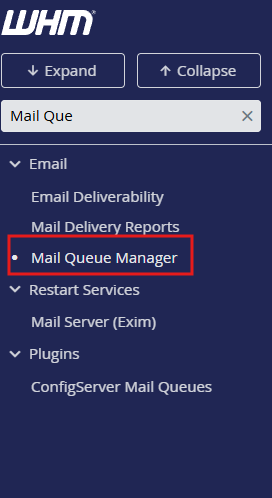
Email » Mail Queue Manager
- The Mail Queue Manager will display a list of queued emails, including failed, frozen, and pending messages.
Step 2: Identify Failed or Frozen Emails
- Look for messages marked as Frozen, which generally indicate a permanent delivery failure.
- Click on the message ID to view delivery logs and headers.
- This inspection can help determine the cause of failure (e.g., invalid domain, recipient blocked).
Step 3: Remove Individual or Bulk Failed Emails in WHM
To remove individual emails:
- Click the checkbox next to the email(s) you want to remove.
- Scroll down and select Delete Selected.
- Confirm deletion when prompted.
To remove all frozen messages:
- Scroll to the bottom of the Mail Queue Manager.
- Click Delete All Frozen Messages.
- Confirm the action to permanently remove all frozen (failed) messages.

Step 4: Clear the Email Queue via Command Line (Optional)
If access to WHM is limited or for faster batch deletion, use SSH to manage the mail queue directly.
ssh root@your-server-ip
To remove all frozen (failed) messages:
exim -bp | exiqgrep -z -i | xargs exim -Mrm
To remove all messages (use with caution):
exim -bp | awk '{print $3}' | xargs exim -Mrm
Step 5: Monitor Queue Status After Cleanup
To confirm the queue has been cleared:
exim -bpc
Conclusion
Clearing the email failure queue in WHM is a crucial task for maintaining optimal mail server performance. This guide demonstrated how to use both the Mail Queue Manager in WHM and command-line tools to identify and remove failed or frozen email messages. Regular queue maintenance not only helps free up server resources but also improves deliverability and system reliability.
Further reading is recommended on Exim queue management, SPF/DKIM configurations, and spam prevention best practices to reduce the occurrence of failed emails.
Should you have any inquiries about the guidelines, please feel free to open a ticket through your portal account or contact us at support@ipserverone.com. We’ll be happy to assist you further.