Search Our Database
How to Disable Junk Filtering on Apple Mail
Introduction
Email junk filtering automatically identifies and moves spam messages, but there are situations where disabling this feature may be necessary. Server-side spam filtering or troubleshooting delivery issues may require turning off Apple Mail’s local junk mail analysis to prevent conflicts or message misclassification. This guide explains how to disable junk mail filtering using Apple Mail’s Junk Mail settings, giving you control over spam management or allowing server-side solutions to handle filtering exclusively.
Prerequisites
- Apple Mail downloaded on your device.
- An existing email account set up in the Mail app.
Step-by-step Guide
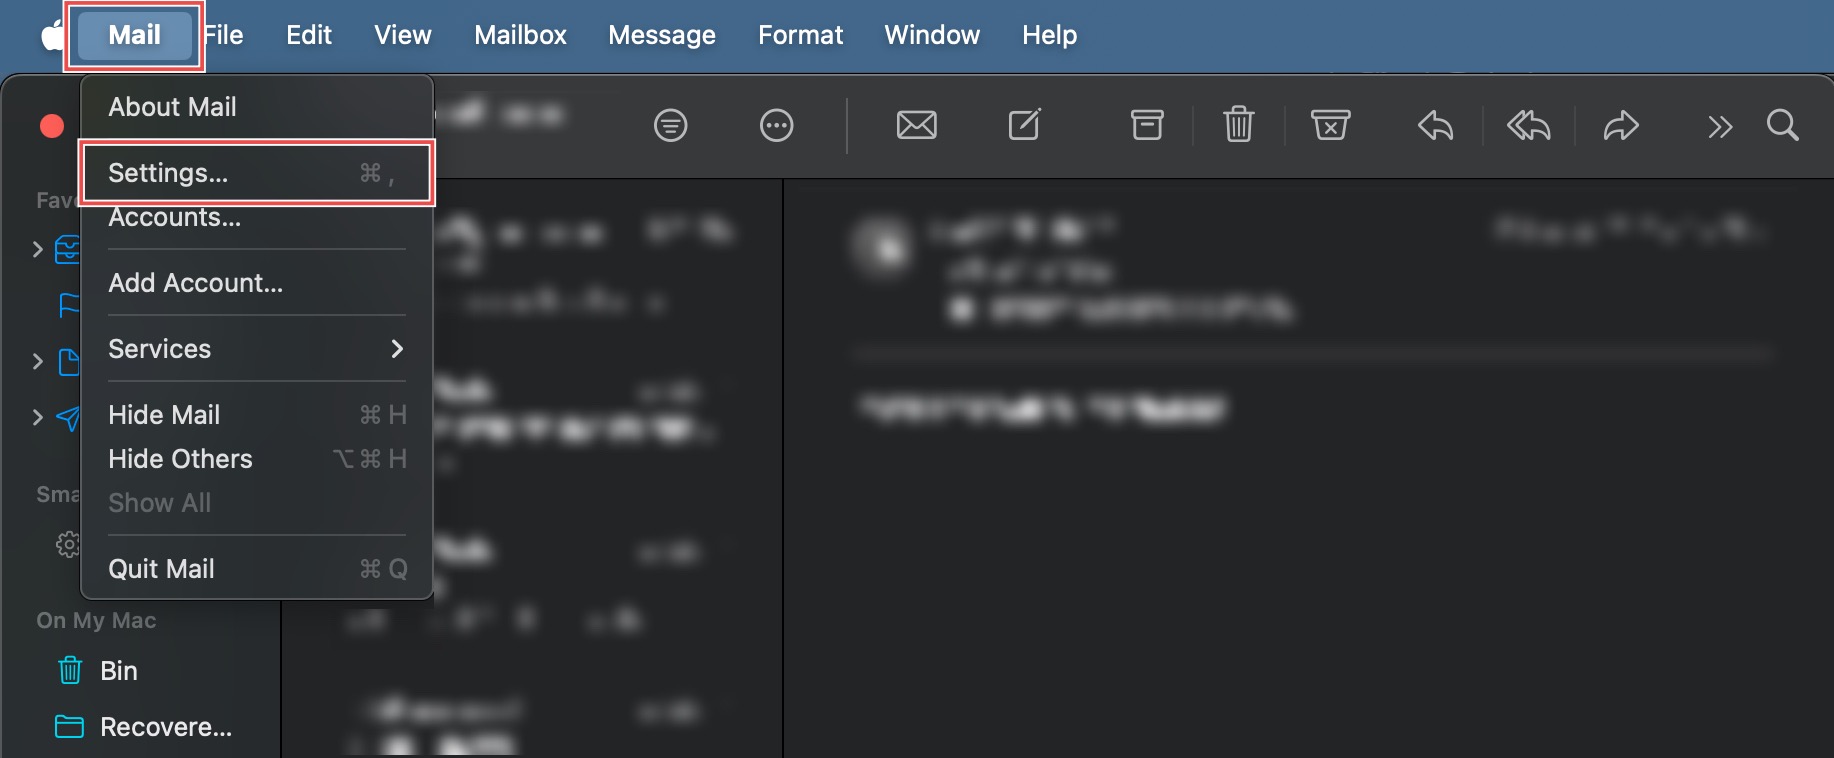
Step 1: Access Mail Settings
Open Apple Mail from your Applications folder. In the top menu bar, Click Mail > Settings… (or Preferences… on older macOS versions).
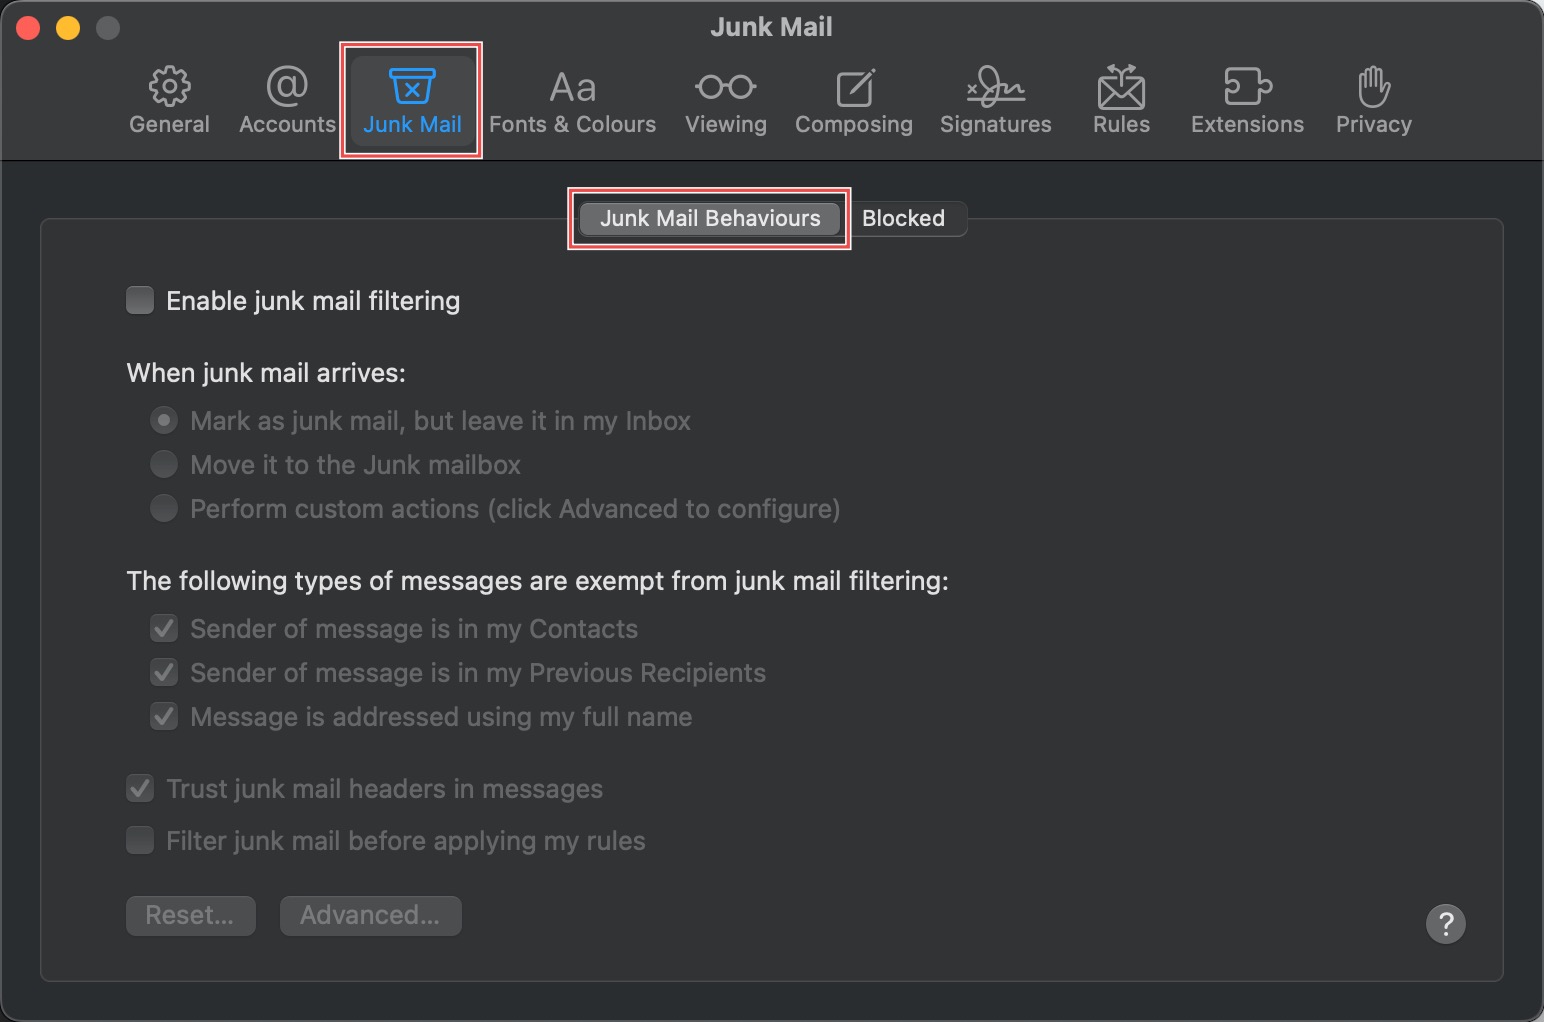
Step 2: Access Junk Mail Behaviours
In the pop-up window, click the Junk Mail tab, and click the Junk Mail Behaviours sub-tab.
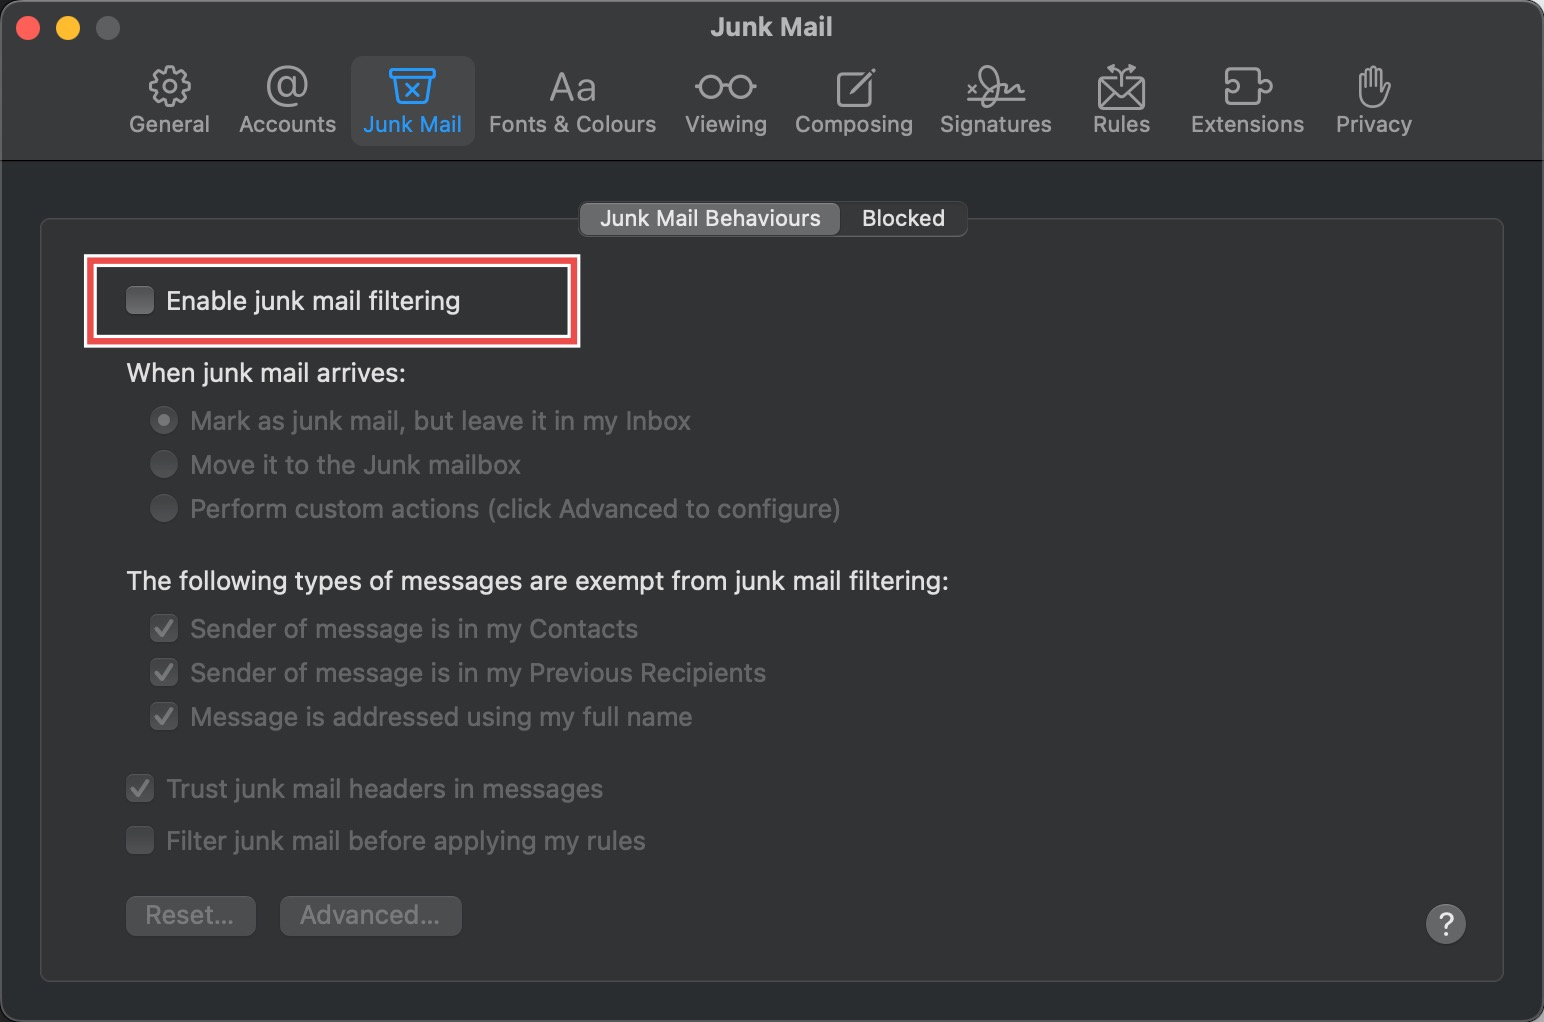
Step 3: Disable Filtering
Uncheck the Enable junk mail filtering checkbox. This disables the local junk mail analysis, preventing the Mail app from automatically moving messages to the local Junk mailbox.
Conclusion
Disabling junk mail filtering through Apple Mail’s Junk Mail settings provides control over how spam is managed in your email workflow. This option is particularly useful when relying on server-side filtering solutions or when troubleshooting email delivery and classification issues that may be caused by local filtering conflicts.
Should you have any inquiries about the guidelines, please feel free to open a ticket through your portal account or contact us at support@ipserverone.com. We’ll be happy to assist you further.