Search Our Database
How to Change the IP Address of an Instance in the Customer Portal
Introduction
In cloud infrastructure environments, modifying the IP address of a virtual machine (VM) or instance can become necessary for a variety of operational, technical, or security-related reasons. The “Change IP” function within the IPServerOne Customer Portal provides users with the ability to assign a new, unallocated public IP address to an existing instance, replacing its current one. Unlike the “Swap IP” function, which exchanges IP addresses between two existing instances, the “Change IP” function is used when there is no need to preserve the old IP or move it to another instance.
This feature is particularly useful in situations where the existing IP is blocked, blacklisted, or experiencing routing issues. It can also be a proactive solution in cases where services require a fresh public IP due to platform restrictions or when implementing new firewall or geolocation rules.
This guide is applicable to users managing their instances within the IPServerOne Customer Portal. It outlines the step-by-step procedure to change the public IP address assigned to an instance and explains what to expect during and after the change.
Changing an IP address does not affect the private IP of the instance or its internal configuration, but it may cause brief downtime as the network reconfiguration takes effect. It is important to plan for a short maintenance window during the change process.
Prerequisites
- Access to the IPServerOne Customer Portal
- A virtual instance (VM) currently running with a public IP address
- At least one unallocated public IP address available in the same region
- User account with the appropriate permissions to manage instances
Step-by-step Guide
Step 1: Log in to the IPServerOne Customer Portal
- Navigate to the IPServerOne Customer Portal at IPServerOne Customer Portal
- Enter your login credentials and sign in.
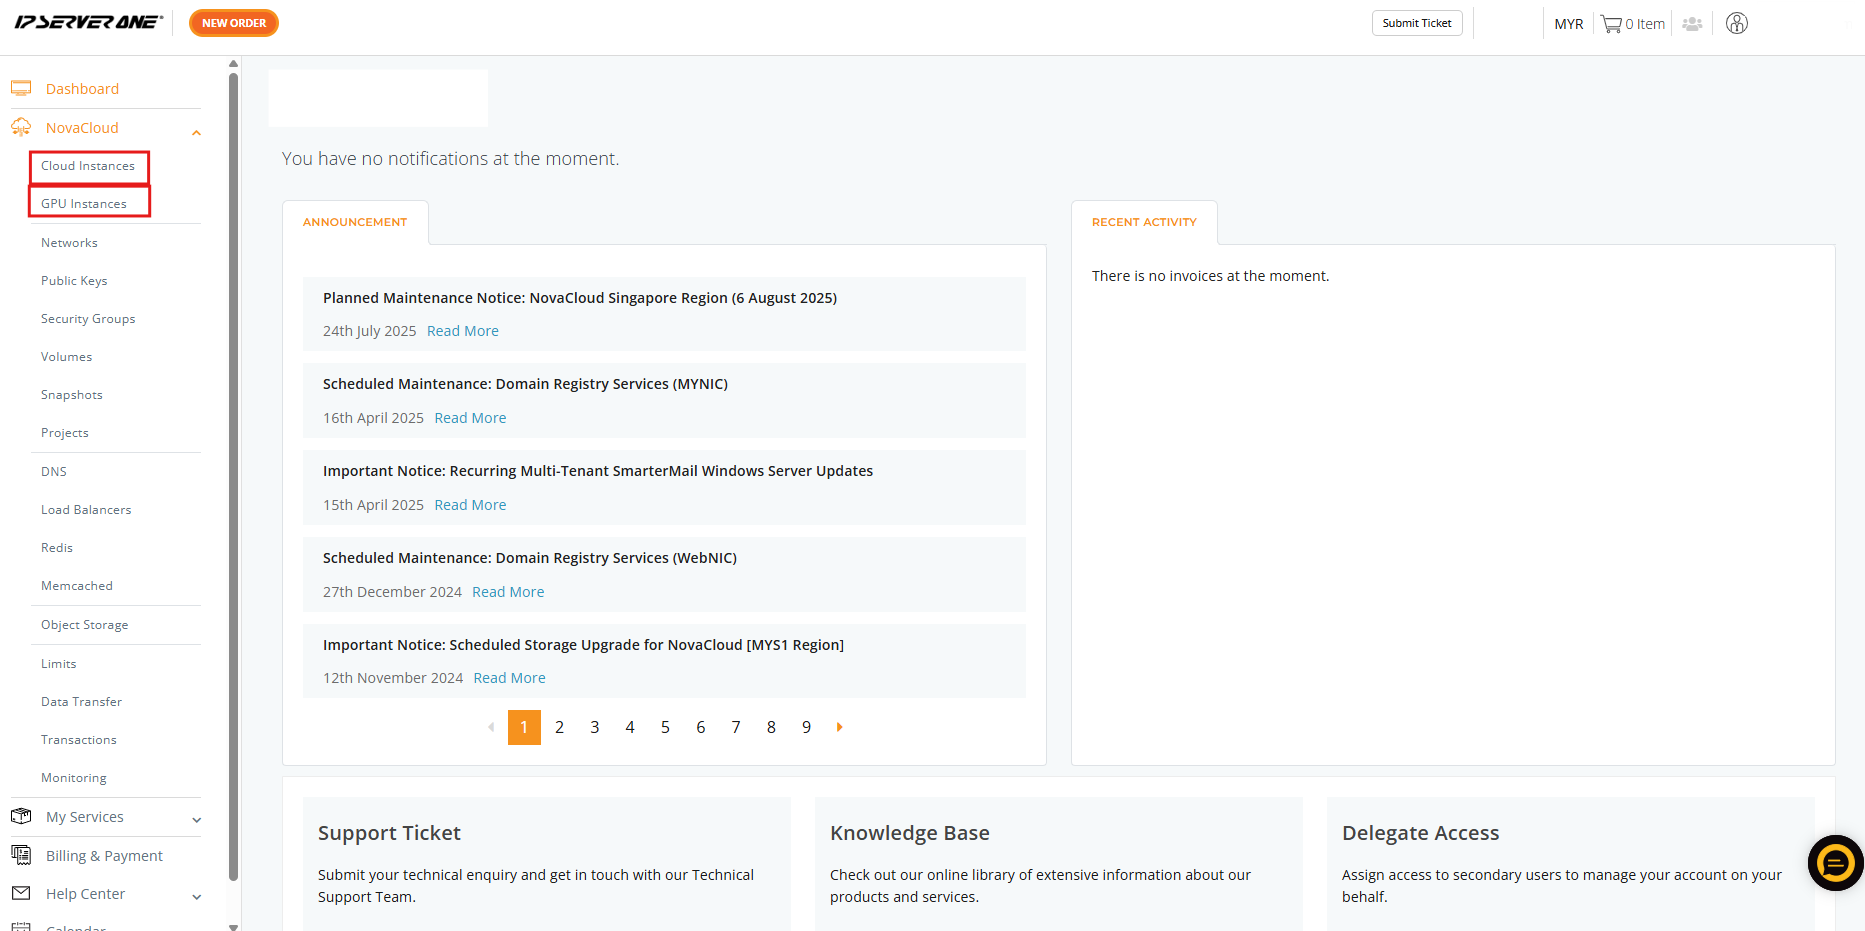
Step 2: Navigate to Your Virtual Instances
-
From the left-hand navigation menu:
-
Under NovaCloud, click on Cloud Instance if managing general-purpose compute instances.
-
Under NovaGPU, click on NovaGPU if managing GPU-based instances.
Select the service based on the type of instance involved in the changing IP.
-
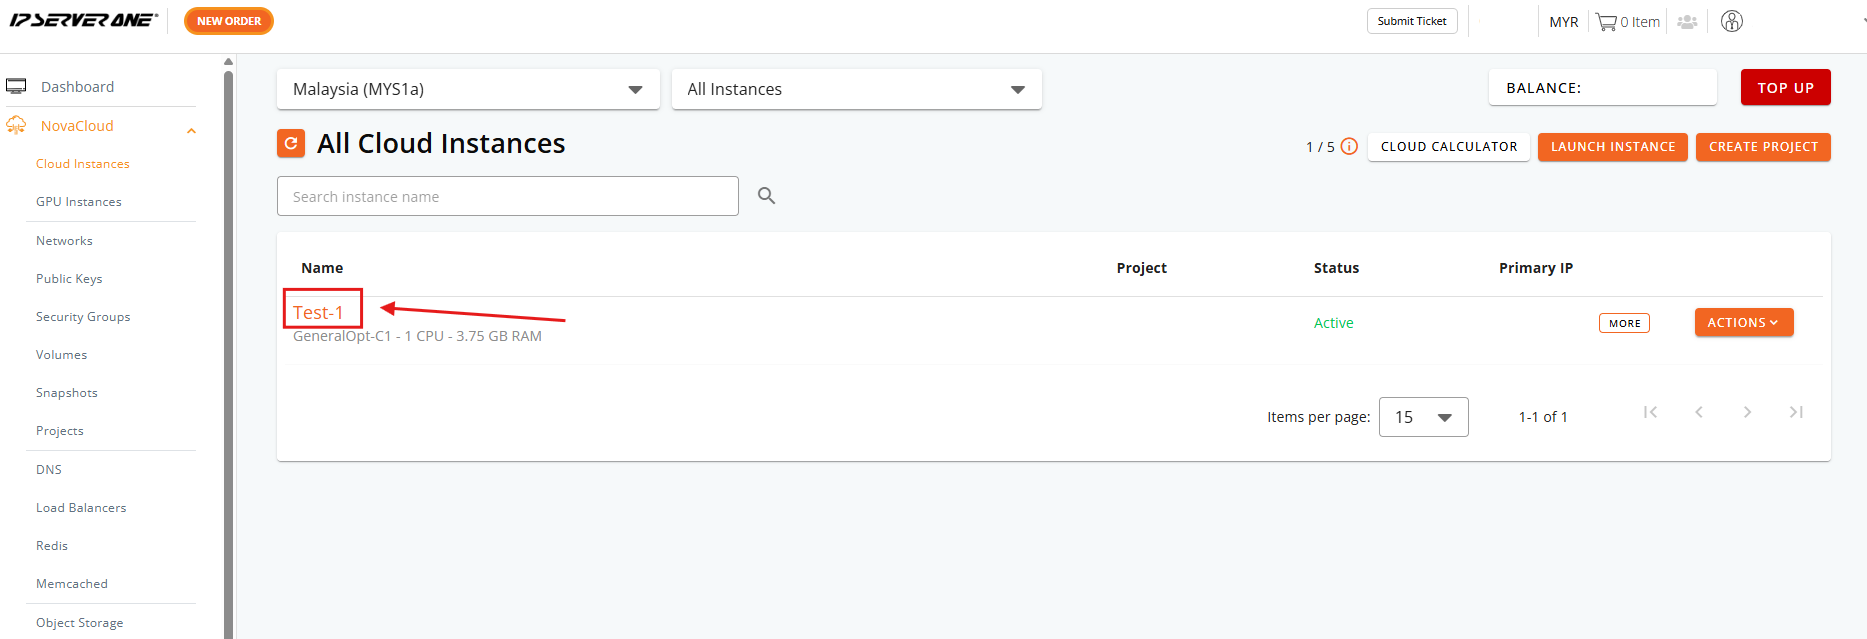
Step 3: Select the Instance
- From the list of available instances, click on the instance that will receive the new IP address (i.e., the target instance for the change IP).
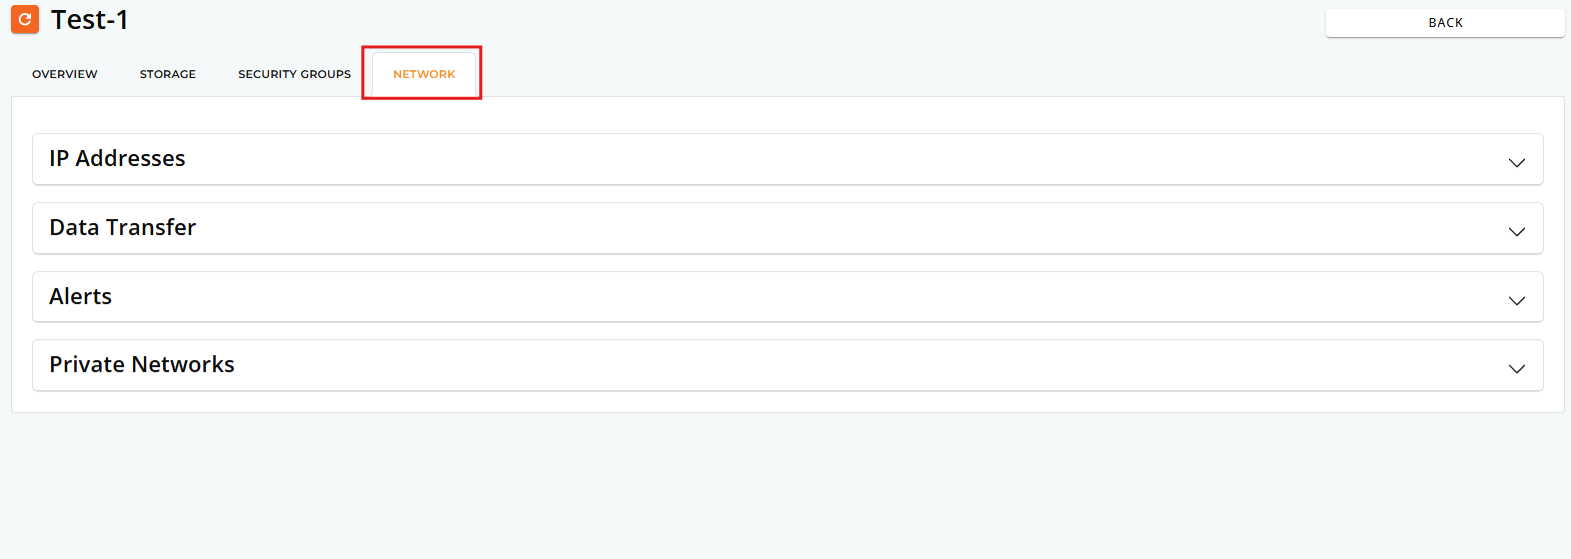
Step 4: Access the Network Interface Section
- Once inside the instance details page, locate and click the Network tab to manage network-related settings.
Step 5: Open the IP Address Section
- In the Network tab, find and select the IP Address section. This will display both the IPv4 and IPv6 addresses assigned to the instance.
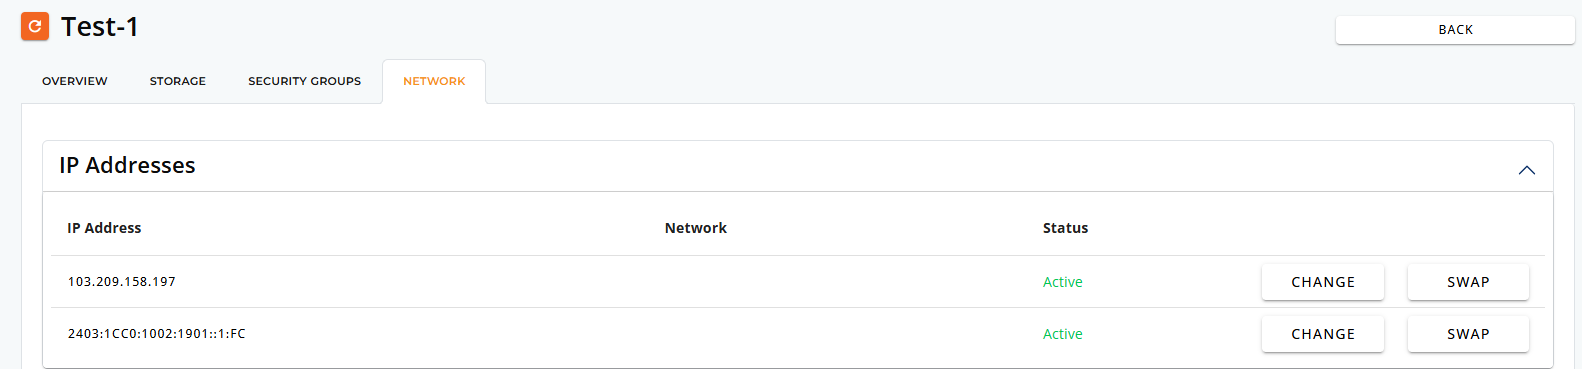
Step 6: Click on the “Change” Option
Locate the assigned IPv4 address, then click the CHANGE button next to it. This action will open a prompt listing eligible IPs from other instances.

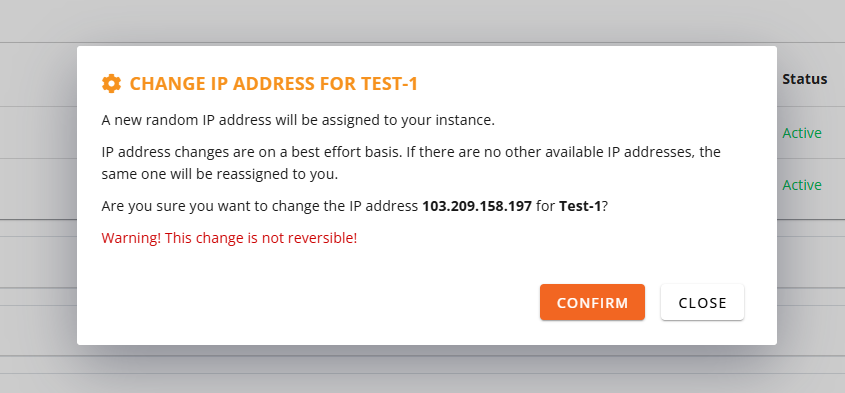
Step 7: Confirm the IP Address Change
-
A confirmation dialog will appear showing the current public IP address and notifying that a random IP address will be assigned to the instance.
-
Carefully read the warning that this change cannot be reversed.
-
If no other IPs are available, the system may reassign the same IP.
-
Click CONFIRM to proceed or Close to cancel the operation.
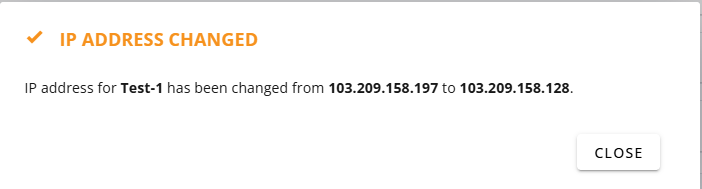
Step 8: Verify the New IP Address and Update External Services
-
After the IP change is confirmed, the instance will be assigned a new random public IP address.
-
Return to the instance’s Network Interface section to verify that the new IP has been updated.
-
Test connectivity using tools like ping, ssh, or browser access (depending on the service running).
-
Update any DNS records, firewall rules, whitelisted IPs, or third-party services that depended on the previous IP address.
Conclusion
Changing the public IP address of an instance through the IPServerOne Customer Portal is a straightforward process that allows users to quickly resolve issues or reconfigure access without having to delete or rebuild the instance. By following the steps above, a new public IP can be assigned seamlessly to any eligible instance in the cloud environment.
For further actions, such as IP swap between two instances or reserving static IP addresses, refer to related guides in the knowledge base.
Should you have any inquiries about the guidelines, please feel free to open a ticket through your portal account or contact us at support@ipserverone.com. We’ll be happy to assist you further.