Search Our Database
How to Add DNS Zone Record in cPanel
Introduction
This Knowledge Base article provides a concise, step-by-step guide to Add DNS zone records in cPanel using the Zone Editor. Use this when you need to create new DNS entries (e.g., A, AAAA, CNAME, MX, TXT) for your domain so services like your website, email, and verification tools resolve correctly.
Prerequisite
- Access to the cPanel login page
- A domain already set up under your cPanel account
Step-by-Step Guide
Step 1: Log in to cPanel
- Access and log in to your cPanel account using your username and password.
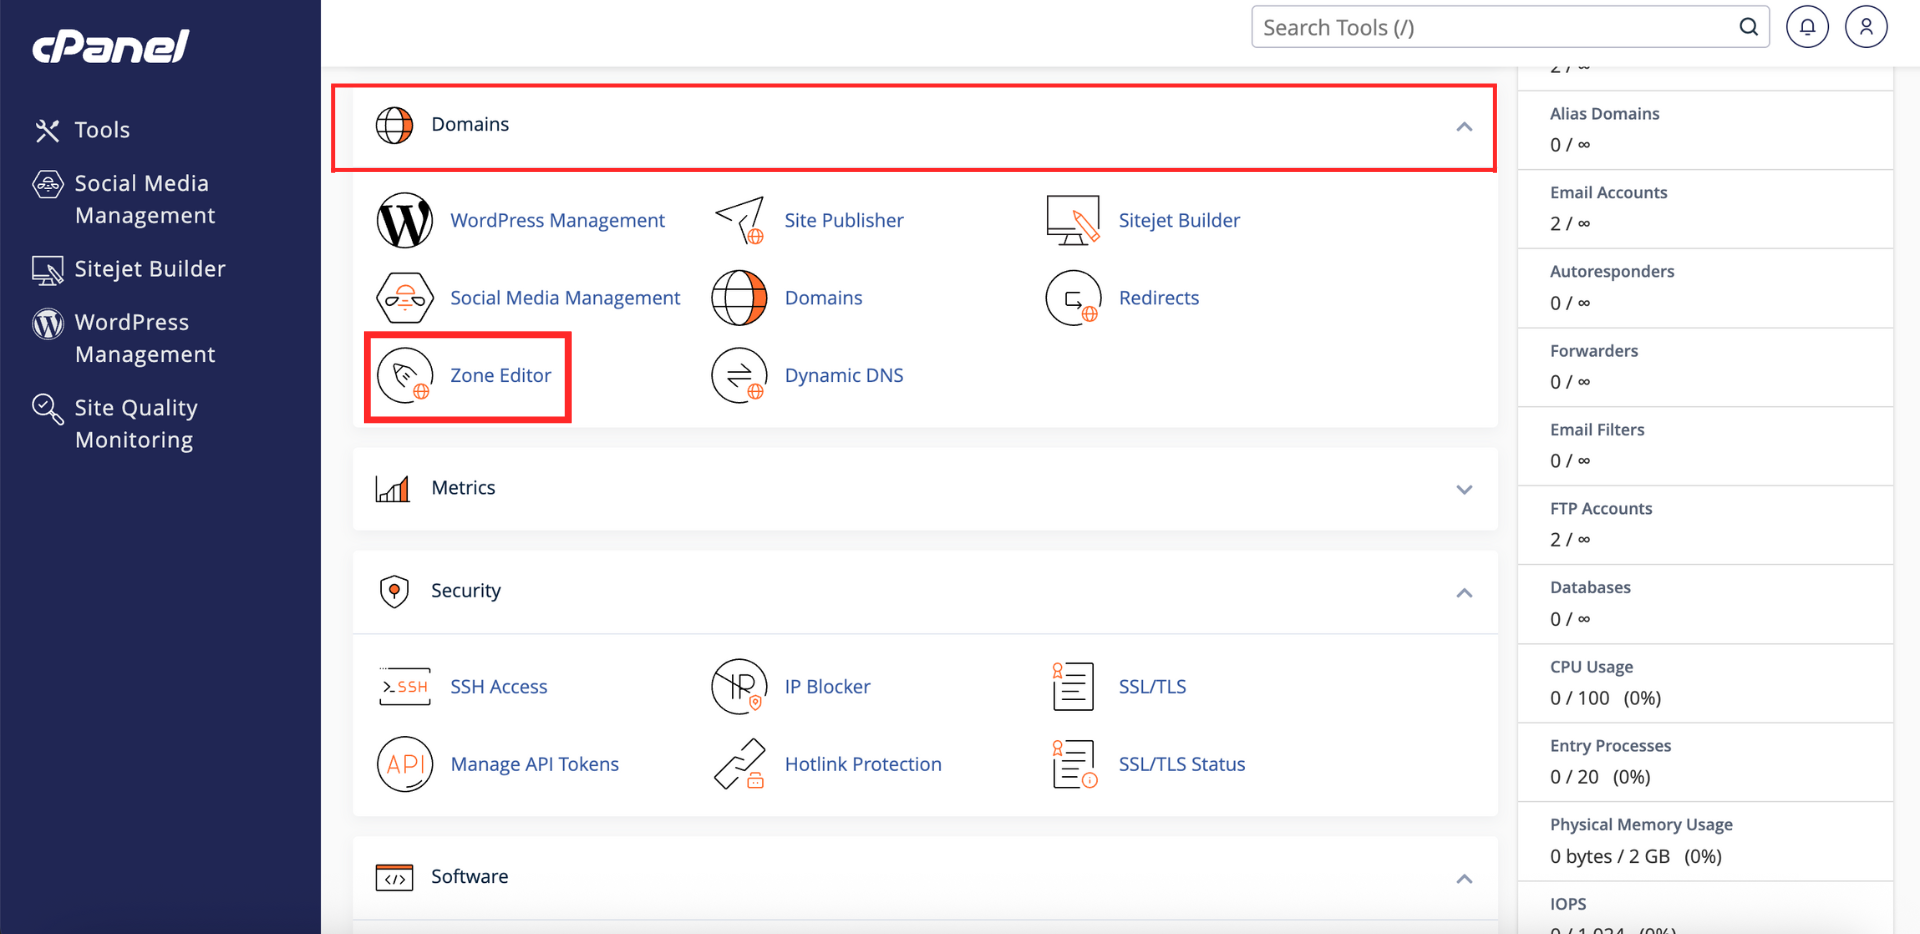
Step 2: Open Zone Editor
- In the Home page, under Domains, click Zone Editor
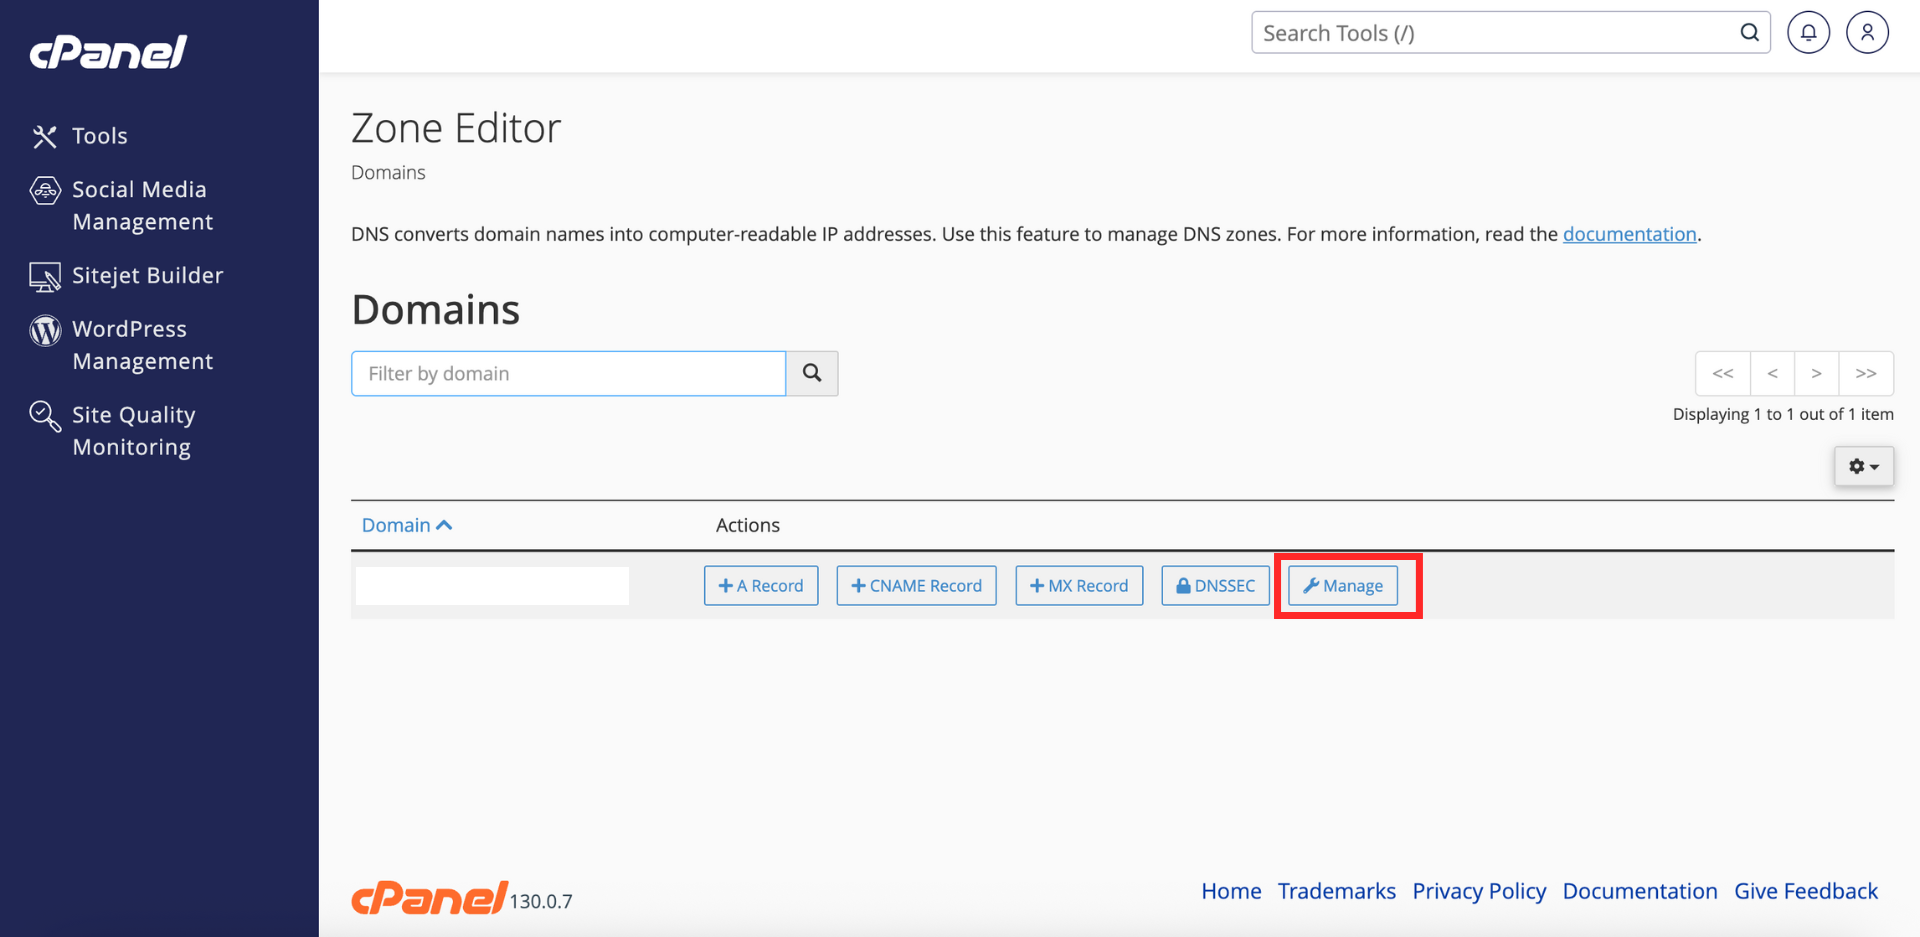
Step 3: Select the Domain
- In the Zone Editor list, click Manage on the right of the domain you want to update to open its DNS zone.
Step 4: Add a New Record
- Click +Add Record and a new entry field will appear for you to fill in the record details.
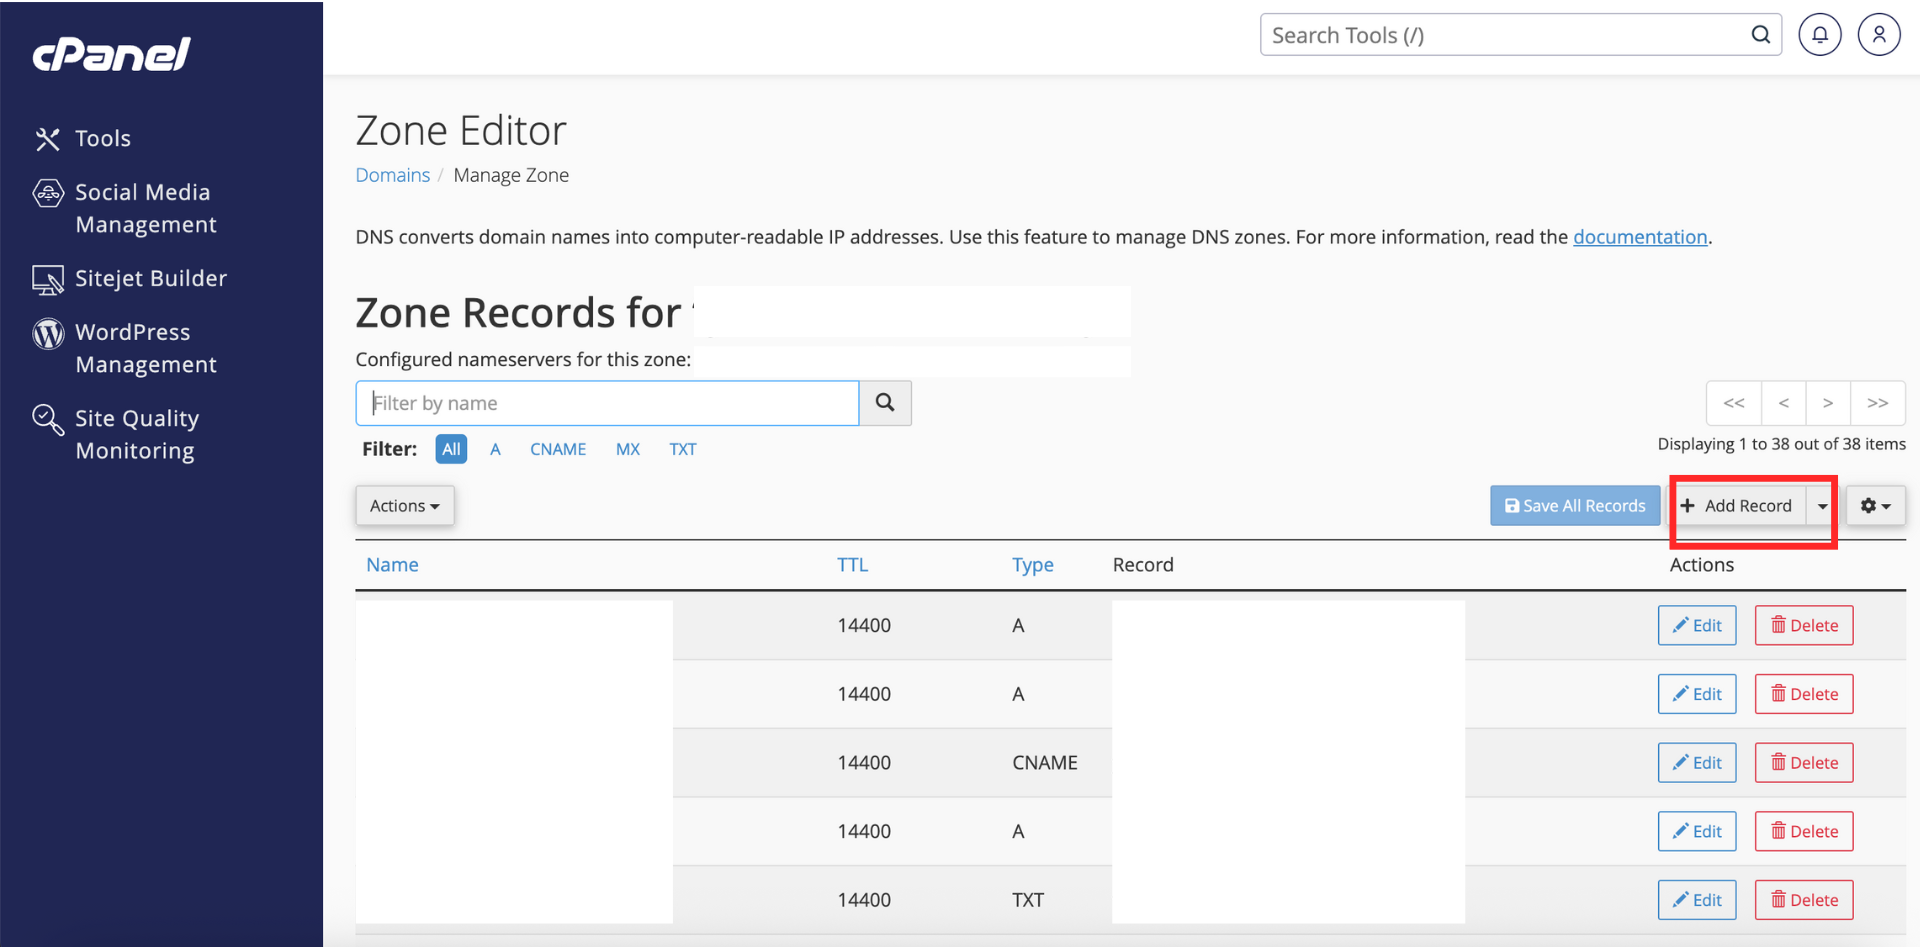
Step 5: Enter Record Details
- Fill up the following details,
- Valid zone name: Enter the valid zone name. (The domain or subdomain you want this record to apply to)
- TTL: Enter the time to know the DNS resolver that how long it should keep the DNS cache a query before requesting new.
- Type Record: Now select the record type from the drop-down (A, TXT, MX, NS, CNAME, etc.).
- Record: Value of the record you want to put.
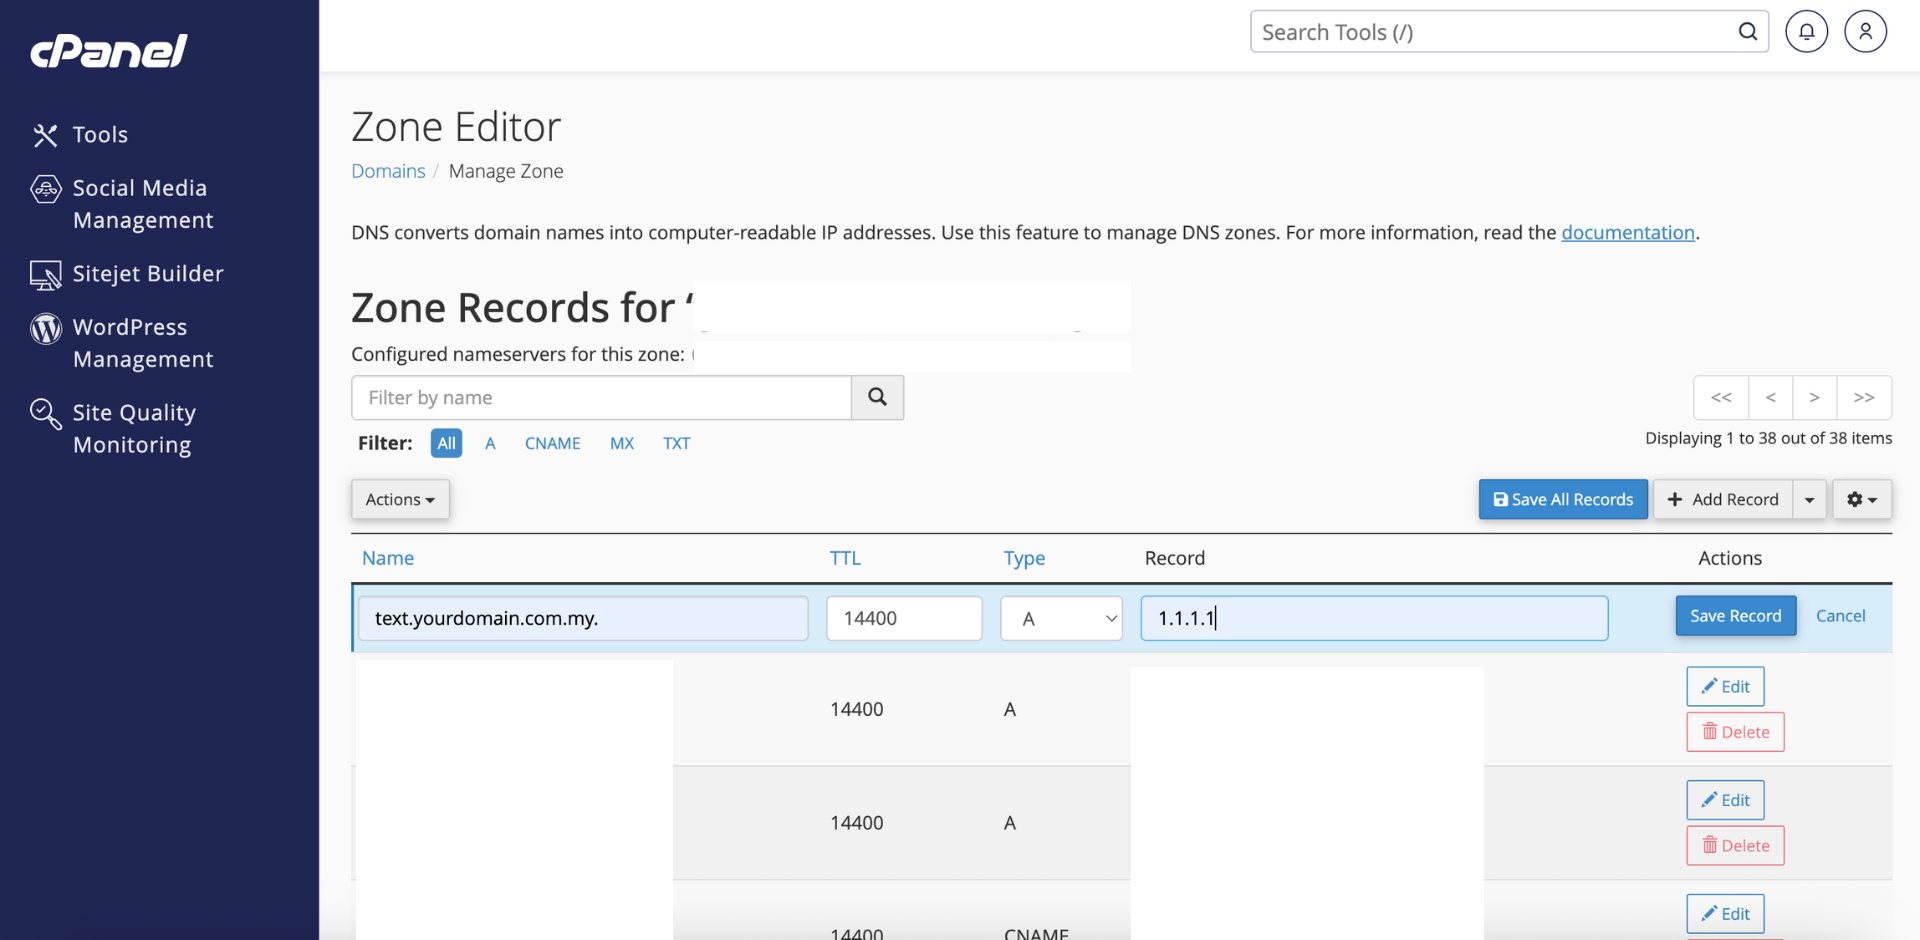
Step 6: Save the Record
- Click Save Record to add the new DNS record to the zone.

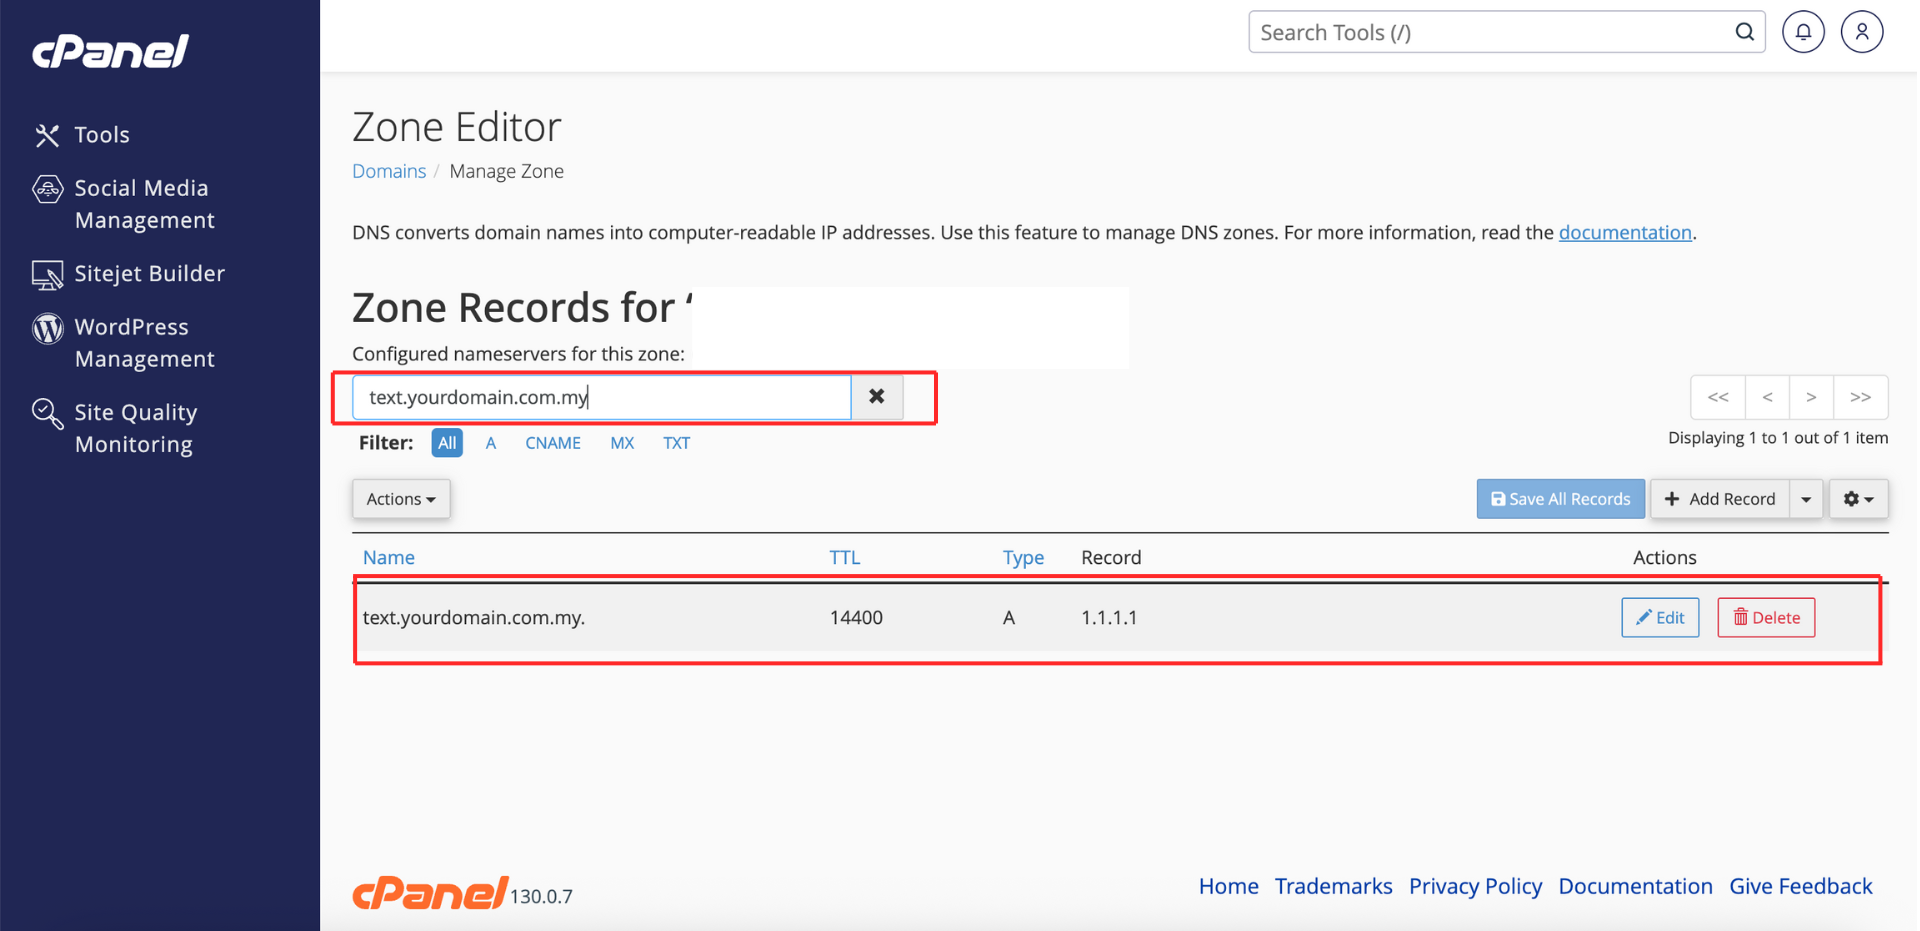
Step 7: Confirm the Entry
-
Use the search/filter box in the Zone Editor to locate the new record and confirm it appears as expected.
⚠️ Important Note: DNS changes may take effect quickly but can take up to the record’s TTL (and sometimes up to 24–48 hours) to propagate globally.
Step 8: Verify the Changes
- After editing the DNS record, you can verify whether the update has been applied using a DNS lookup tool such as dnschecker.org.
-
If the changes still do not take effect after 48 hours, kindly contact us at support@ipserverone.com for further assistance.
Conclusion
You’ve added a DNS zone record in cPanel using the Zone Editor. Repeat these steps for each additional record you need. Remember that DNS propagation depends on TTL and network caches, so changes might not be immediately visible everywhere.
Should you encounter any issues or have any questions, our support team at IPSERVERONE is always here to assist you. Don’t hesitate to reach out to us at support@ipserverone.com for any help you need.