Search Our Database
How to install ImunifyAV on cPanel
Introduction
ImunifyAV is a free Linux server antivirus that scans for malware on your server. When installed on a cPanel/WHM server, it provides automatic website scans and alerts you to any infections. This guide will walk you through the steps to install ImunifyAV.
Prerequisite
- Access to your cPanel account as root user
- Basic knowledge of navigating the cPanel interface
Step-by-step guide
Step 1: Access cPanel
- Login to your cPanel control panel.
The URL to your cPanel typically will be like <domain>:2087 or <server IP>:2087.
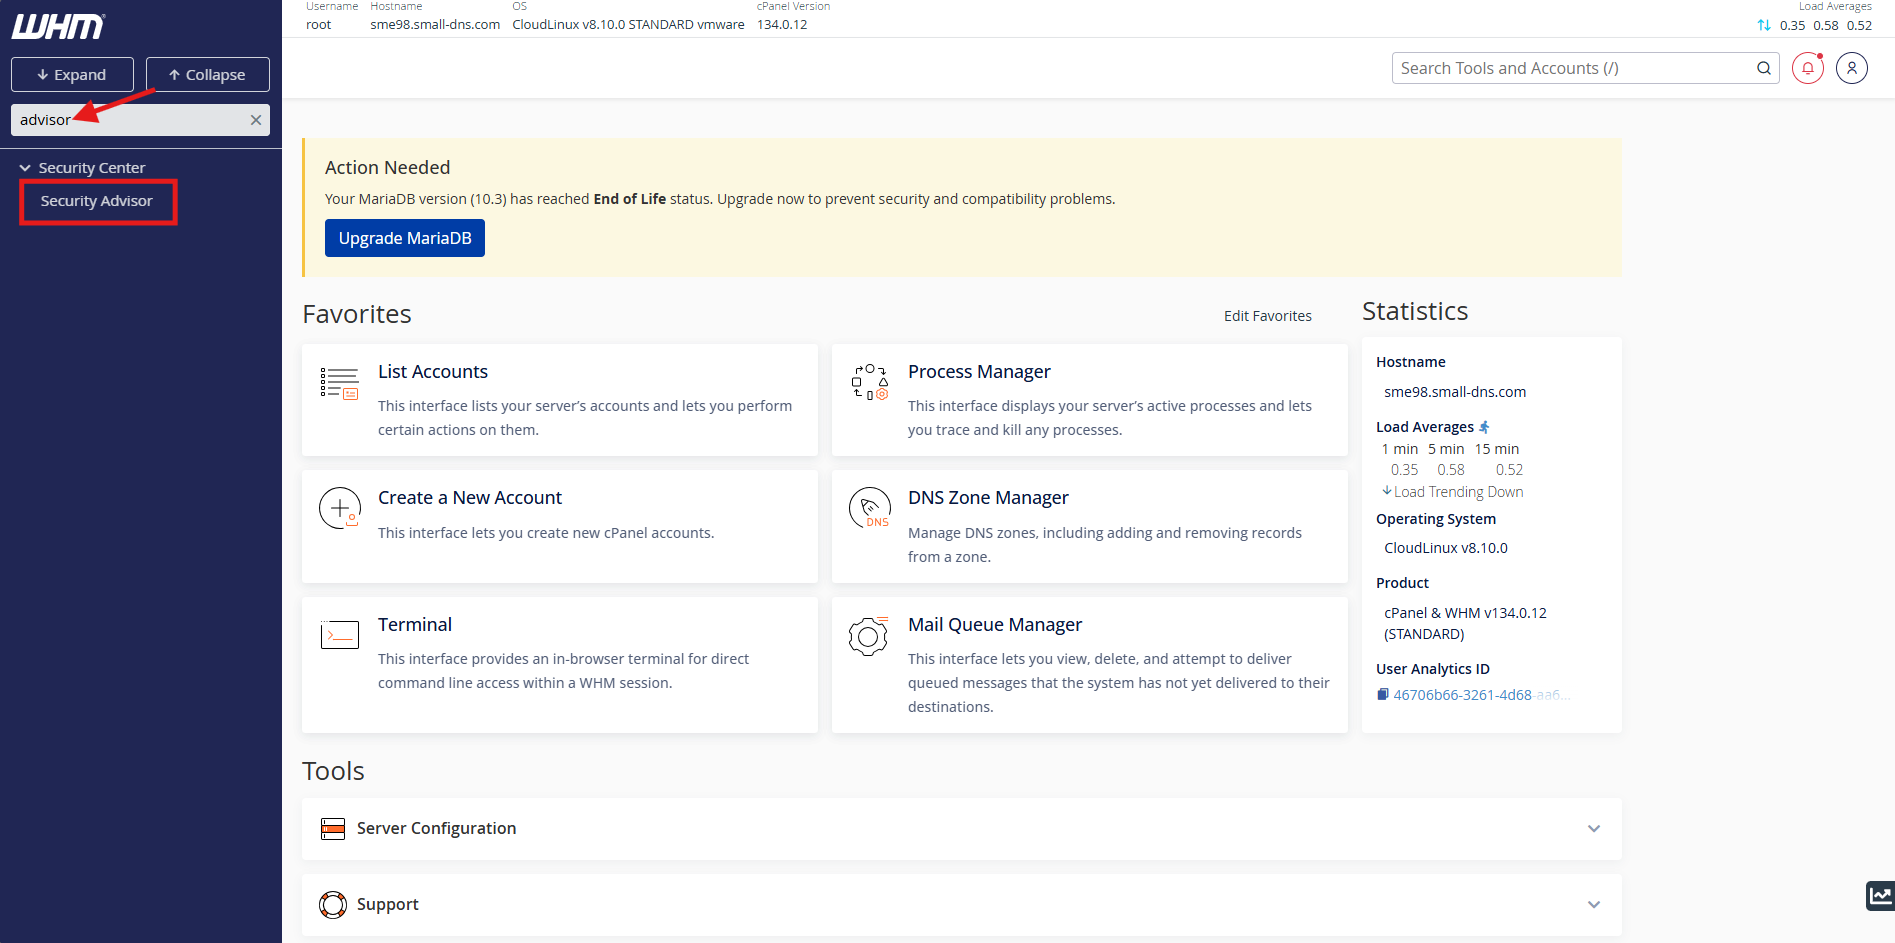
Step 2: Verify ImunifyAV Installation
- Search ‘advisor’ in the search bar on top left.
- Select Security Advisor to enter plugin management page.
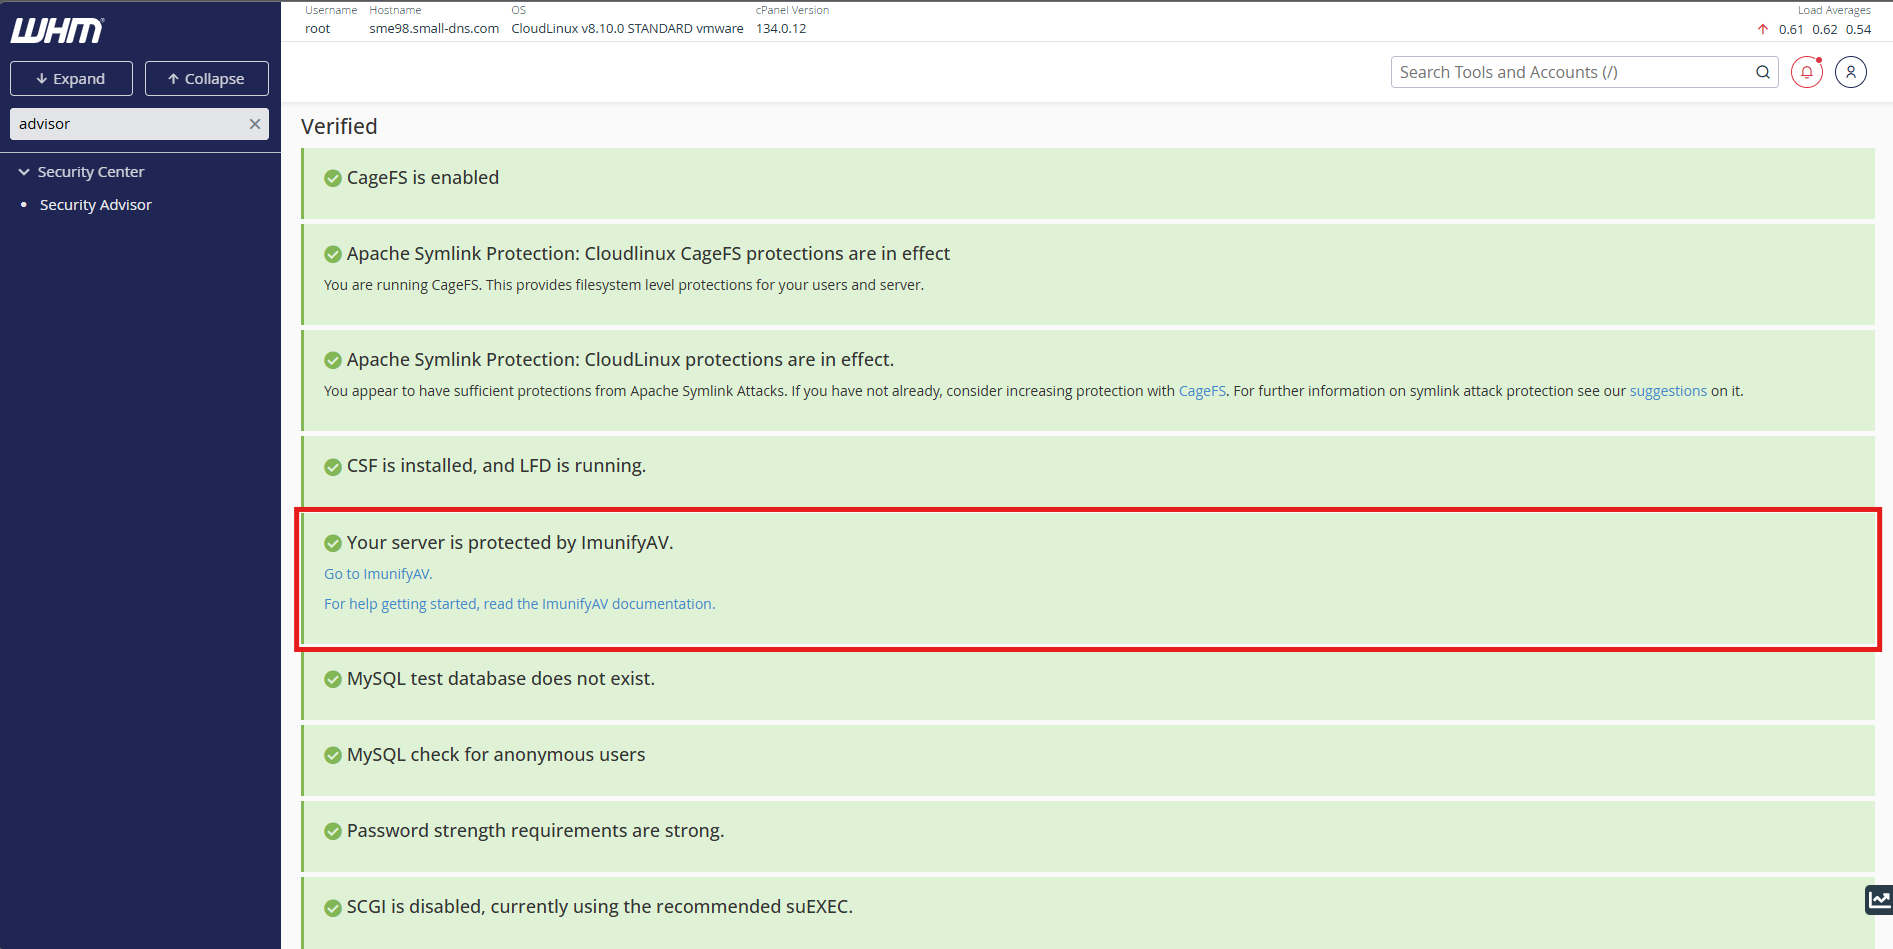
Step 3: Installation
- If ‘Your server is protected by ImunifyAV.’ is visible on this screen, the ImunifyAV plugin is already installed. You may refer HERE for the step to perform scanning.
Else, you may press ‘Install’ to install the ImunifyAV plugin.
Conclusion
By following this guidance, you can successfully install ImunifyAV on your cPanel server, enabling it to automatically scan for and alert you to potential malware threats on your hosted websites.
For additional assistance or if you encounter any issues, please contact our support team at support@ipserverone.com.