Search Our Database
How to increase bandwidth for a user in DirectAdmin (Evolution Skin)
📘 Introduction
In DirectAdmin, if a user exceeds their allocated bandwidth, you may want to increase their limit without modifying their entire hosting package. This guide will walk you through the steps to manually increase a user’s bandwidth quota using the Evolution skin.
✅ Prerequisites
Before proceeding, ensure the following:
-
You have Admin-level access to the DirectAdmin control panel.
-
The user account in question already exists.
-
You are using the Evolution skin in DirectAdmin.
🧭 Steps to Increase Bandwidth for a User
Step 1: Log in to DirectAdmin
- Open any browser you prefer and navigate to your DirectAdmin login page. e.g:https://yourdomain.com:2222
- Enter your Admin username and password to log in.

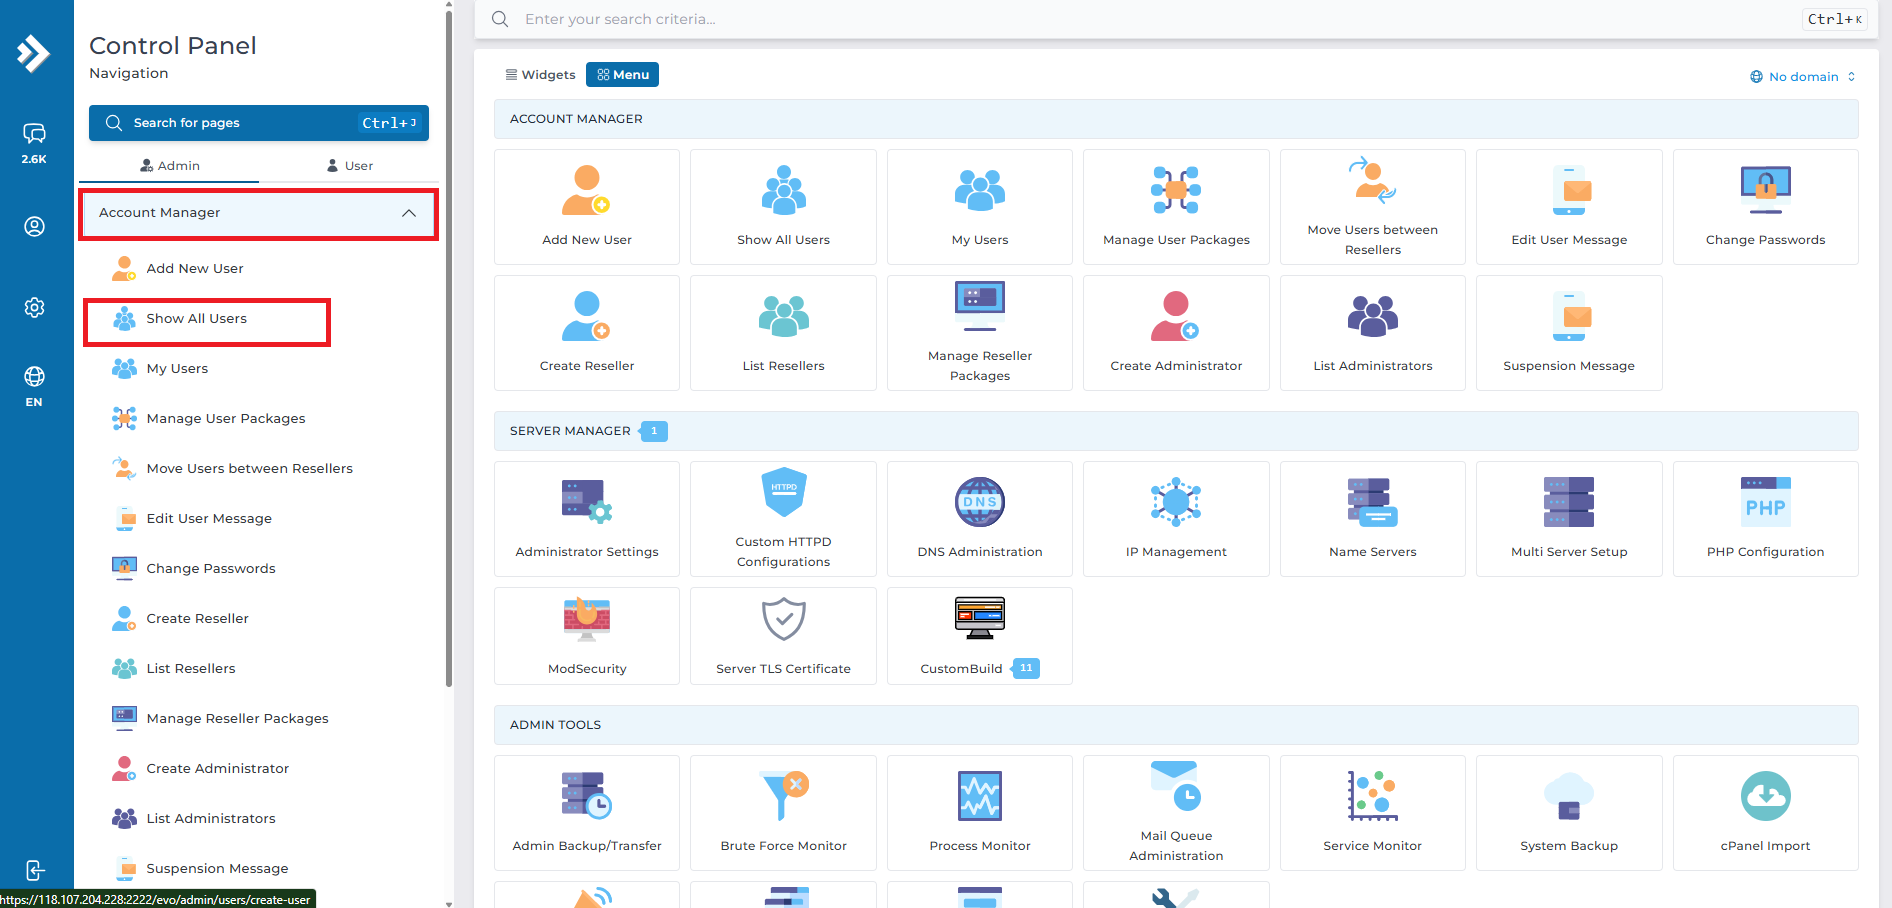
Step 2: Go to “Show All Users”
-
Once logged in, ensure you’re in the Admin Level dashboard.
-
Locate and click “Show All Users” under Account Manager.
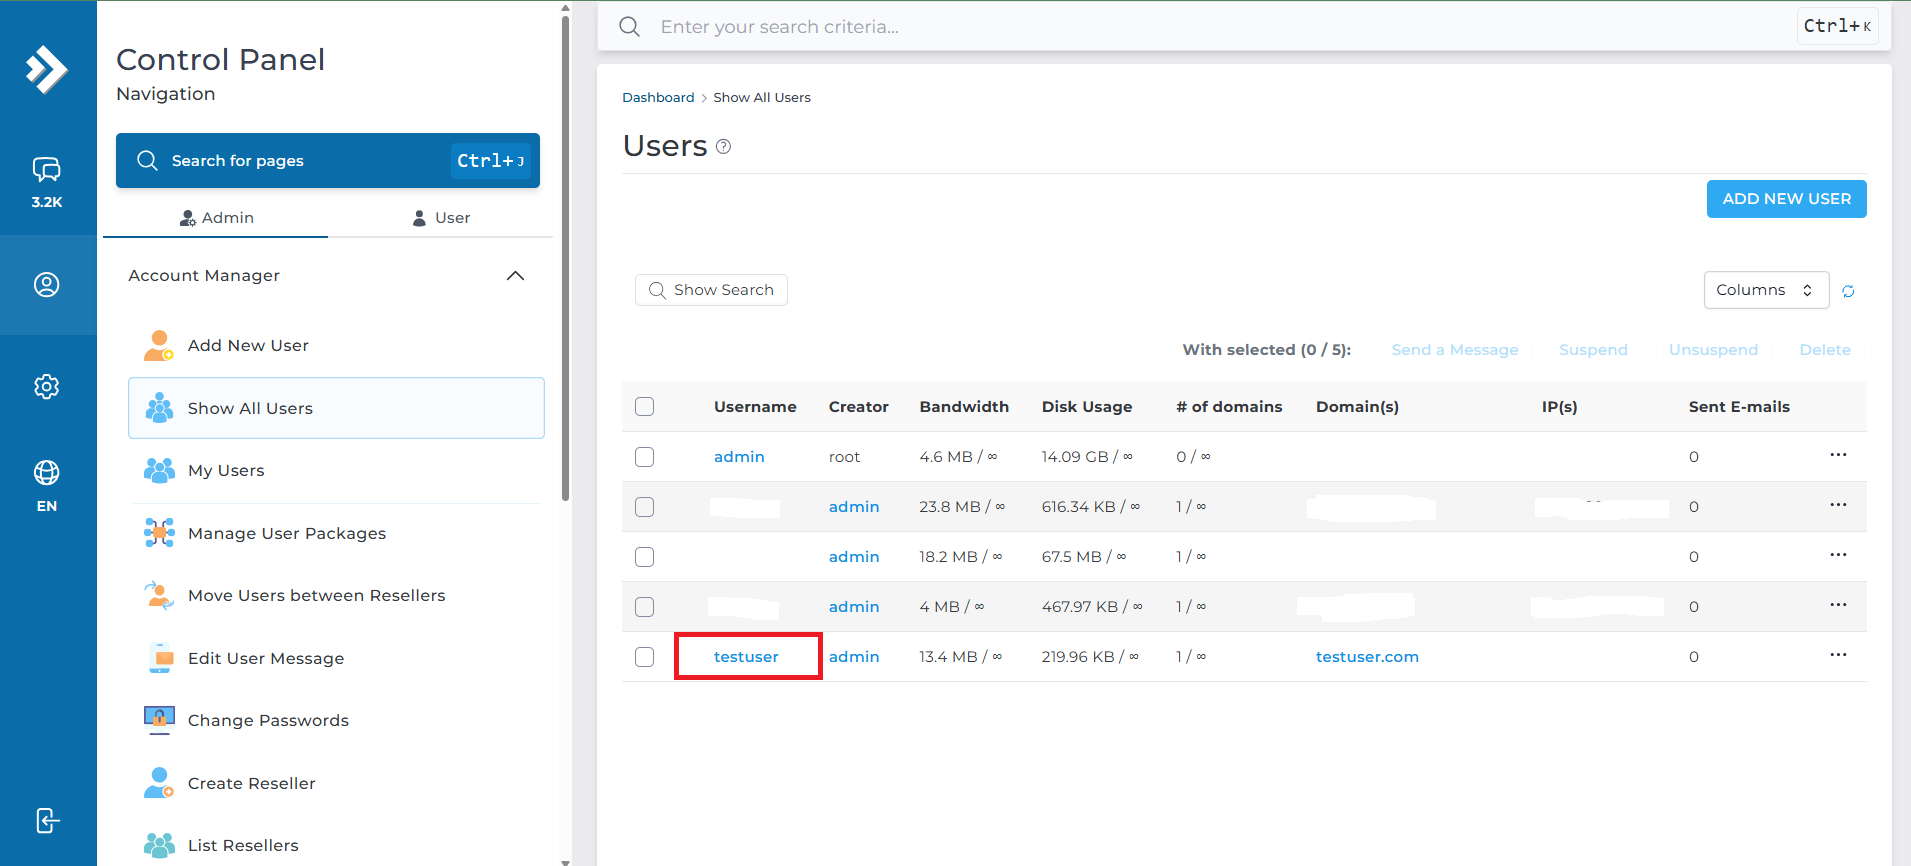
Step 3: Select and Modify the User
-
In the user list, find the account you want to modify.
-
Click the username or domain to view user details.
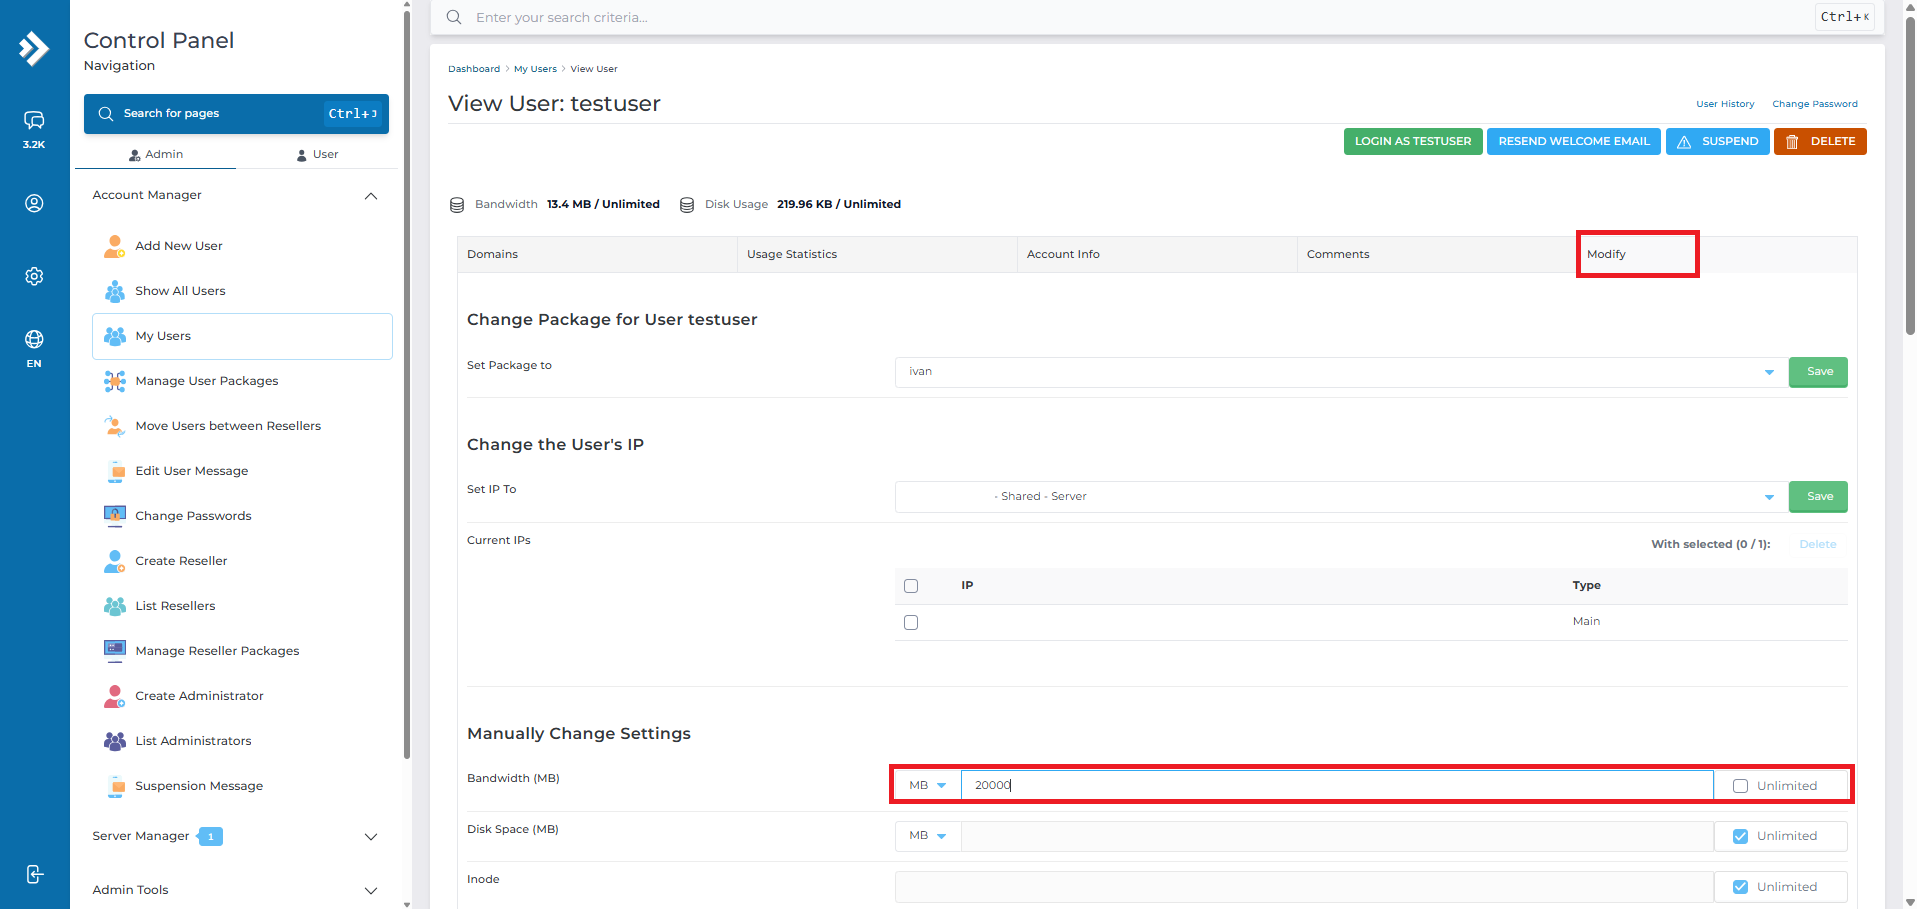
Step 4: Modify the Bandwidth Limit
On the user’s page, click “Modify”.
In the modification form:
-
Scroll down to the Bandwidth field.
-
Enter the new bandwidth limit (in MB or GB).
Example: Enter 20000 for 20 GB.
⚠️ Note: Setting the value to 0 will grant unlimited bandwidth.
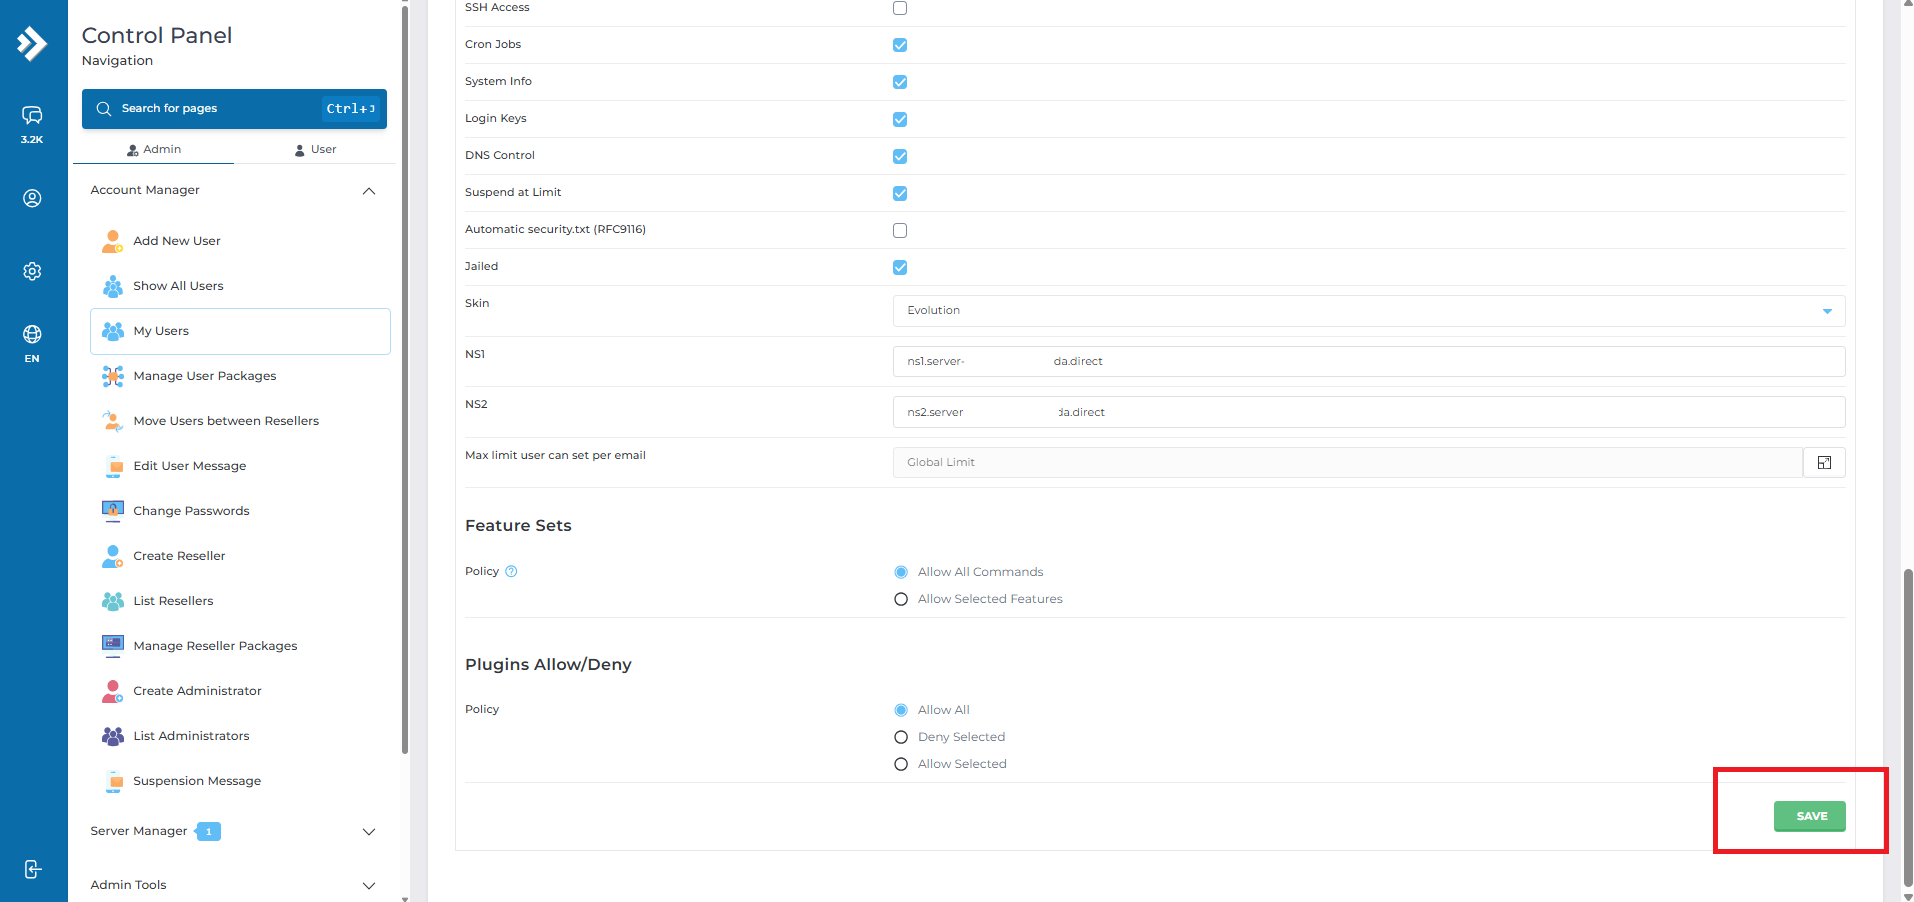
Step 5: Save Changes
Scroll to the bottom of the form and click “Save” or “Modify” to apply the changes.
The new bandwidth limit will take effect immediately.
✅ Conclusion
You’ve successfully increased the bandwidth for a user in DirectAdmin using the Evolution skin. This method is ideal for handling bandwidth overages without modifying the entire hosting package.
If you need any help, feel free to contact us at support@ipserverone.com.