Search Our Database
How To Use Content Filtering In SmarterMail – Blocking SPAM tagged email
Introduction
Content filtering in SmarterMail provides domain administrators and users with a flexible way to manage incoming messages based on specific rules. This functionality is essential for improving inbox organization, reducing unwanted messages, and enforcing internal communication policies. Content filters allow for granular control over emails by analyzing different components such as sender address, subject line, message content, and more.
This feature is especially useful for businesses and organizations looking to enforce email security or maintain compliance with internal or external guidelines. Filters can be created to automatically move emails to folders, delete them, forward them to another account, or flag them based on the rules defined.
SmarterMail’s web interface makes content filtering accessible to both technical and non-technical users. Filters can be configured at the domain level to affect all users or individually per mailbox, depending on administrative permissions. However, creating efficient filters requires a good understanding of rule conditions and actions. Poorly configured filters may result in important emails being deleted or overlooked.
This guide explains how to locate and configure content filtering rules in SmarterMail using the webmail interface. It includes detailed steps to set up a rule based on an email address and perform a specific action—such as deleting the message when conditions are met.
Prerequisites
- A valid domain email account on a SmarterMail server
- Access to SmarterMail Webmail (Version 17.x or later)
- Domain administrator privileges (to configure domain-wide rules)
- A modern web browser (e.g., Chrome, Firefox, Edge)
Step-by-step Guide
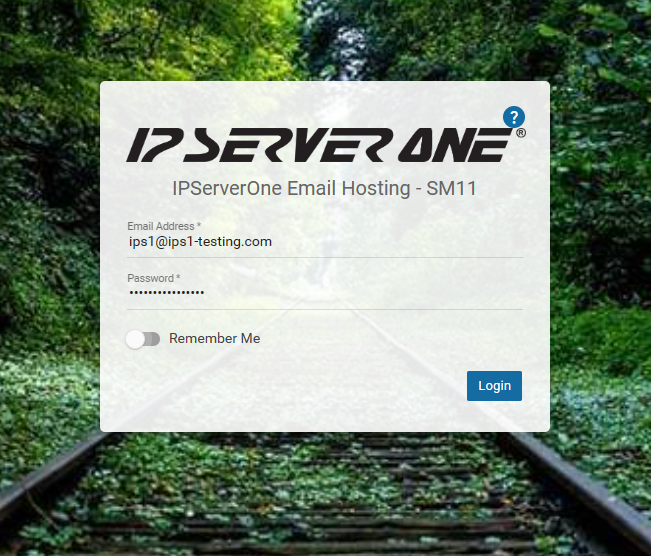
Step 1: Log in to SmarterMail Webmail
- Access the SmarterMail login page via a supported web browser and enter valid login credentials.
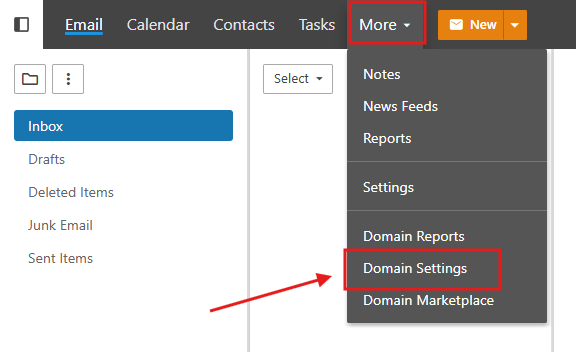
Step 2: Navigate to Domain Settings
- Once logged in, go to the top menu and click on More. Then select Domain Settings from the dropdown options.
Step 3: Open Content Filtering Settings
- Under the Domain Settings panel, click on Content Filtering. Then, click the New button to create a new filter.

Step 4: Define Filter Conditions and Actions
When creating a new content filter, several configuration options will be available:
- Conditions: Specify the criteria that an email must meet for the rule to trigger. This may include sender address, subject keywords, or body content.
- Actions: Define what will happen when the condition is met. Actions can include deleting the email, moving it to a folder, or forwarding it.
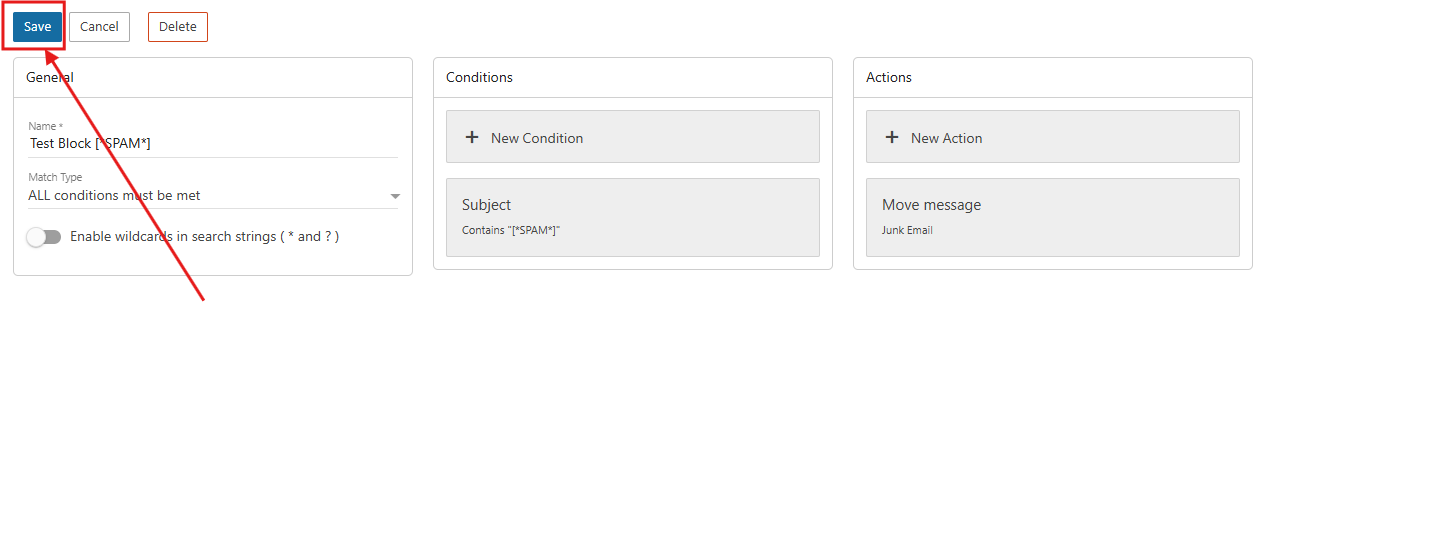
Step 5: Set the Filter Name
- Enter a descriptive name for the filter in the Filter Name field. For example: Block SPAM tagged
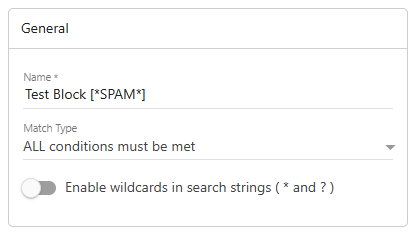
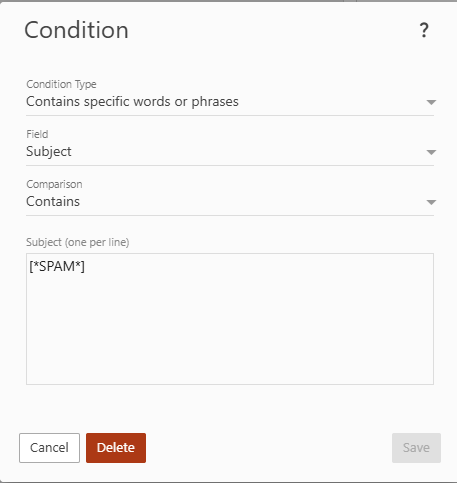
Step 6: Define the Conditions
- In the conditions section, choose the condition type as “Contains specific words or phrases” followed with “Subject” in Field section. You may follow in the example as shown below:
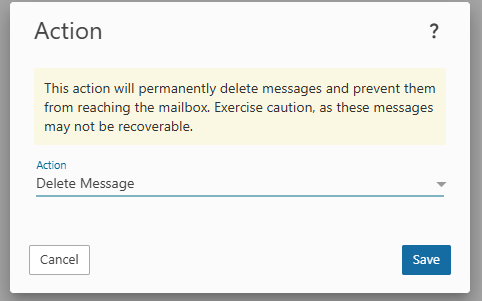
Step 7: Define the Action to be Taken
There are multiple available actions:
-
To delete the email automatically, select Delete Message.
-
To move the email to the Junk Email folder instead, select Move Message and then choose Junk E-Mail as the destination folder.
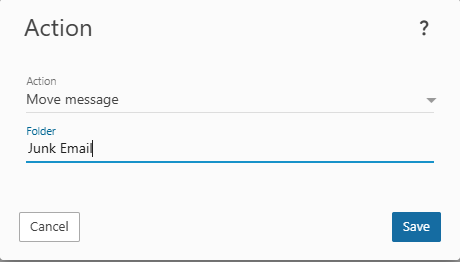
This provides flexibility depending on whether the goal is to remove unwanted emails completely or simply redirect them for later review.
Step 8: Save the Filter
Once all conditions and actions are configured, click Save to activate the filter.
Conclusion
This guide has demonstrated how to use SmarterMail’s content filtering features to manage incoming messages more effectively. By configuring rules based on sender addresses or other conditions, administrators can automate message handling and enhance mailbox security. For further filtering options, consider exploring SmarterMail’s spam filtering and user-level filter capabilities.
Should you have any inquiries about the guidelines, please feel free to open a ticket through your portal account or contact us at support@ipserverone.com. We’ll be happy to assist you further.