Search Our Database
How to Create a Reseller Account in DirectAdmin
Before you can create a new reseller, a reseller package have to be created.
From the administrative main page, click on the “Create Reseller” link, you will be guided to the following page:
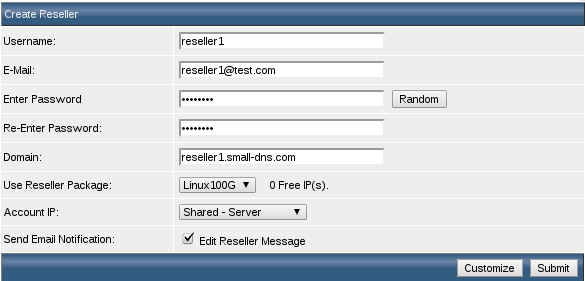
1.) Username
Setting the username of the Reseller. It must be 3-10 letters/numbers long and contain no illegal characters.
2.) E-Mail
This is the e-mail address of the Reseller. It is the address where account notification will be sent, as well as being the default e-mail address in the Reseller’s control panel.
3.) Password
This is the control panel password for the Reseller. It is advised to use a complex password that contains both upper- and lower-case letters and also numbers. Click on random password for a randomly generated password.
4.) Domain
This is the domain name of the Reseller’s web site. It can be a non-registered domain. Enter the domain name without the “http://” or “www.”
5.) Package
Select a pre-created package for the Reseller. If you want to customize package features for this Reseller only, click the “Customize” button at the bottom of the table, after you are finished filling out the information in this table.
6.) Domain IP
Select “Shared – Server” or “Assigned” from the dropdown menu. If you choose “Shared,” the Reseller’s web site will be name-based and have the same IP address as the server. If you select “Assigned,” the Reseller’s web site will have its own dedicated (static) IP address (assuming at least 1 IP address is set as a feature in the Reseller Package).
7.) Send E-Mail Notification
Check this box to send the customer their account details by e-mail automatically. You can click on the “Edit Reseller Message” link to customize the e-mail content.
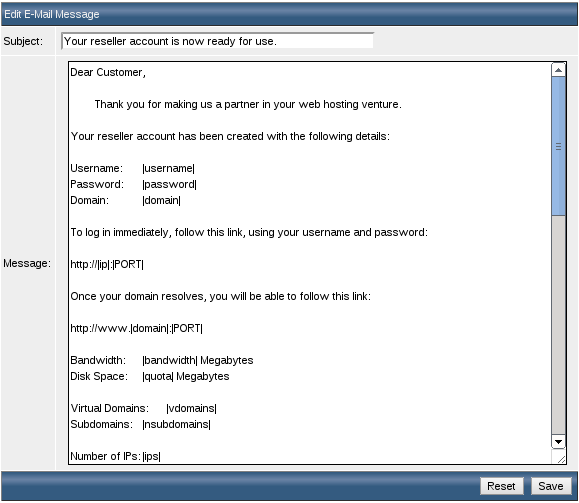
After making changes, click on the “Save” button. You may restore the message back to its original content by clicking on the “Reset to Default” button.
Remark:
To change the “From:” address of these welcome messages, switch to your User panel and go to the “Site Summary / Statistics / Logs” menu. Then, enter the appropriate e-mail address in the “E-mail” field.
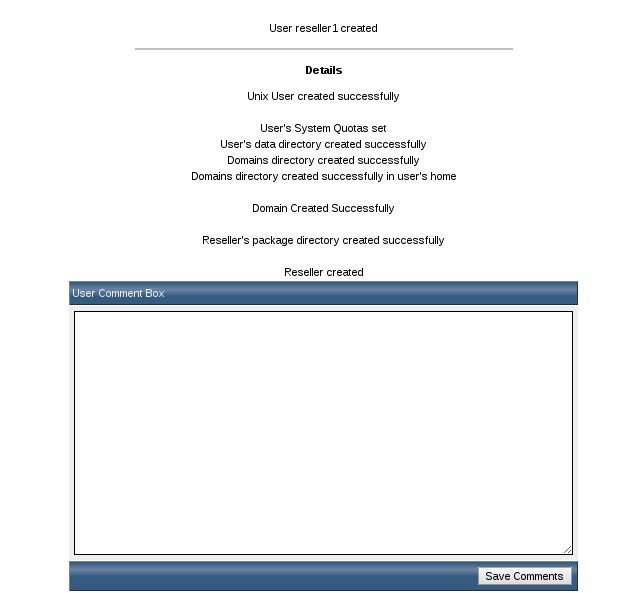
8.) Once done inserting information, click on submit. Page with account confirmation will be shown as below.